
Google Sitemap by BestWebSoft
Adding your site to Google Webmasters resource tutorial
WordPress version: | 3.9.2 * |
Google Sitemap by BestWebSoft version: | 2.9.2 * |
* When using other versions some differences are possible to occur
In case you failed to add a sitemap to Google automatically using Google Sitemap by Bestwebsoft plugin and you received a message notifying that your login and password do not match, it is possible to do it manually.
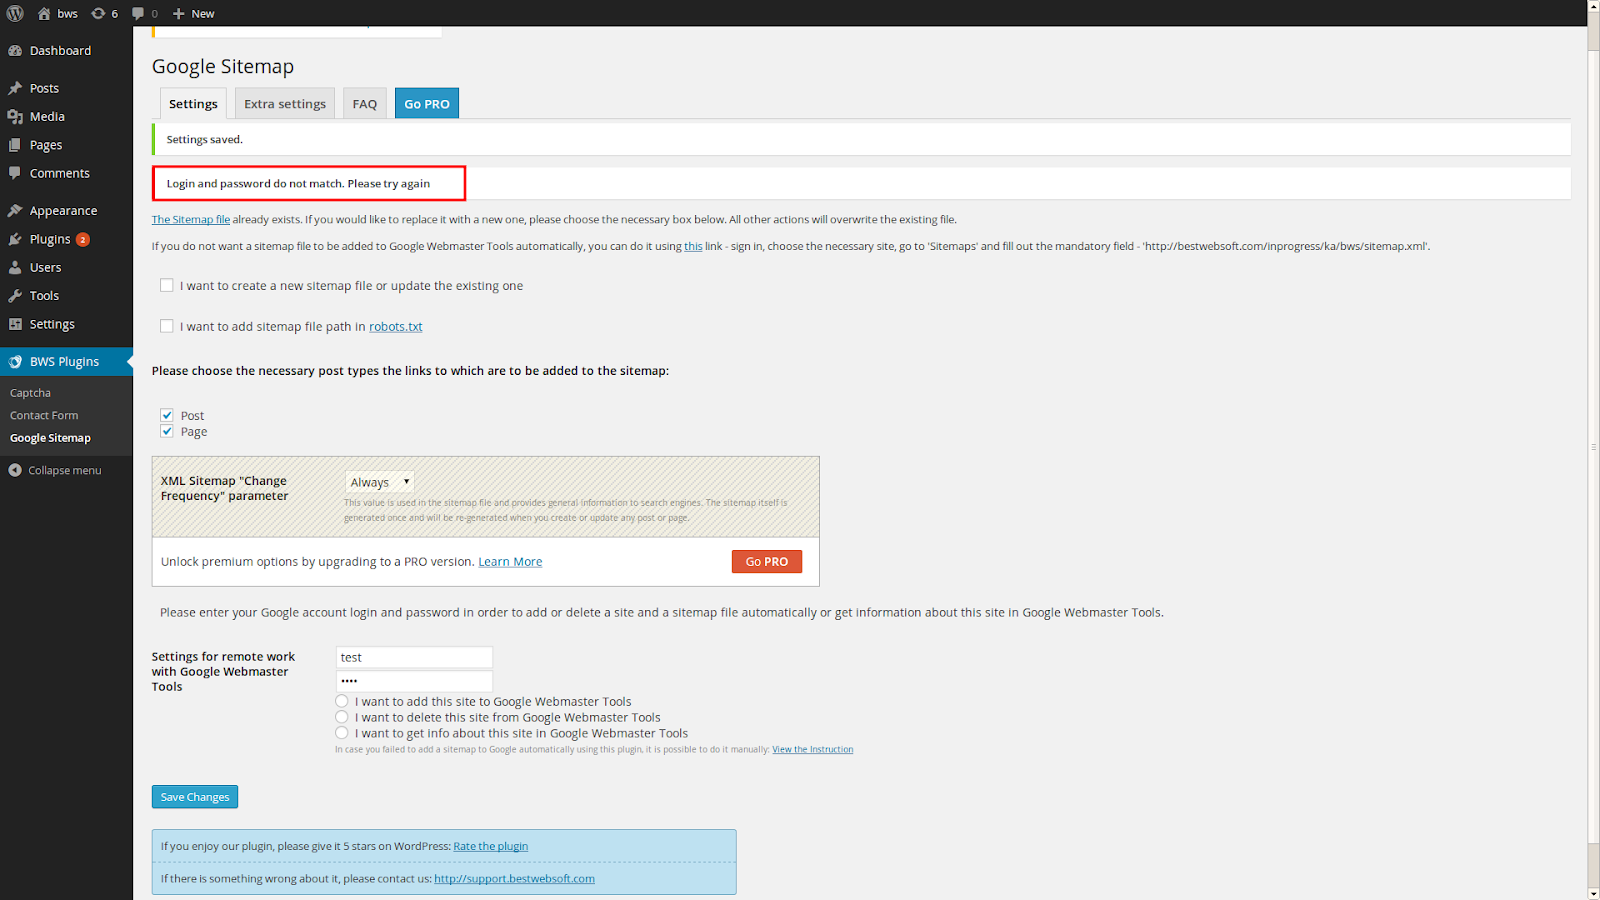
The first step is to create Sitemap.xml file with the help of Google Sitemap by Bestwebsoft plugin – in order to do that it is necessary to mark checkbox on the plugin page - “I want to create a new sitemap file or update the existing one” and click Save Changes button.
You will see a message at the top of the window - “Your Sitemap file is created in the site root directory.”

Please make sure that the file is in situ, for example, using FileZilla or using your hosting file manager.
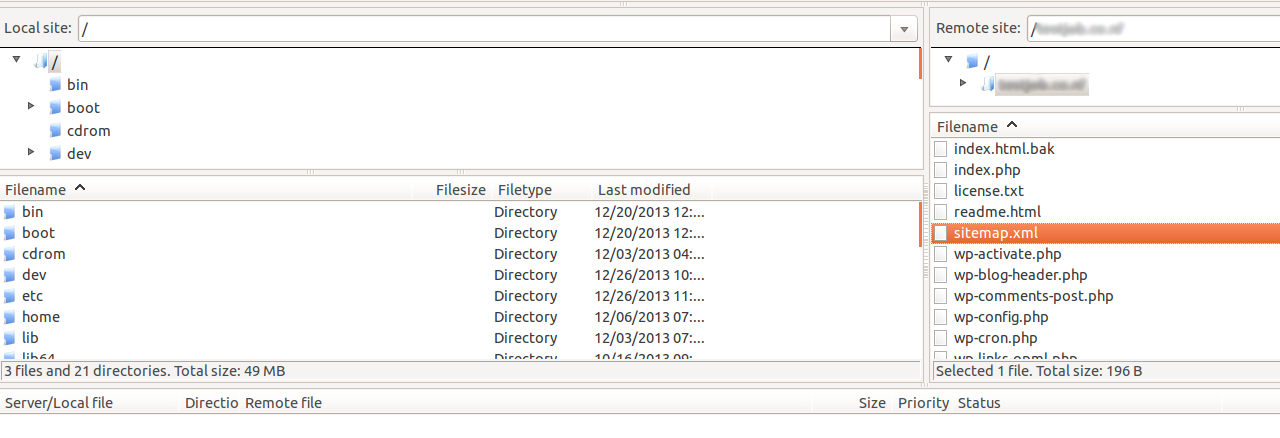
If Sitemap.xml file already exists it is highly recommended not to skip this step!
After that go to https://www.google.com/webmasters/tools/
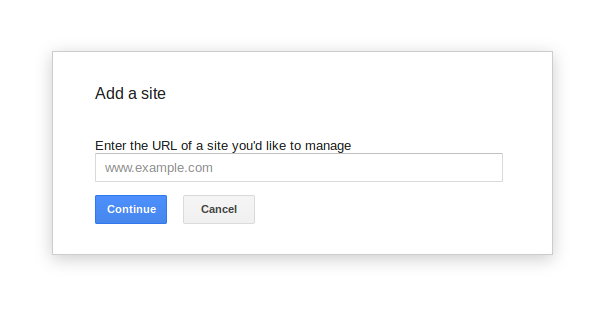
You will see a window with a video lesson, and right below it there will be an address bar if it is the first time you are adding a site,

otherwise you will see a list of sites and “ADD A SITE” button in the top right corner.

After clicking it you will see a Pop-Up window with an input line to enter url.
Enter your site’s url and click “ADD A SITE” if it is the first time, or “Continue”.

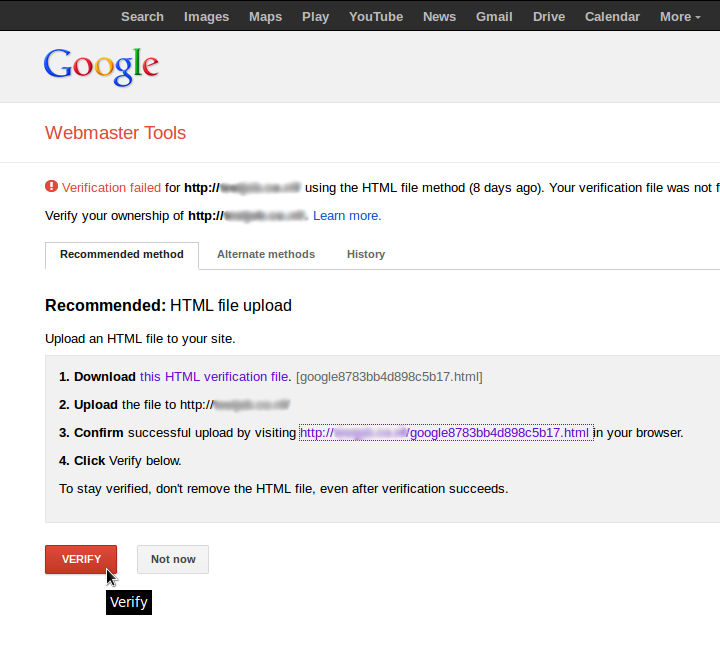
You will get to the verification page.
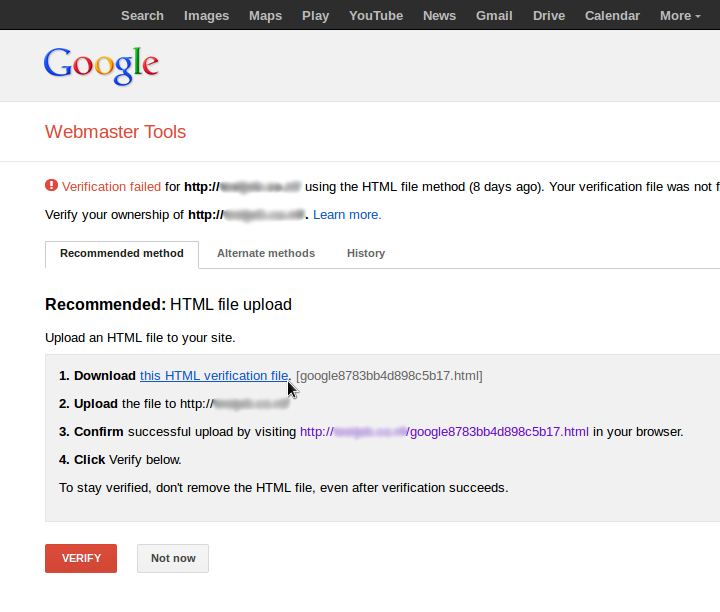
Click “this HTML verification file” link and save it.
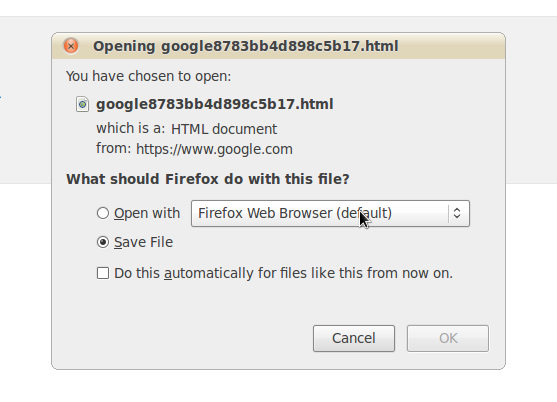
Copy the obtained file with the name googlexxx.html (xxx – is the personal number assigned to your site by Google) to the root directory of your site, where sitemap.xml file is also located.

Go back to Google webmasters – in the third point of the list there will be a link of the following type: http://your_site_name/googlexxx.html (xxx – is the personal number assigned to your site by Google).

Follow the link to make sure that the file is in situ. If everything is correct, you will see a blank page with the line “google-site-verification: googlexxx.html” (xxx – is the personal number assigned to your site by Google) in your browser.

If you see a “Page not found” message it means that googlexxx.html file is in the wrong folder.
If you see an “Access denied” message it means that googlexxx.html doesn’t have enough permissions. Please make use of the following documentation provided by Wordpress.org - Changing_File_Permissions
Go back to Google webmasters and click “Verify”.
If you followed the instructions correctly, you will see a message with congratulations and confirmation that you are the owner of the specified site.

Click “Continue” and you will get to Site Dashboard page. Don’t worry if you don’t see any statistics about your site - after a while the section will be filled with various information.
- - - - - - - - - - - - - - - - - - - - - - - - - - - - - - - - - - - - - - - - - - - - - - - - - - - - - - - - - - - - - - - - - - - - - - - - - - - - - - - - - - - - -
This instruction can be applied mostly to Google Sitemap by BestWebSoft Pro, too.
Help & Support
Visit our Help Center if you have any questions.
Our friendly Support Team is happy to help.
support.bestwebsoft.com |
Need Website Development or Design Services?
We provide additional services such as Wordpress themes & plugins development, graphic design, custom programming.
Contact us now to get a free quote — https://bestwebsoft.com/contacts/