It is not a secret that the Timesheet by BestWebSoft plugin is the best solution for small and medium businesses to track and manage work schedules using the WordPress website. Timesheet plugin partly created to simplify the part of an interaction between employers and employees. We keep improving this instrument in every update.
The new update has brought little, but a very important feature – the possibility to view and display the total scheduled hours! Just complete a timesheet and the total hour will be calculated automatically, without any additional settings.
So how does it look on the WordPress Dashboard and web-pages? Let’s take a look!
View the Total Scheduled Hours in Timesheet on a Dashboard
1. First of all, you need to install and configure the Timesheet by BestWebSoft plugin. If you don’t know how to do it – not a problem, we created special documentation which will help you with it.
2. After the successful installation and configuration of the plugin open the “Timesheet” > “My Availability” page, edit the status in the table, and click the “Save” button.
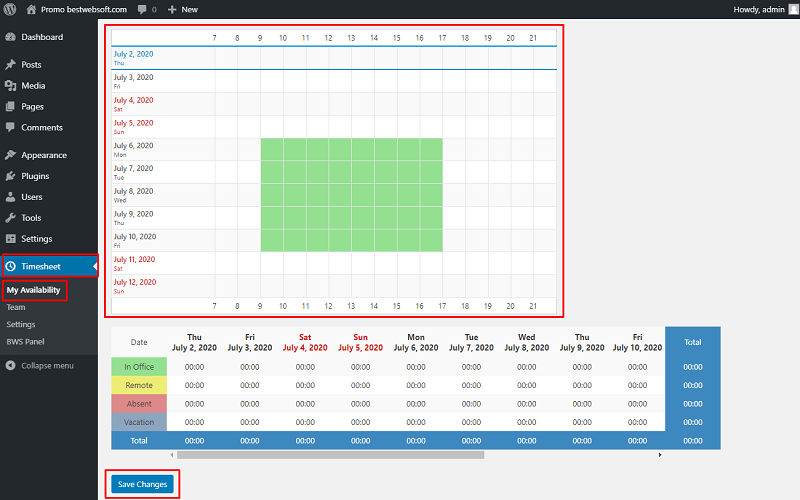
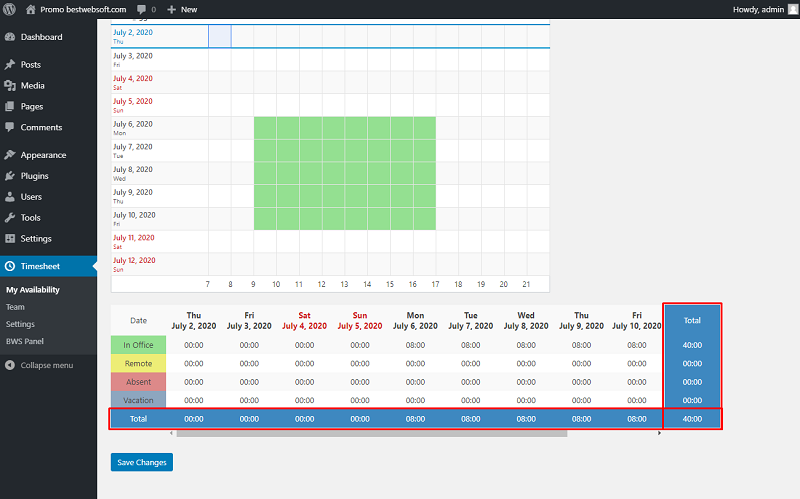
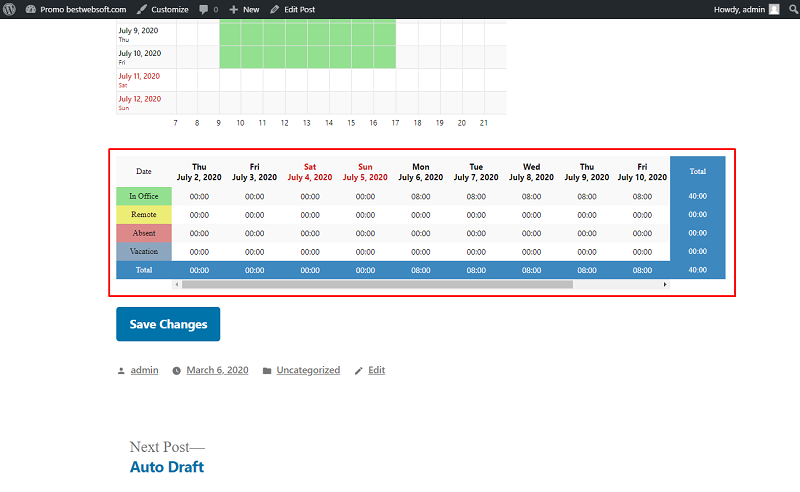
3. After those simple actions, the total time will be calculated in the table, depending on statuses and days for the selected dates. The total row is calculating hours on days and the total column is calculating hours depending on statuses.
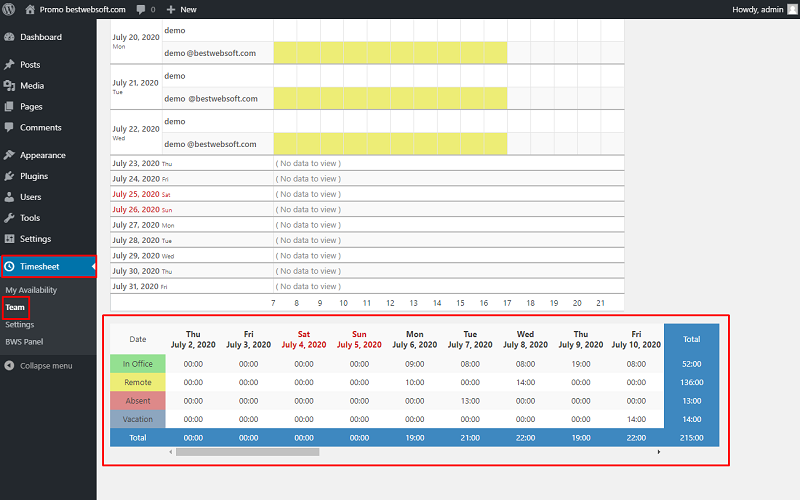
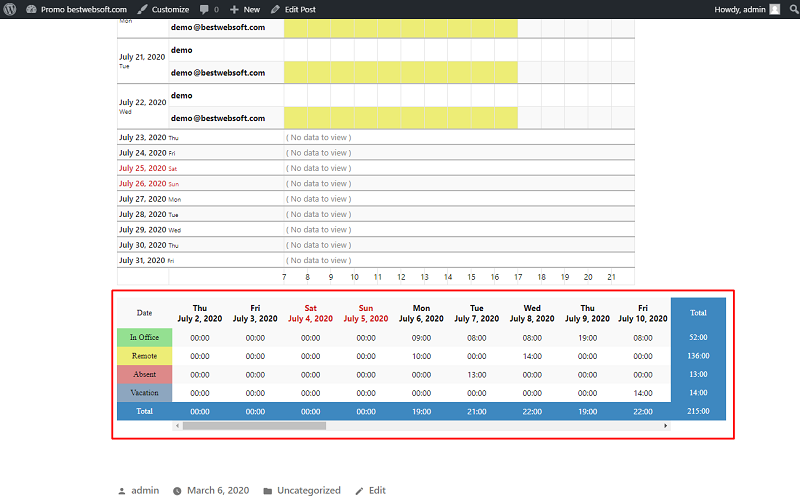
4. You will see the same table at the “Timesheet” > “Team” page with one big difference: in addition to your scheduled hours it will display total hours of all users that completed their timesheet.
As we mentioned before – no additional settings needed! Now let’s take a look at how you can add that info to your WordPress website posts and pages.
Display the Total Scheduled Hours in Timesheet on Posts and Pages
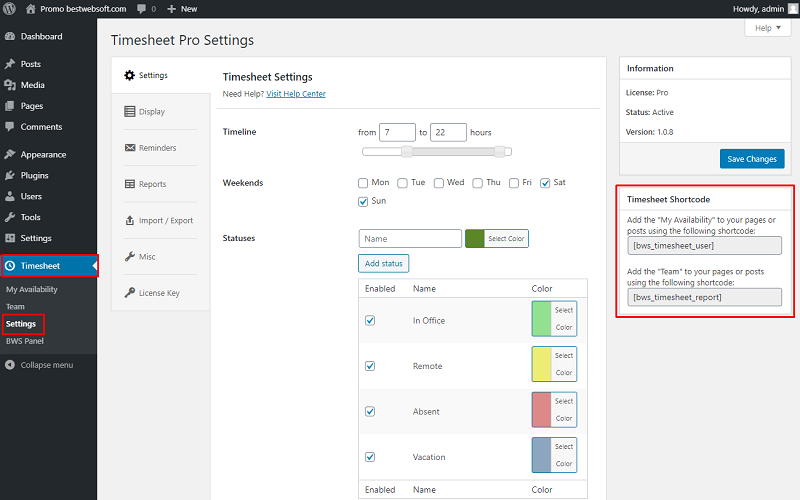
1. We made a possibility to display information in the easiest possible way – via shortcodes. To get a shortcode for inserting Timesheet info to a post or a page open the “Timesheet” > “Settings” page and copy one of the two available shortcodes.
2. Then, just insert a shortcode to a post or a page and publish it. After that Timesheet info will be displayed the same way as in the WordPress dashboard. For example, “My Availability” total hours table may look on a page as follows:
3. If you will decide to insert a shortcode for “Team” page total hours table may look the following way:
Conclusion
Timesheet by BestWebSoft plugin was and remains the best solution for tracking and managing work schedules using WordPress. This was not the last update, and we will continue to bring new functionality that will match the requirements of the most demanding users.
Simplicity and functionality are the best words to describe the Timesheet plugin. And it keeps getting better with every new update!
Install the Timesheet plugin now to take time planning to a new level!


