Cards and prints are foremost original and interesting things. Everyone loves greeting cards, but not everyone knows that it is possible to create a unique greeting even directly from your computer. In addition, using Adobe Photoshop or Illustrator you can make your own variations of prints and compositions.
The best way to create your own style is to find and install special sets of vectors and bitmap graphics, which will be a great addition to your ideas. Designers create hand-drawn bundles and vector kits, which wouldn’t only make your piece of art more daintith, but also will look like a unique brand name item. And today we’ll talk about creating your own card using Watercolor Flowers – Hand Drawn Watercolor Floral Kit.
Hand Drawn Watercolor Floral Kit is a set of hand-drawn watercolor illustrations in vector formats. Perfect floral bundle for invitations, stationery, packaging, greeting cards, websites, and much more. You can easily design your own colorful flower style. There are plenty of ideas and opportunities, besides it includes 20+ pre-build fully editable bouquets and wreaths kits.
Imagine the wonder and delight of your friends, colleagues, and loved ones, when you’ll say that you are one who have created your favorite cup design! Using Hand Drawn Watercolor Floral Kit you will be able to create a set of patterns for your dinnerware, a special design for napkins, pillows, tablecloths, phone cases, or your favorite t-shirt and shorts design, to make them more interesting and stylish.
1. Purchase, Download & Install
Once the purchase is completed you can download the kit (see Fig.1).
Extract the files from archive. A new folder named “watercolor-flowers” will appear in that same location. Browse the folder.
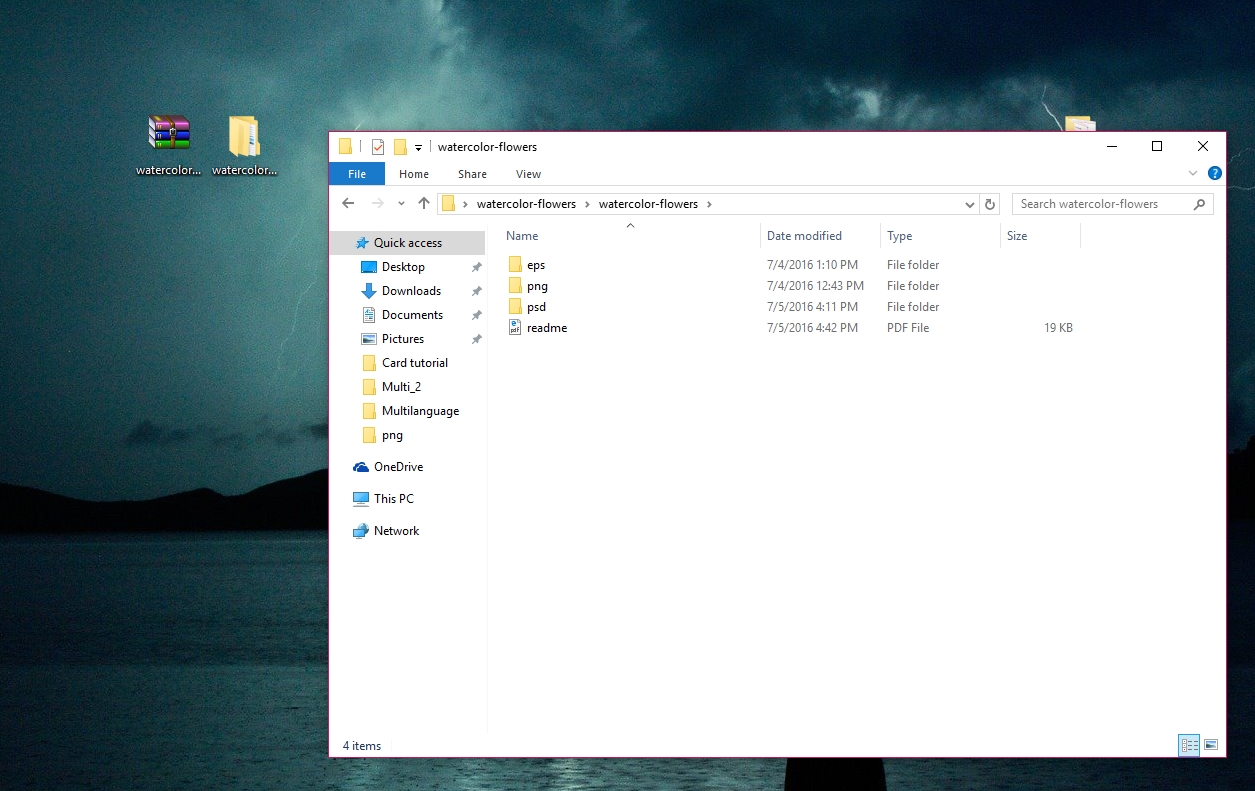
Use Illustrator to open and manage EPS files. Photoshop can be used to work with PSD and PNG files.
You should have at least minimum Adobe Photoshop CS3 version, for the more advanced features you should have CS5 or higher.
2. Create Your Document
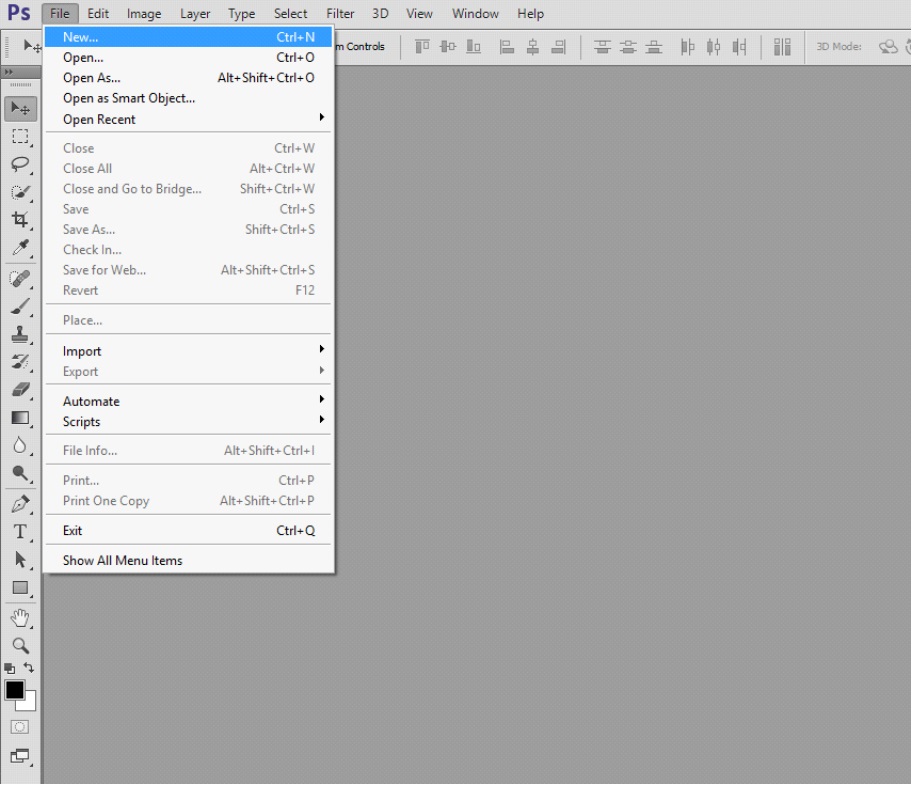
Open Adobe Photoshop software, and create a new file, as it’s shown in the picture (File >New…).
In the pop-up window select the needed size, resolution (72 for web; 300 and higher – for prints) and color mode for your card (RGB – for web; CMYK – for prints) and press OK.
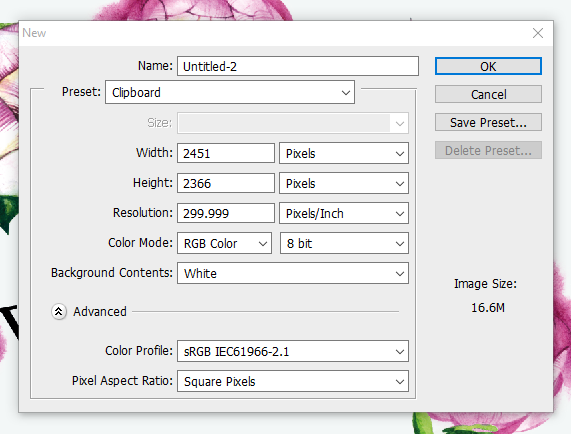
You will see the white box, it is the background and basis for your future work.
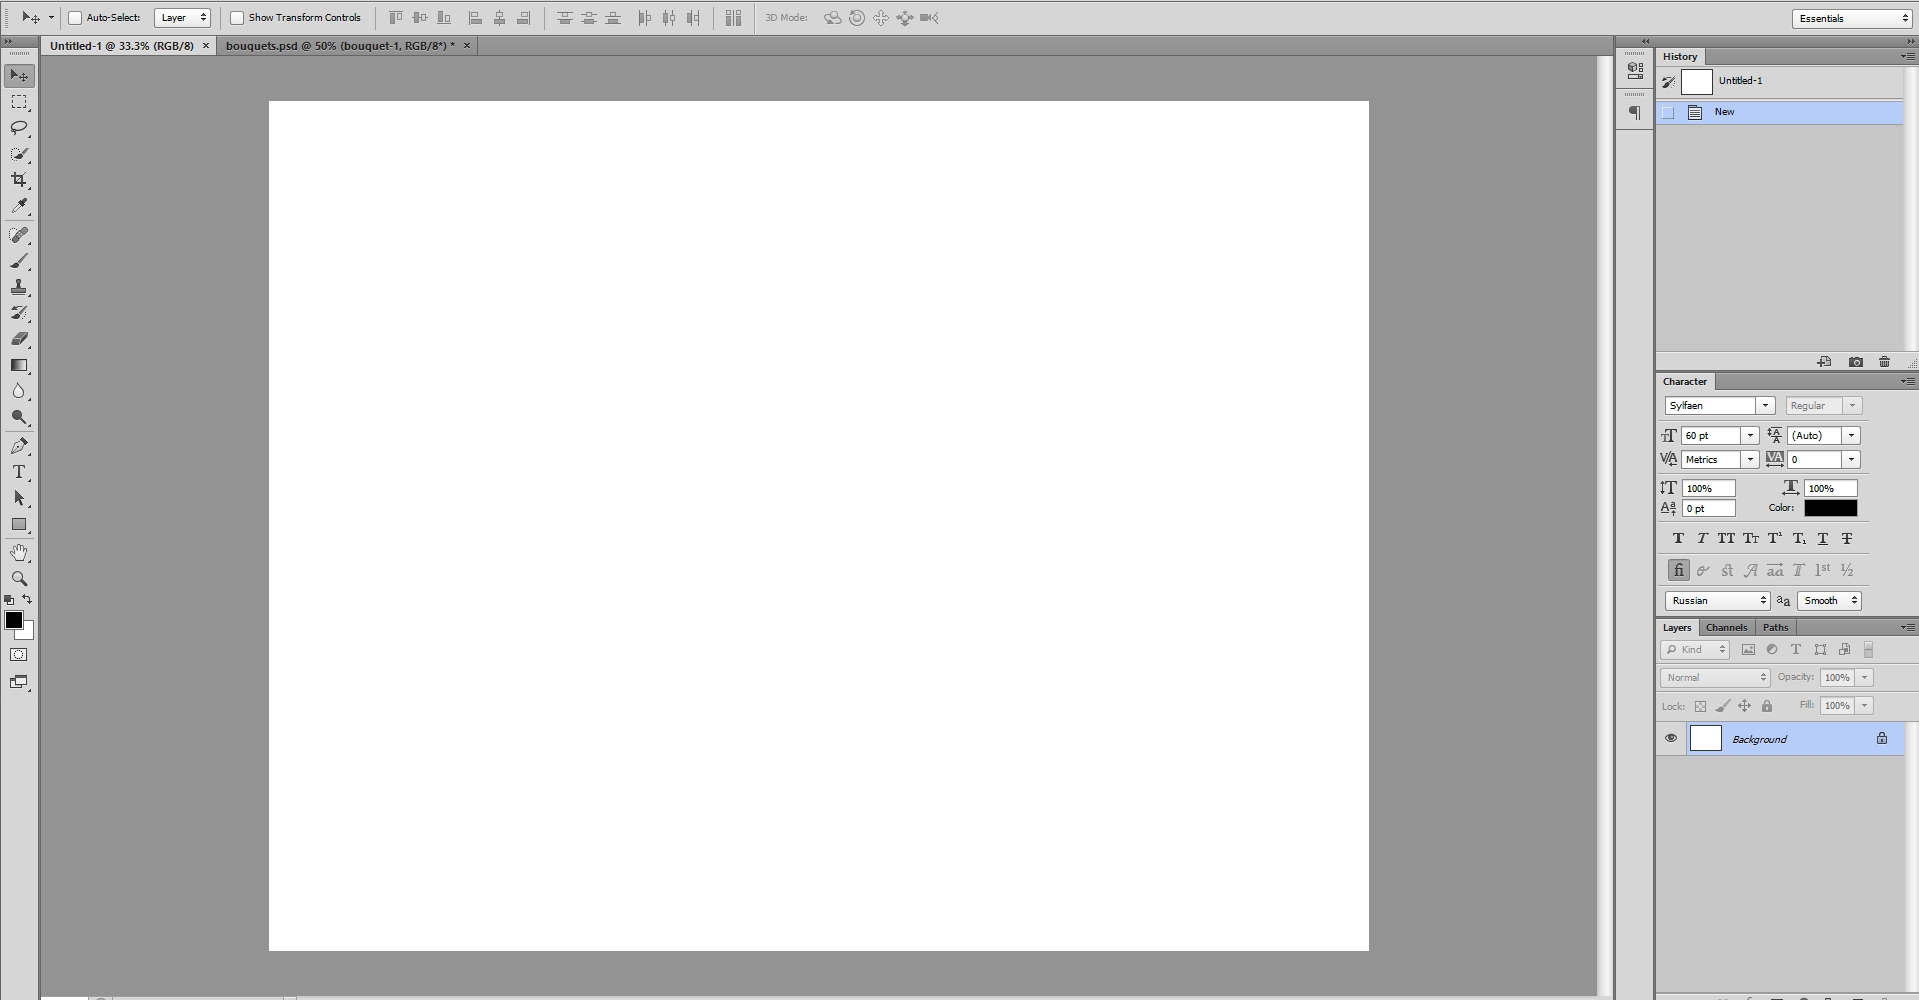
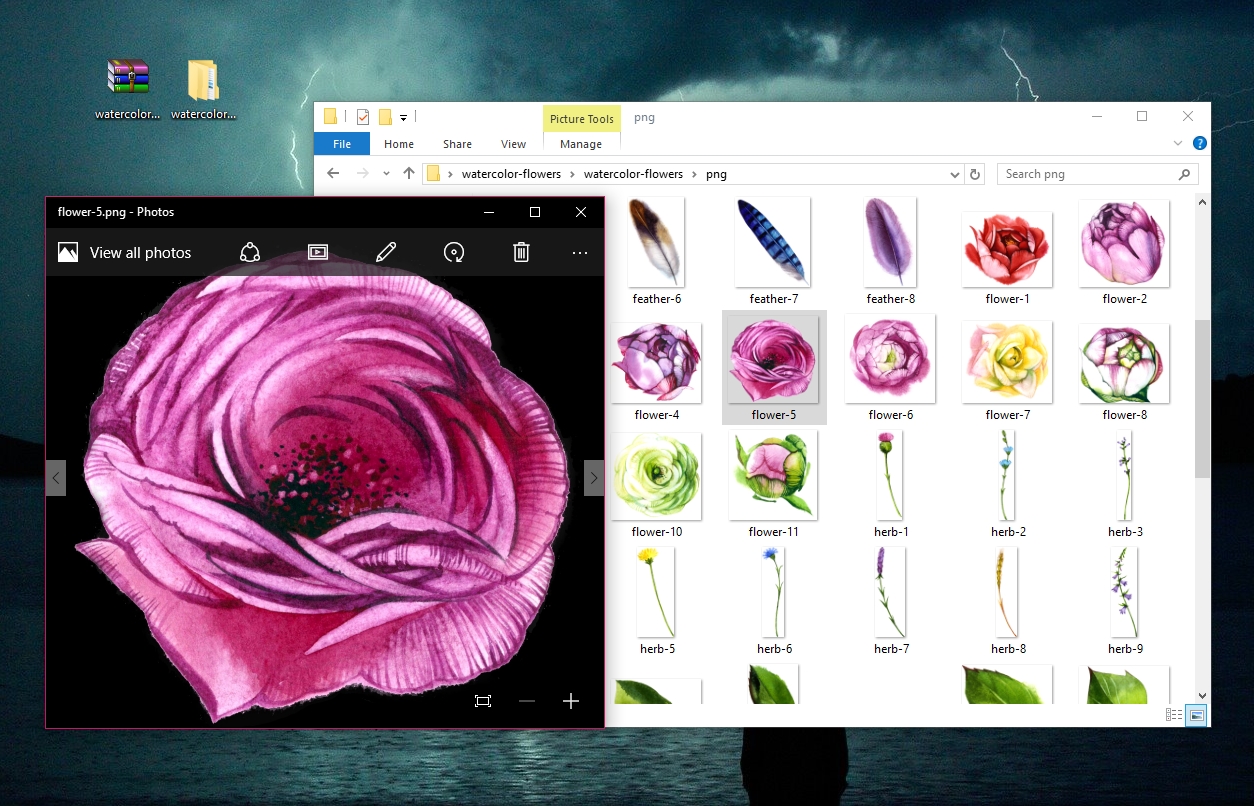
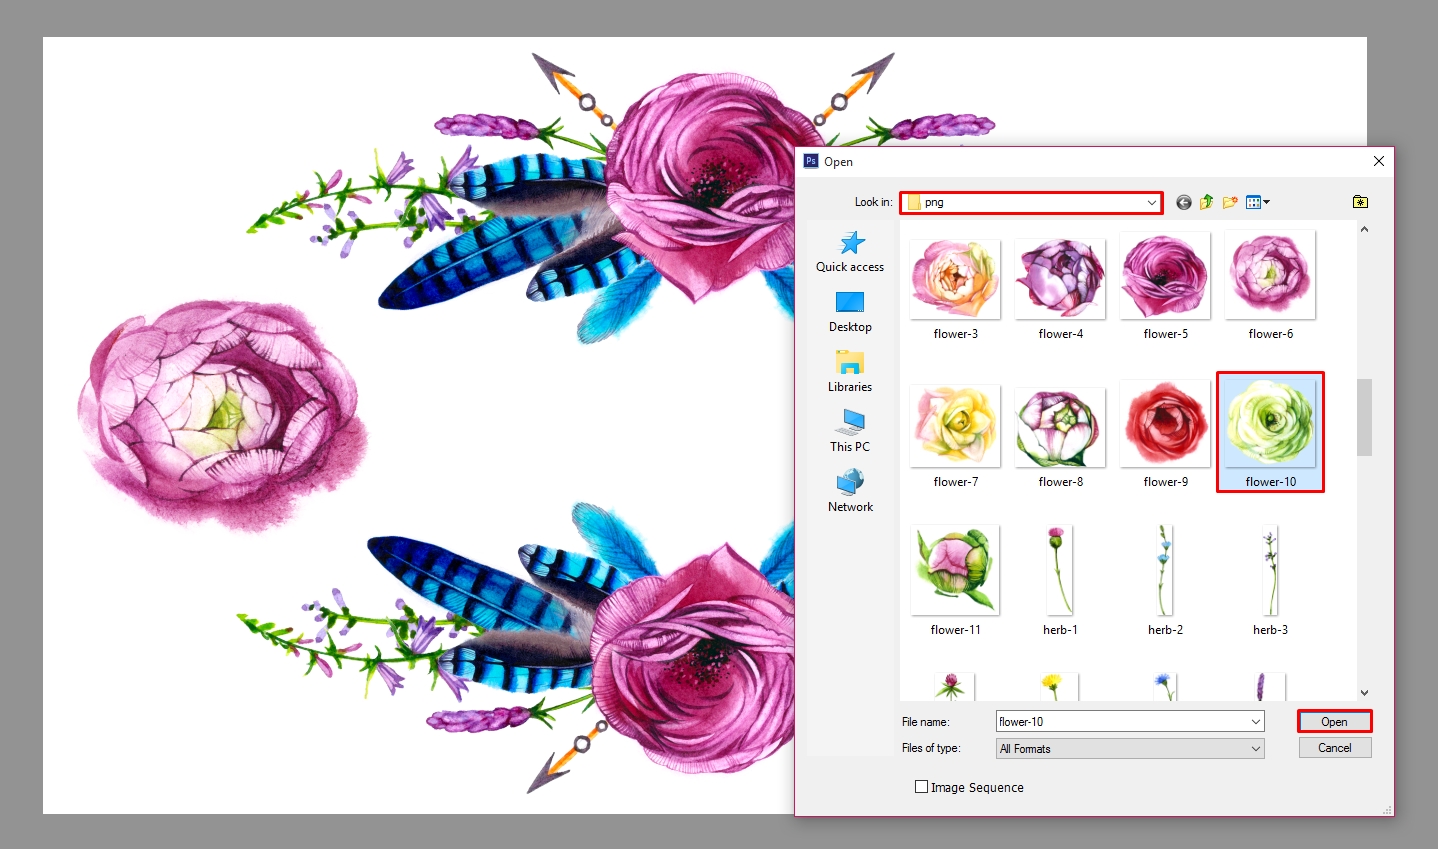
In order to use the flower, arrow, leaf or a ready-made wreath from the Watercolor Flowers set, you need press File > Open and select our Watercolor Flowers folder > png, where you will see the list of the images that you can use.
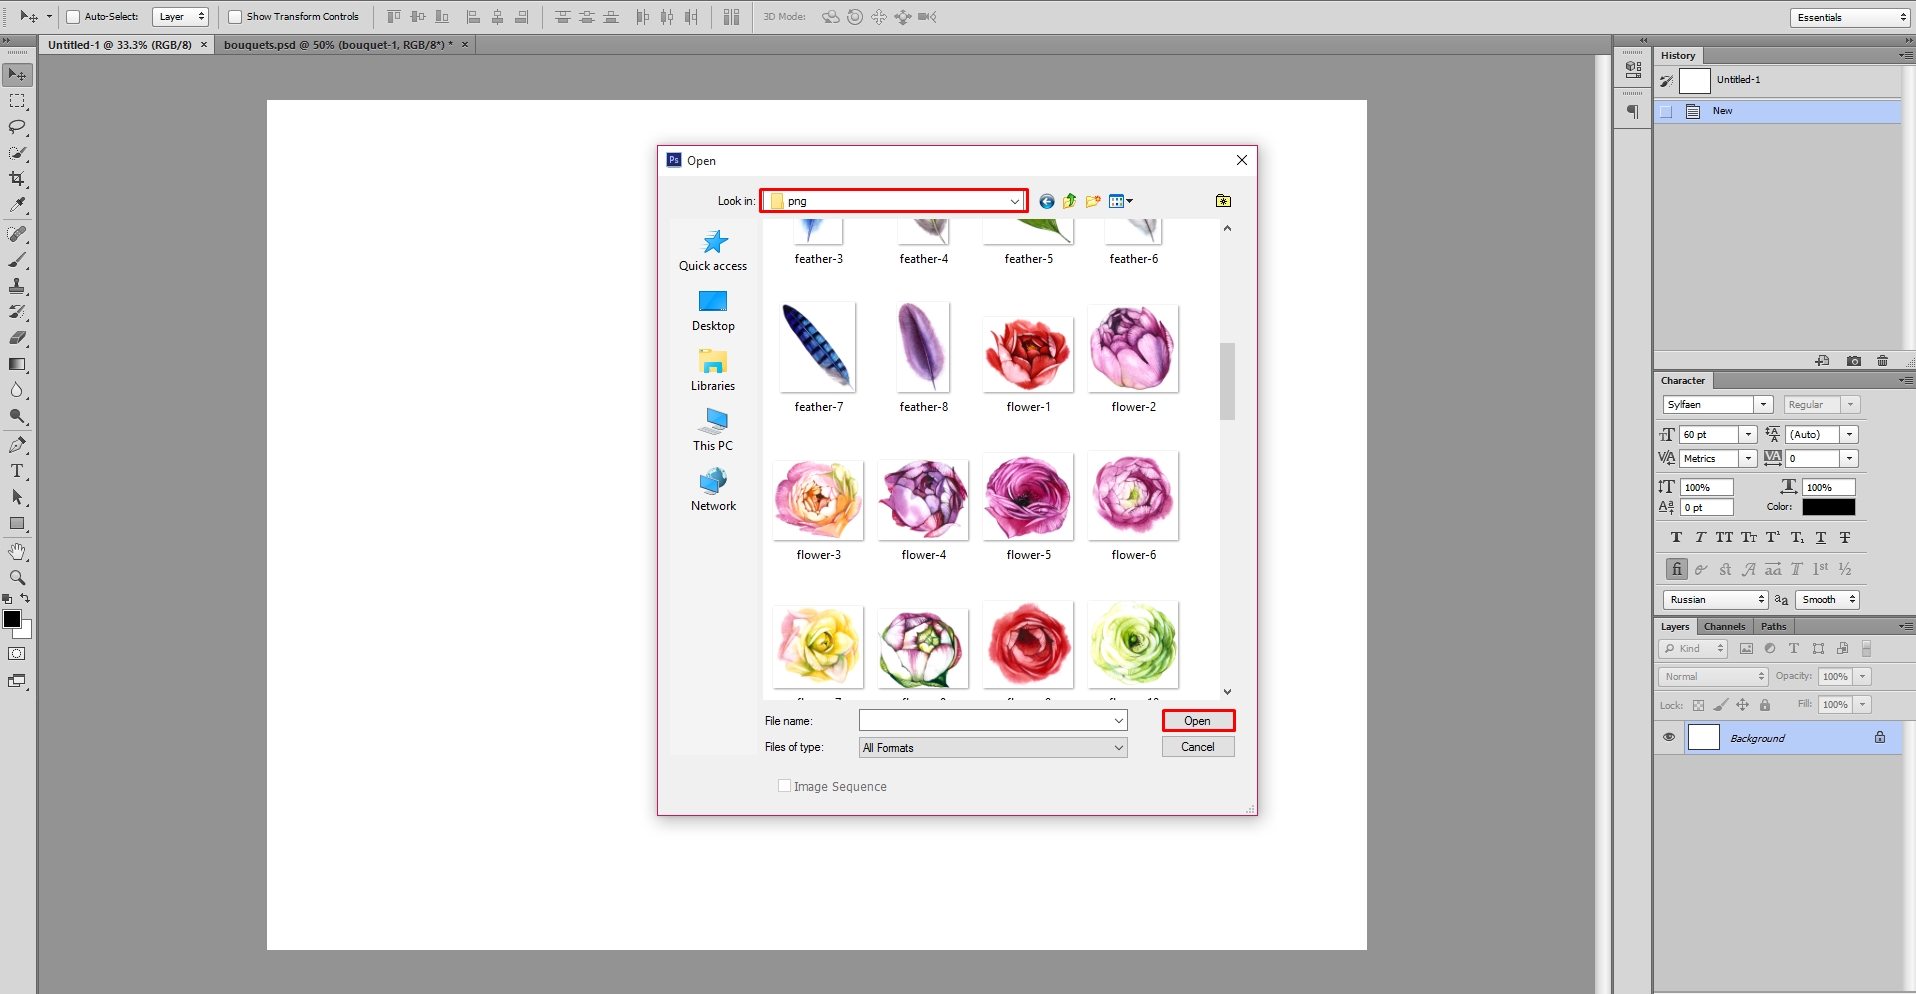
To select a ready-made bouquet, go to the folder Watercolor Flowers > pds > bouquets, wait for a set of bouquets loaded. After downloading you will see a list of bouquets. By clicking on the eye beside the folder of the bouquet, you will discover the appropriate bouquet.
3. Use Pre-Build Elements
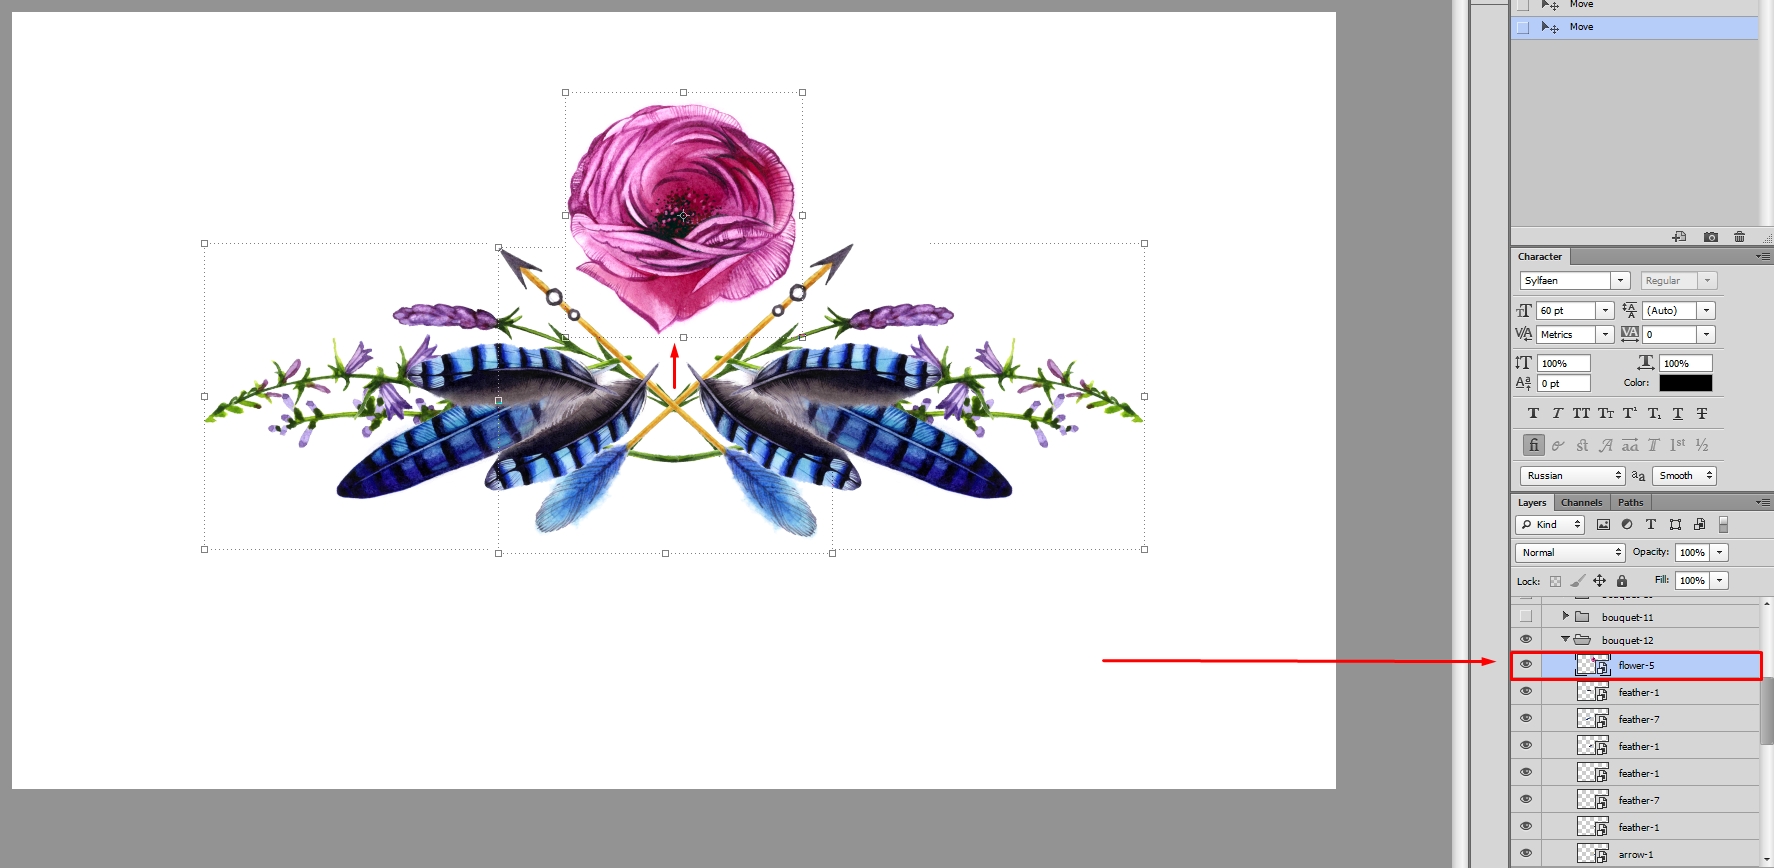
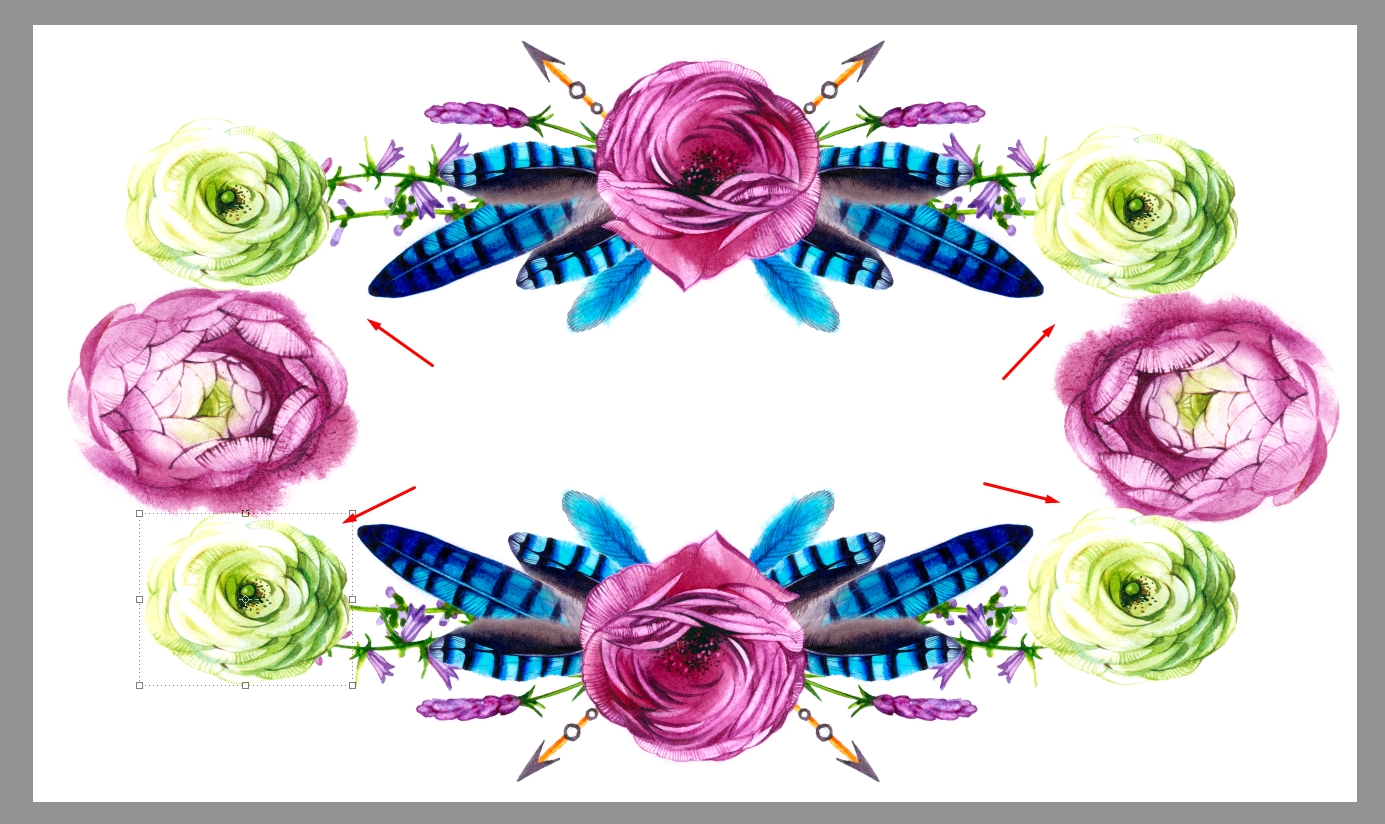
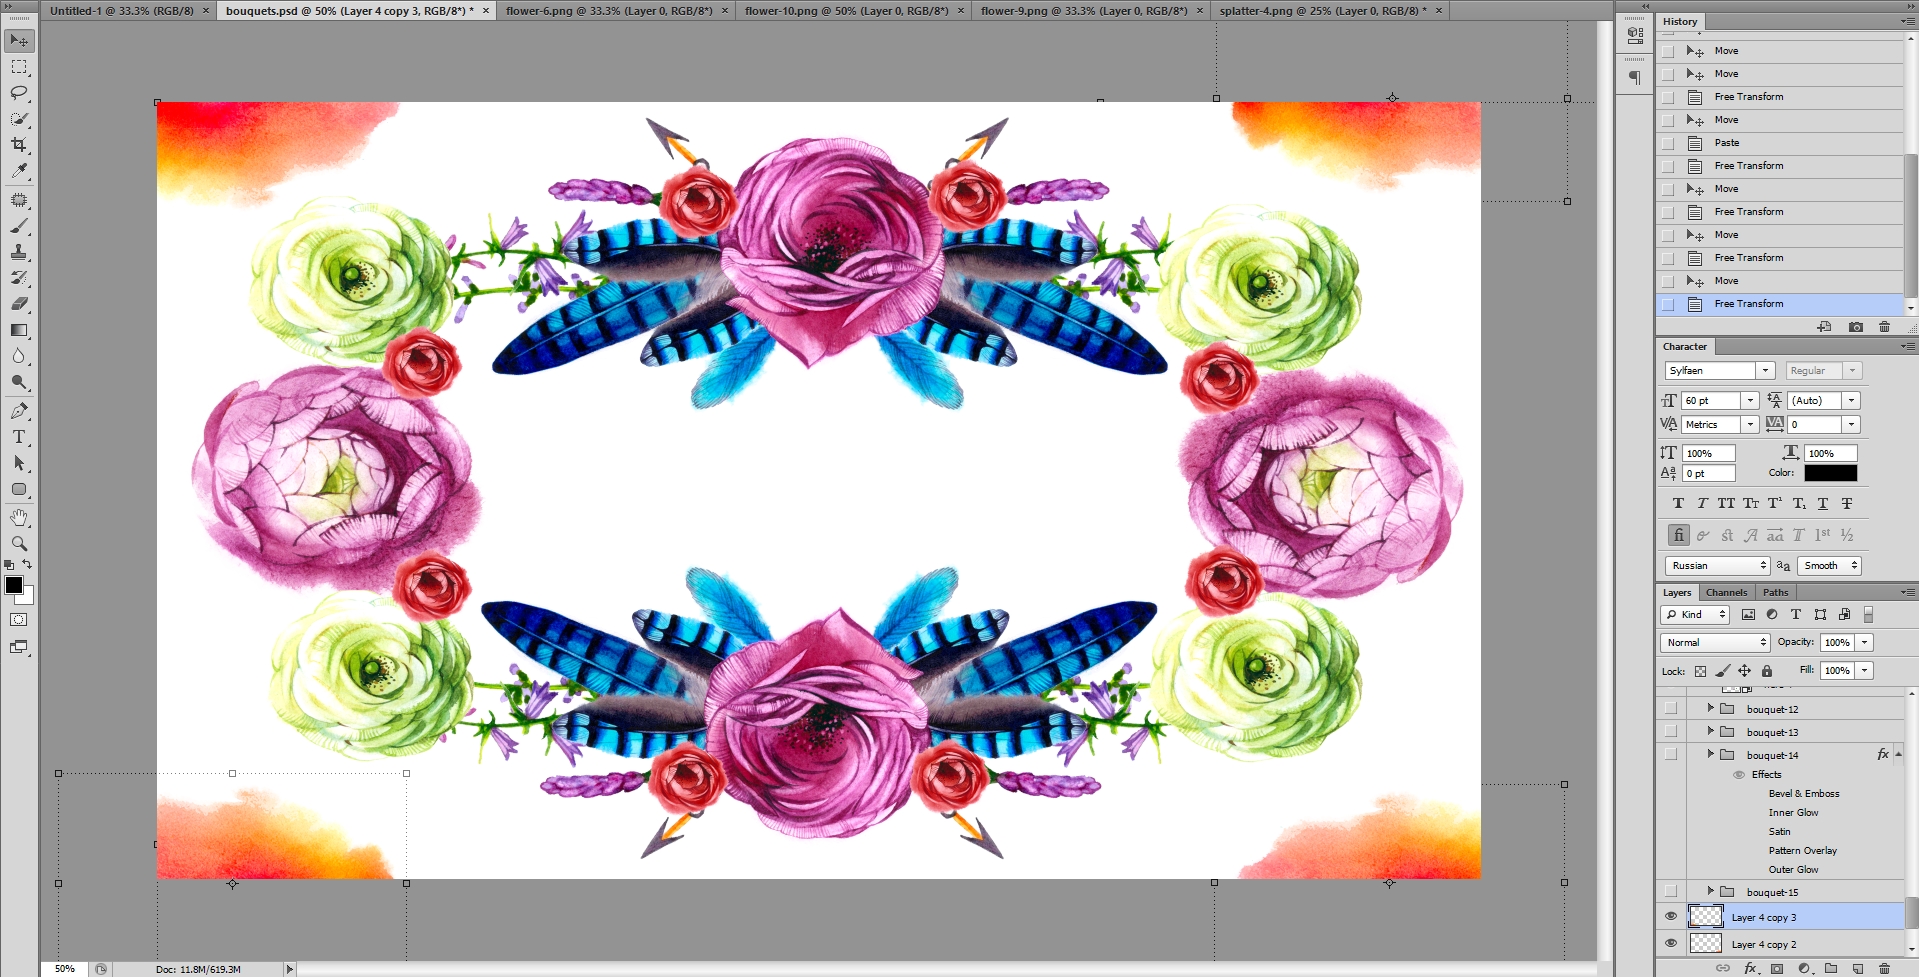
Today we will tell you how to create your own card with the help of ready-made bouquets. You should open ready-made bouquet. We chose a bouquet No.12.
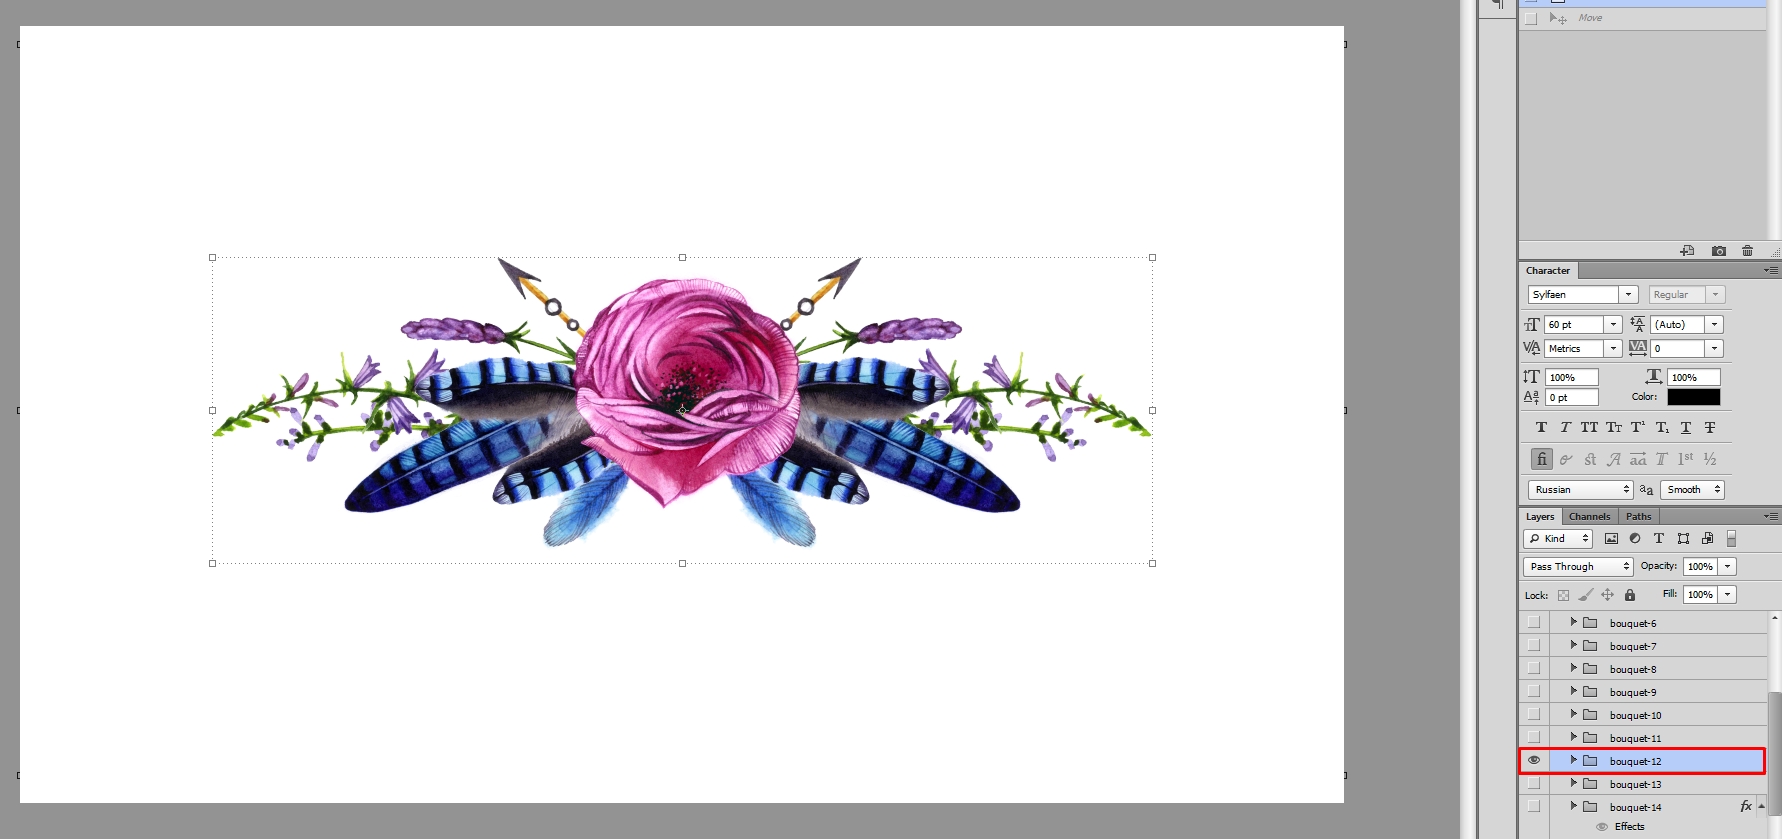
Pressing Ctrl and clicking the mouse on the bouquet number in the list on the right side, you could move the entire bouquet in any place on your canvas. If you want to move a single object in this bouquet, you will need to hold down Ctrl and click the left mouse button on the object you want to move. In the right corner, the Photoshop will show you what layer you are moving.
In order to cancel the previous action, you need to hold down Ctrl + Alt + Z and the image will return to its place. So simple, isn’t it?:)
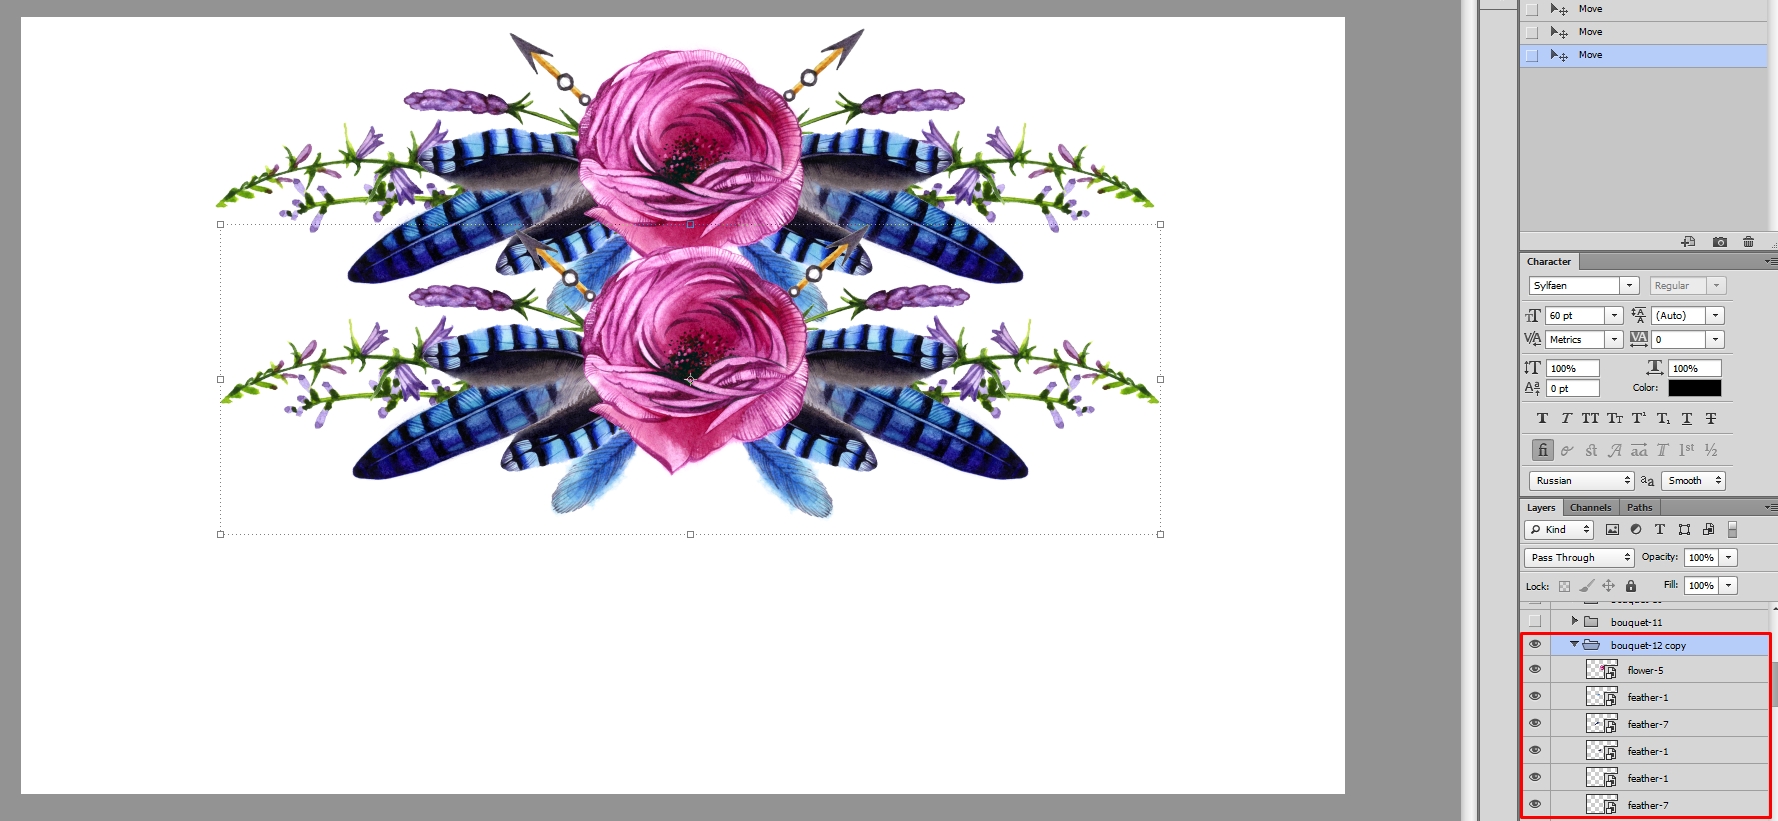
In order to copy the whole bouquet, you need to hold down Alt and hold down the left mouse button bouquet and drag the image to the needed area. On the right side, you will create a folder marked “Copy” where you will see a list of layers that are used in the copy of the bouquet.
In order to make a copy of the one composition element, you need to find this element’ layer, click the left mouse button on it to highlight the layer in blue color, then hold down Alt, hold left mouse button on the desired item and pull over the image in the needed area.

To flip an image, click the right mouse button on it, and choose Flip Horizontal.
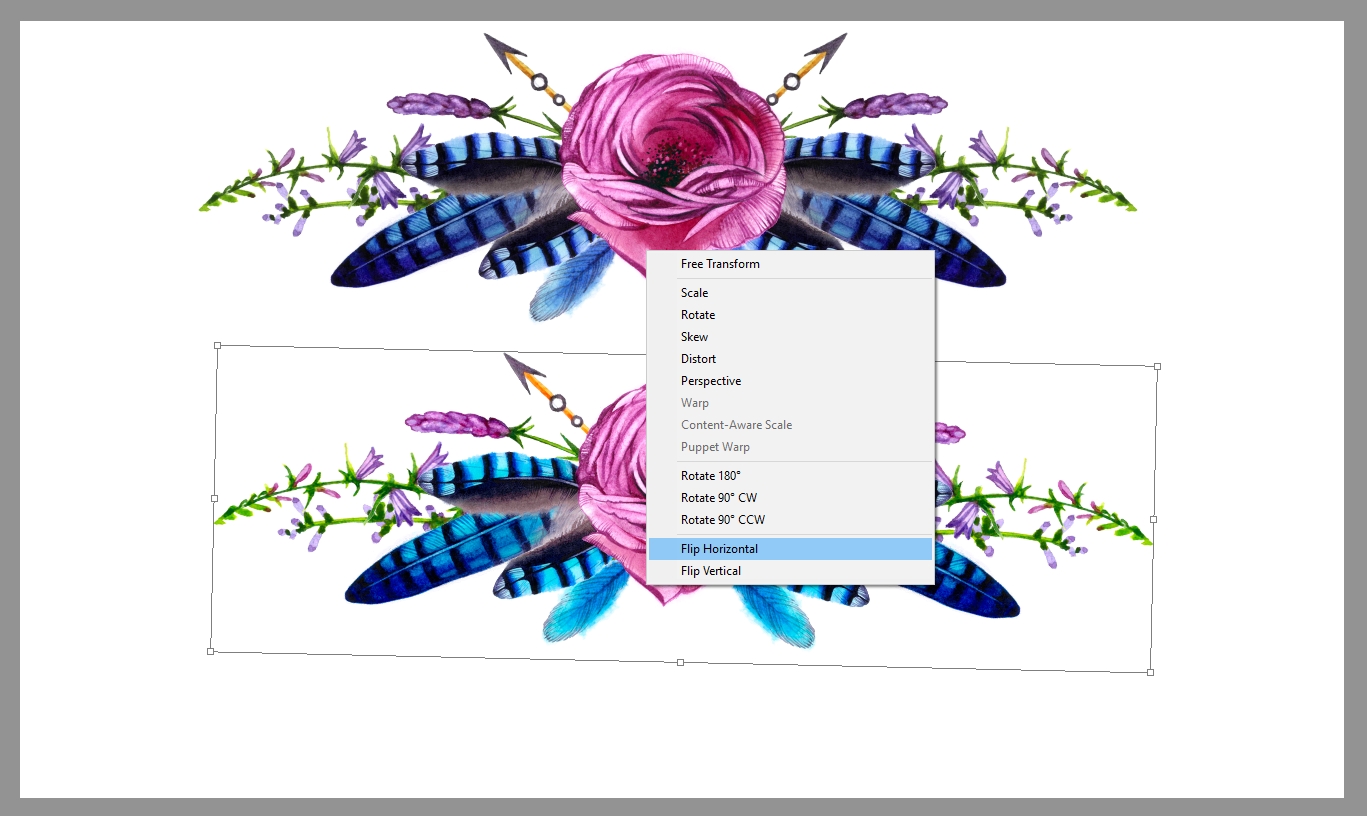
Then, you will receive a reflected image, which you can move in any direction with the help of the mouse.
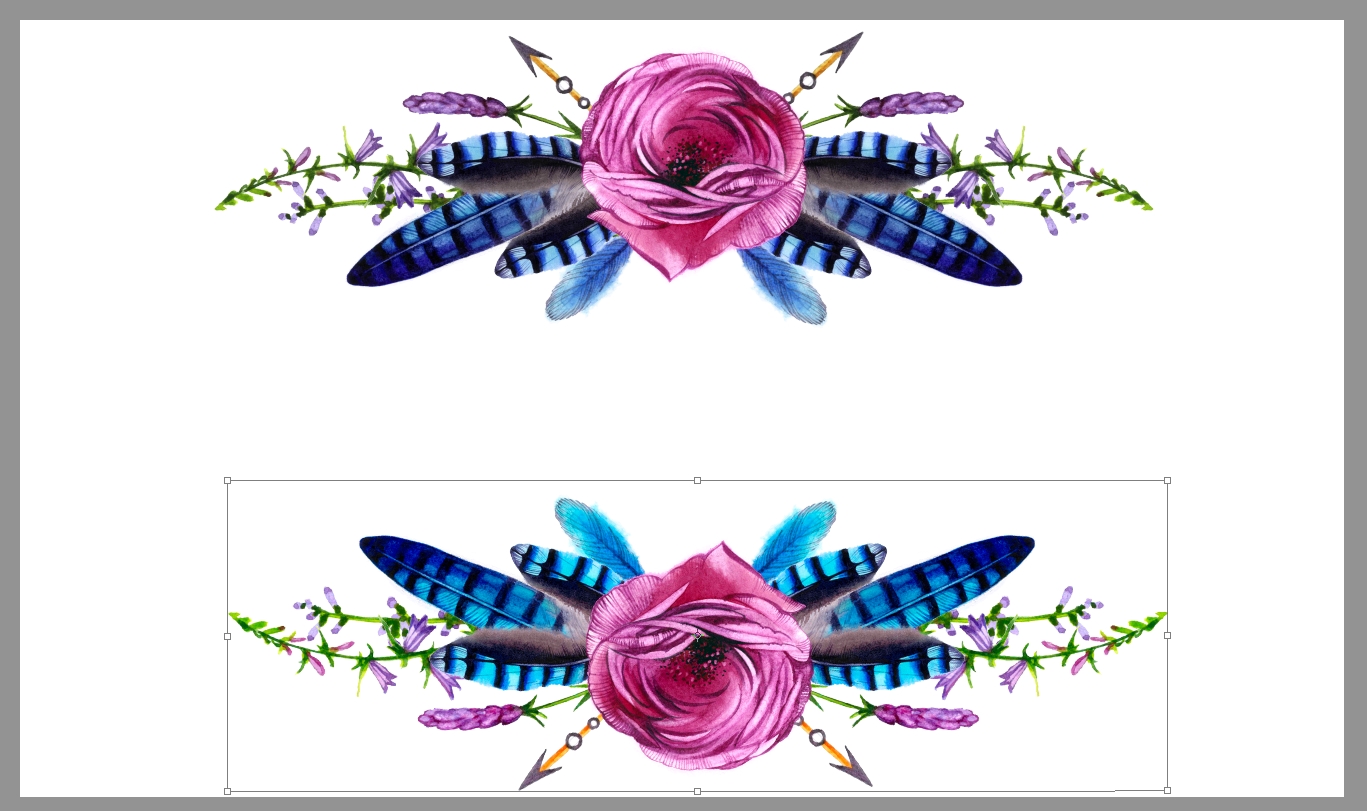
The resulting image you can use as a template for your greeting card. Also, we will show you how you can flesh out it with the existing png files.
Following these easy steps, we can help you to get outside of the Photoshop, and show you how easy it actually is to work with this Watercolor Floral Kit.
4. Add Additional Single Elements
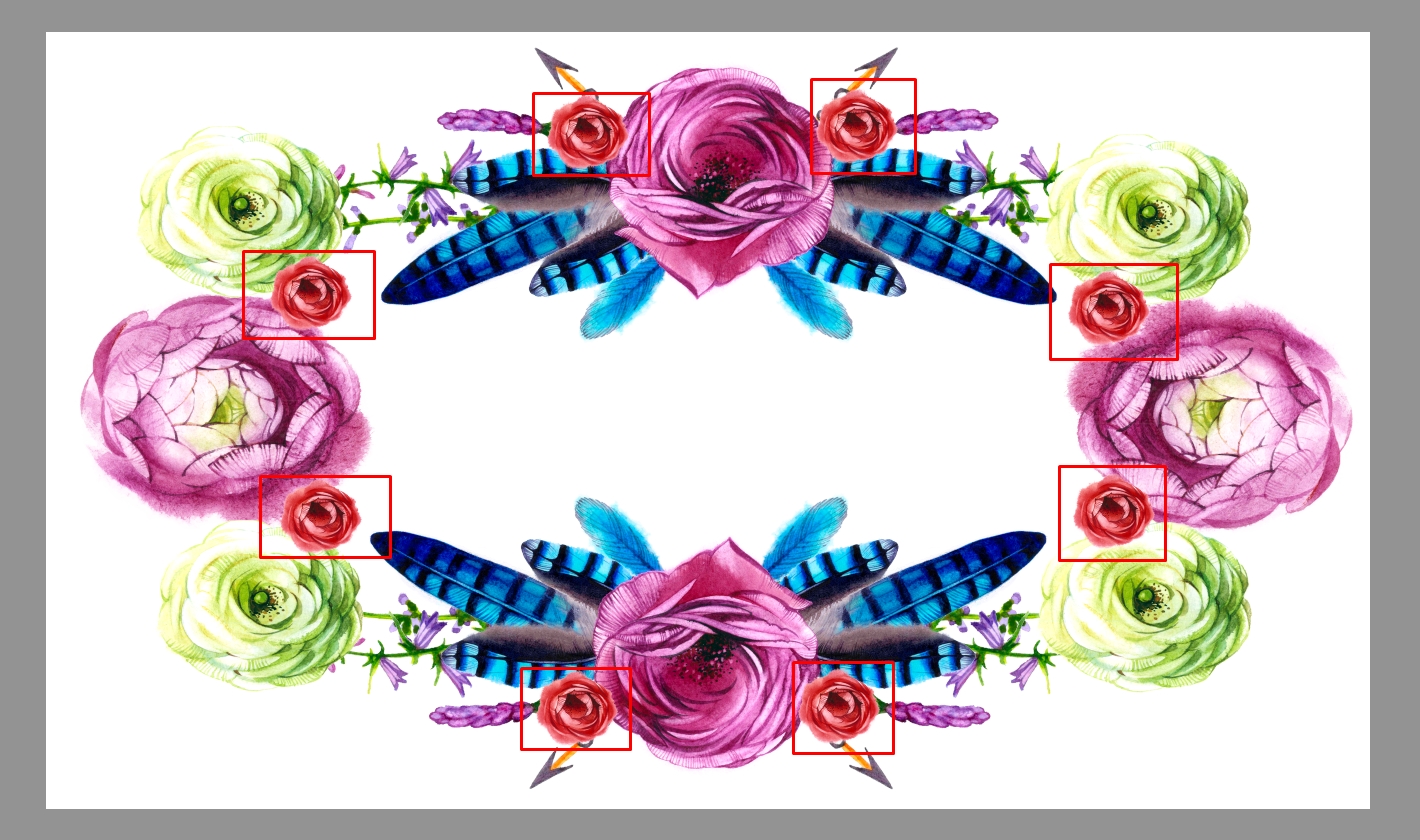
Click Open > watercolor flowers > png, choose one of the shown pictures and follow the instructions.
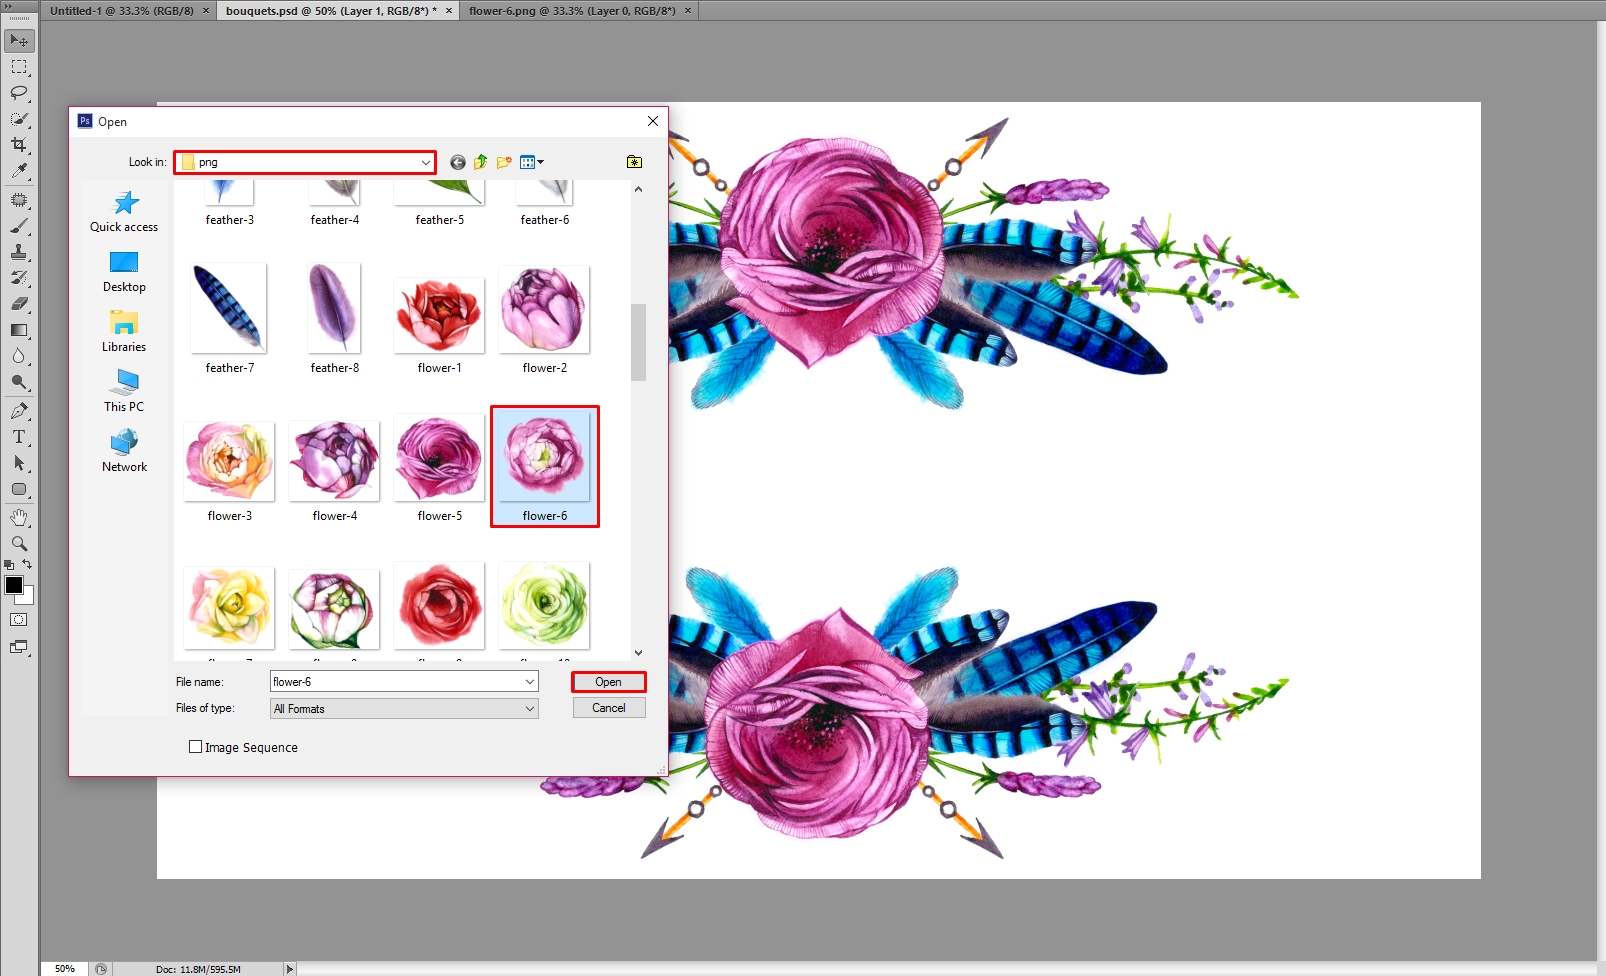
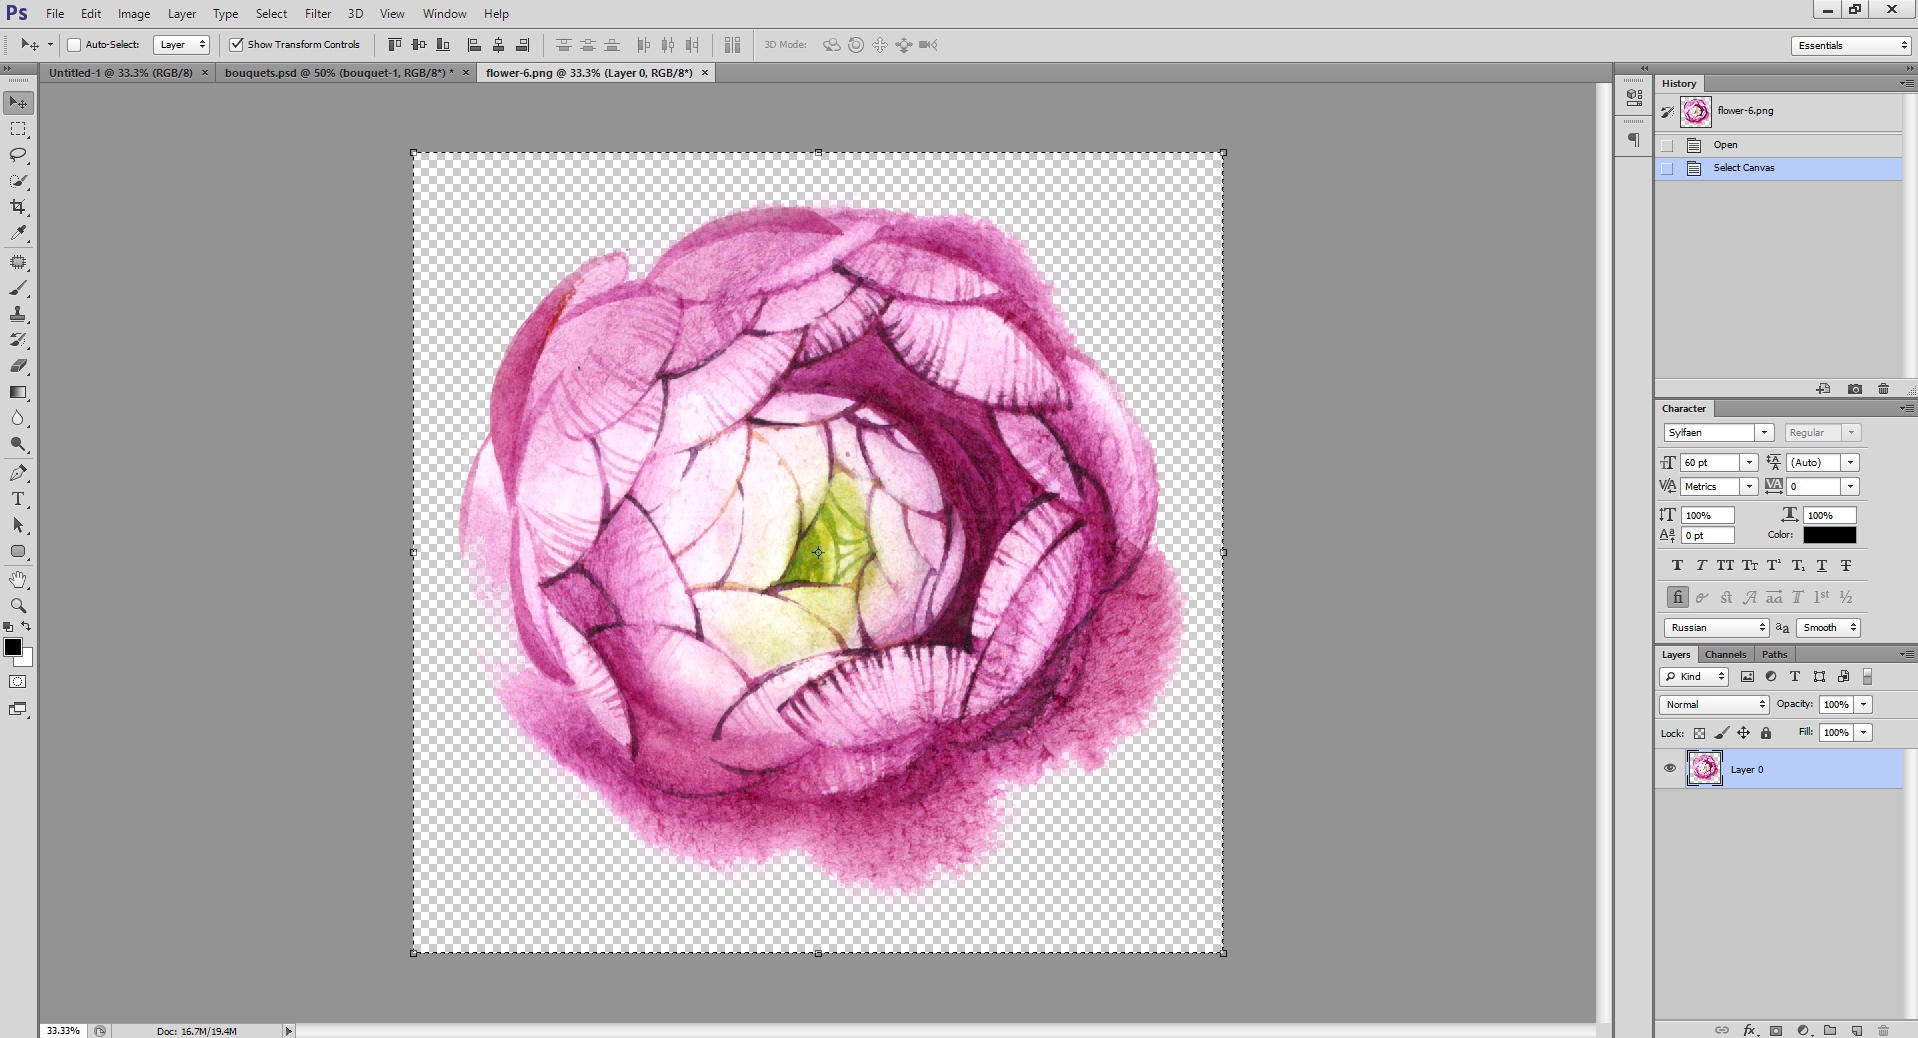
You have opened a folder with png image format. You can choose the shown flower or any other element you like. Please note that these are high-resolution images, so you would need to downscale it to the needed size.
Click Open to see the selected picture, in order to transfer it to your card, you need to press Ctrl+A to mark up the whole image and then Ctrl+C to copy it.
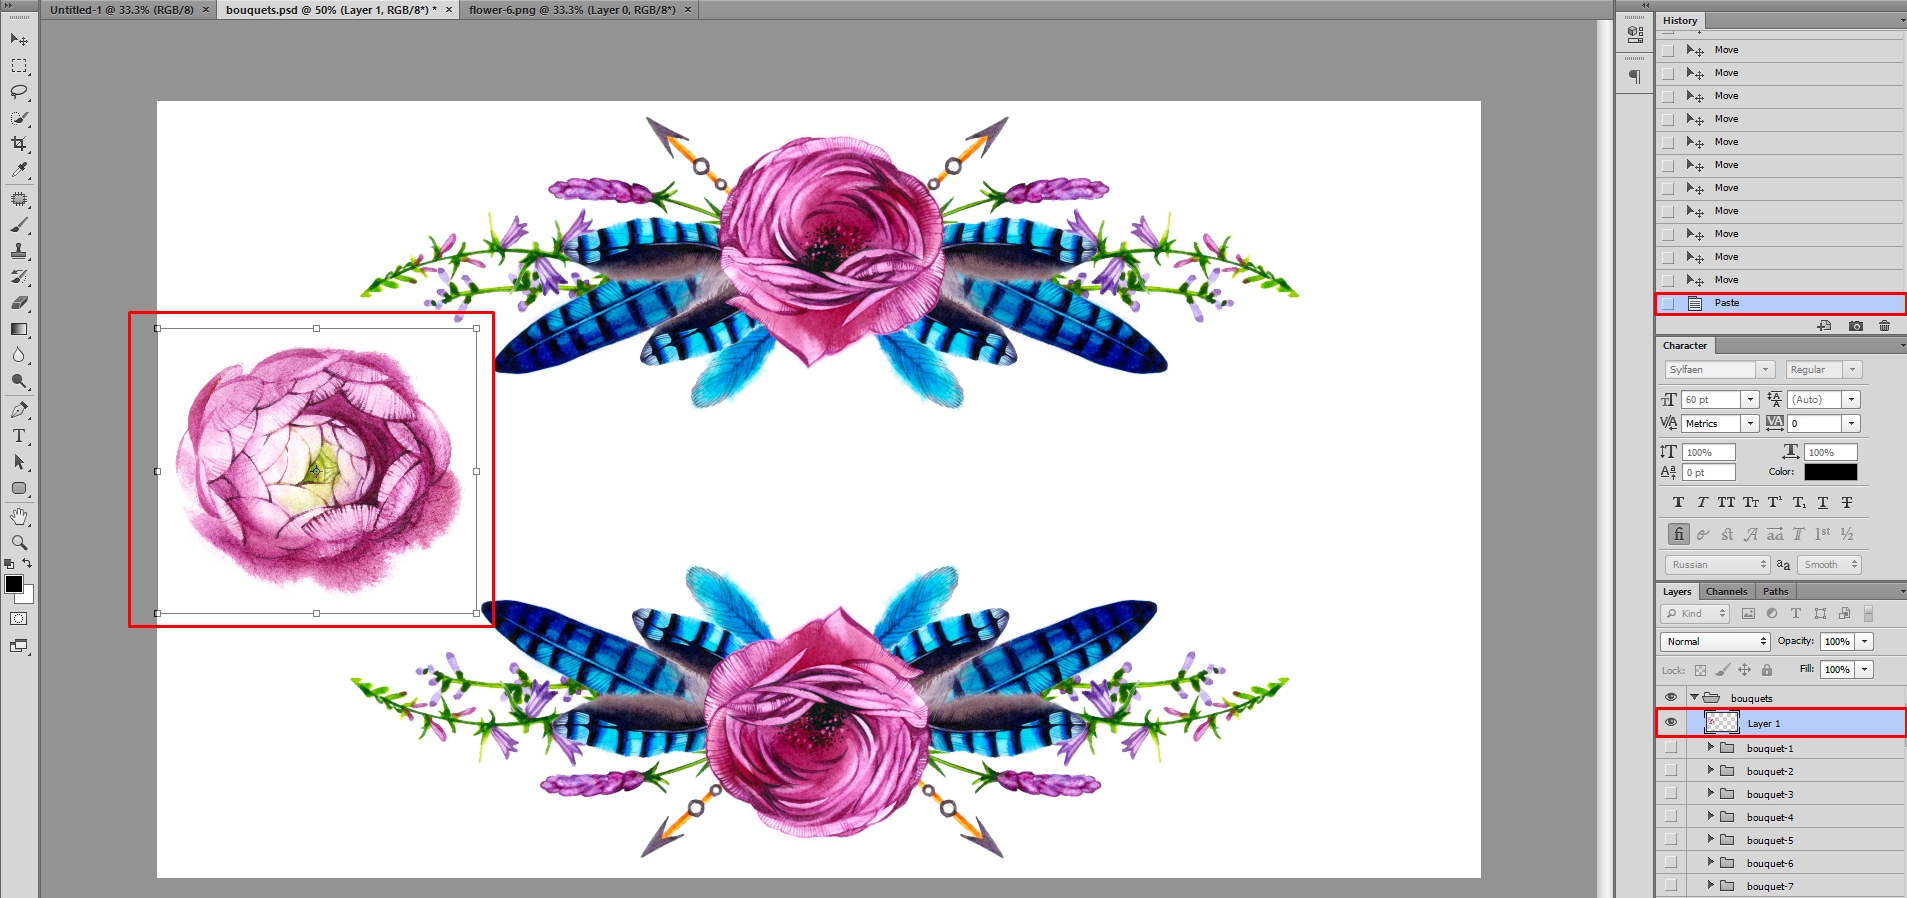
In order to paste the copied image, you need to go to your workspace, in our case, it is the composition of the bouquets. Press Ctrl+V to paste the copied image. Then, in the corners of the picture, you will see squares, pull them with the left mouse button to zoom out your flower to the desired size. Put the picture as it is shown in the figure below.
To copy this small size element hold down the Alt key, hold the left mouse button and pull the copied item aside. Turn the item as you wish, and put it the way we did.

To continue the decoration of the composition, go to the png folder, select another item, copy it, paste it in the bouquet composition, and zoom out to the desired size. We made green flower smaller than previous one. Put it as it’s shown in the picture.
To copy the needed element, use Alt and the left mouse button.
Performing the similar actions, we chose another flower made it even smaller than previous one, and placed it in the corners of the roses and flowers. You can do the same. Also, you can choose another flower, feather or leaf, or you can just skip this step.
If you want to make your card even brighter, you can use various stains and dyes from the kit. For example, we took splatter-4.
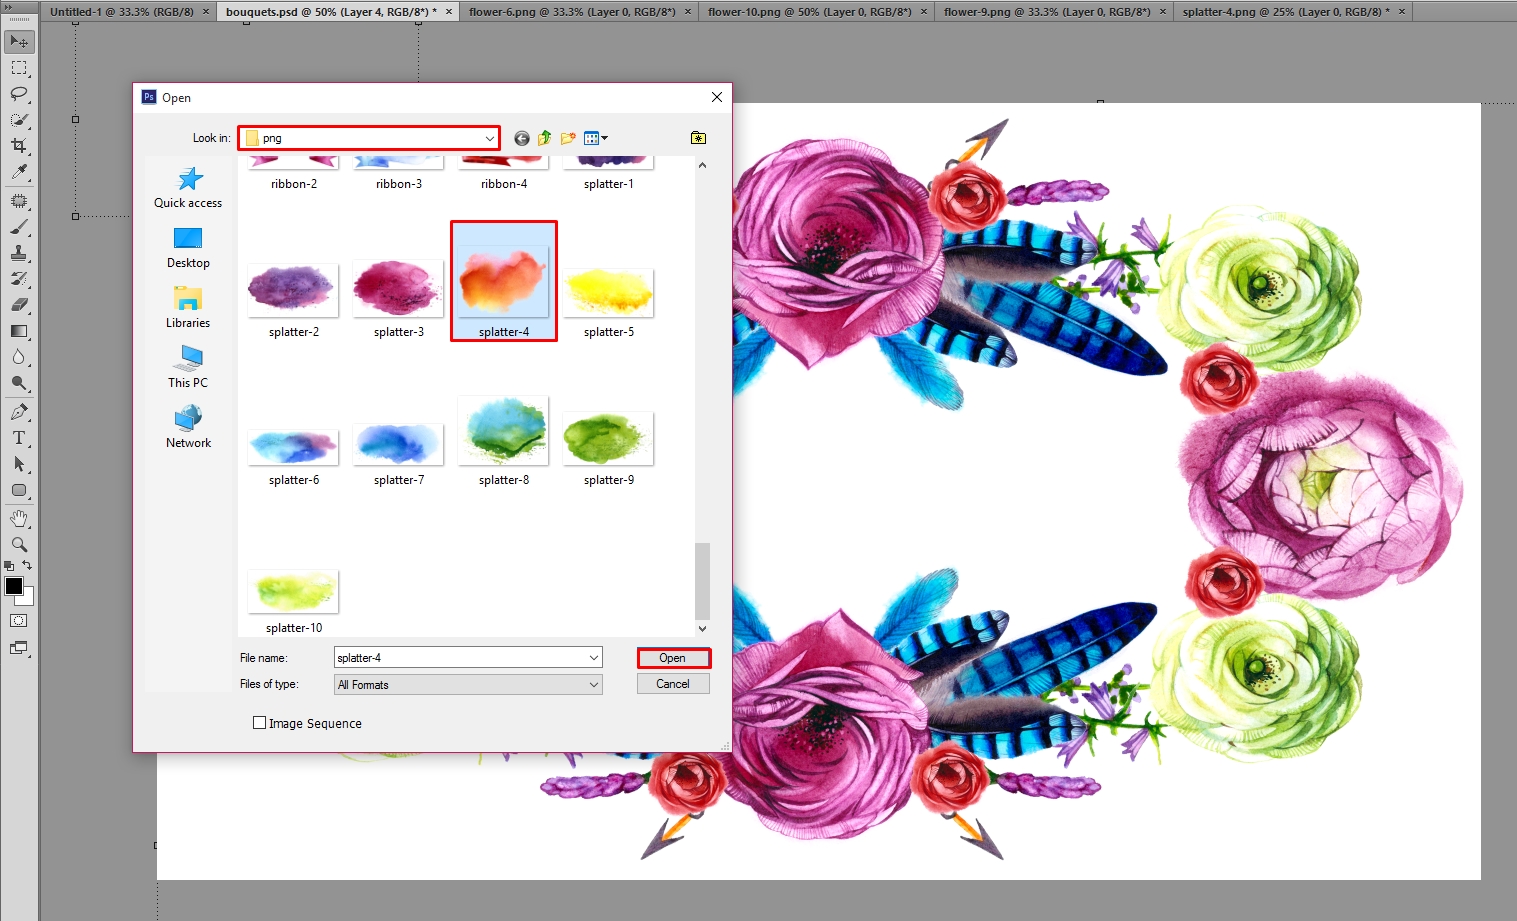
We have reduced it to the needed size and placed in the corner of our card.
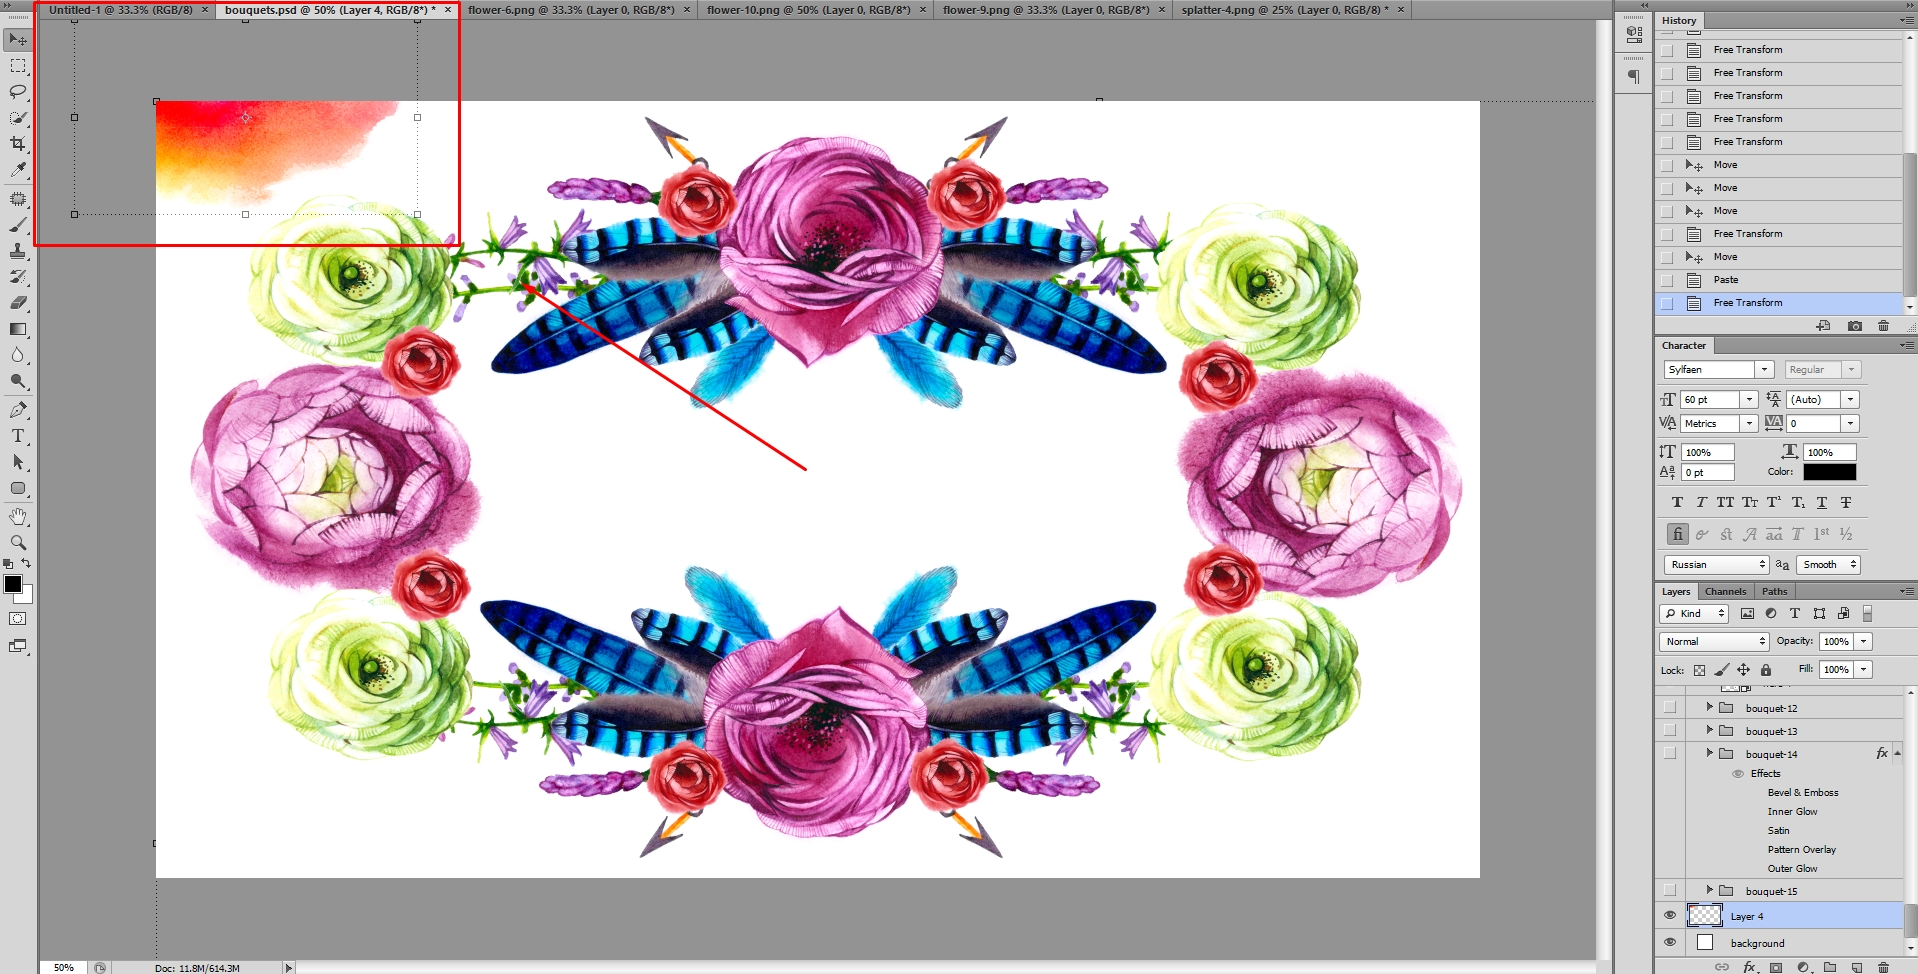
Doing the same steps to all the sides of the card, we will receive the picture below.
But what the greeting card is without greeting or inspirational inscription?!
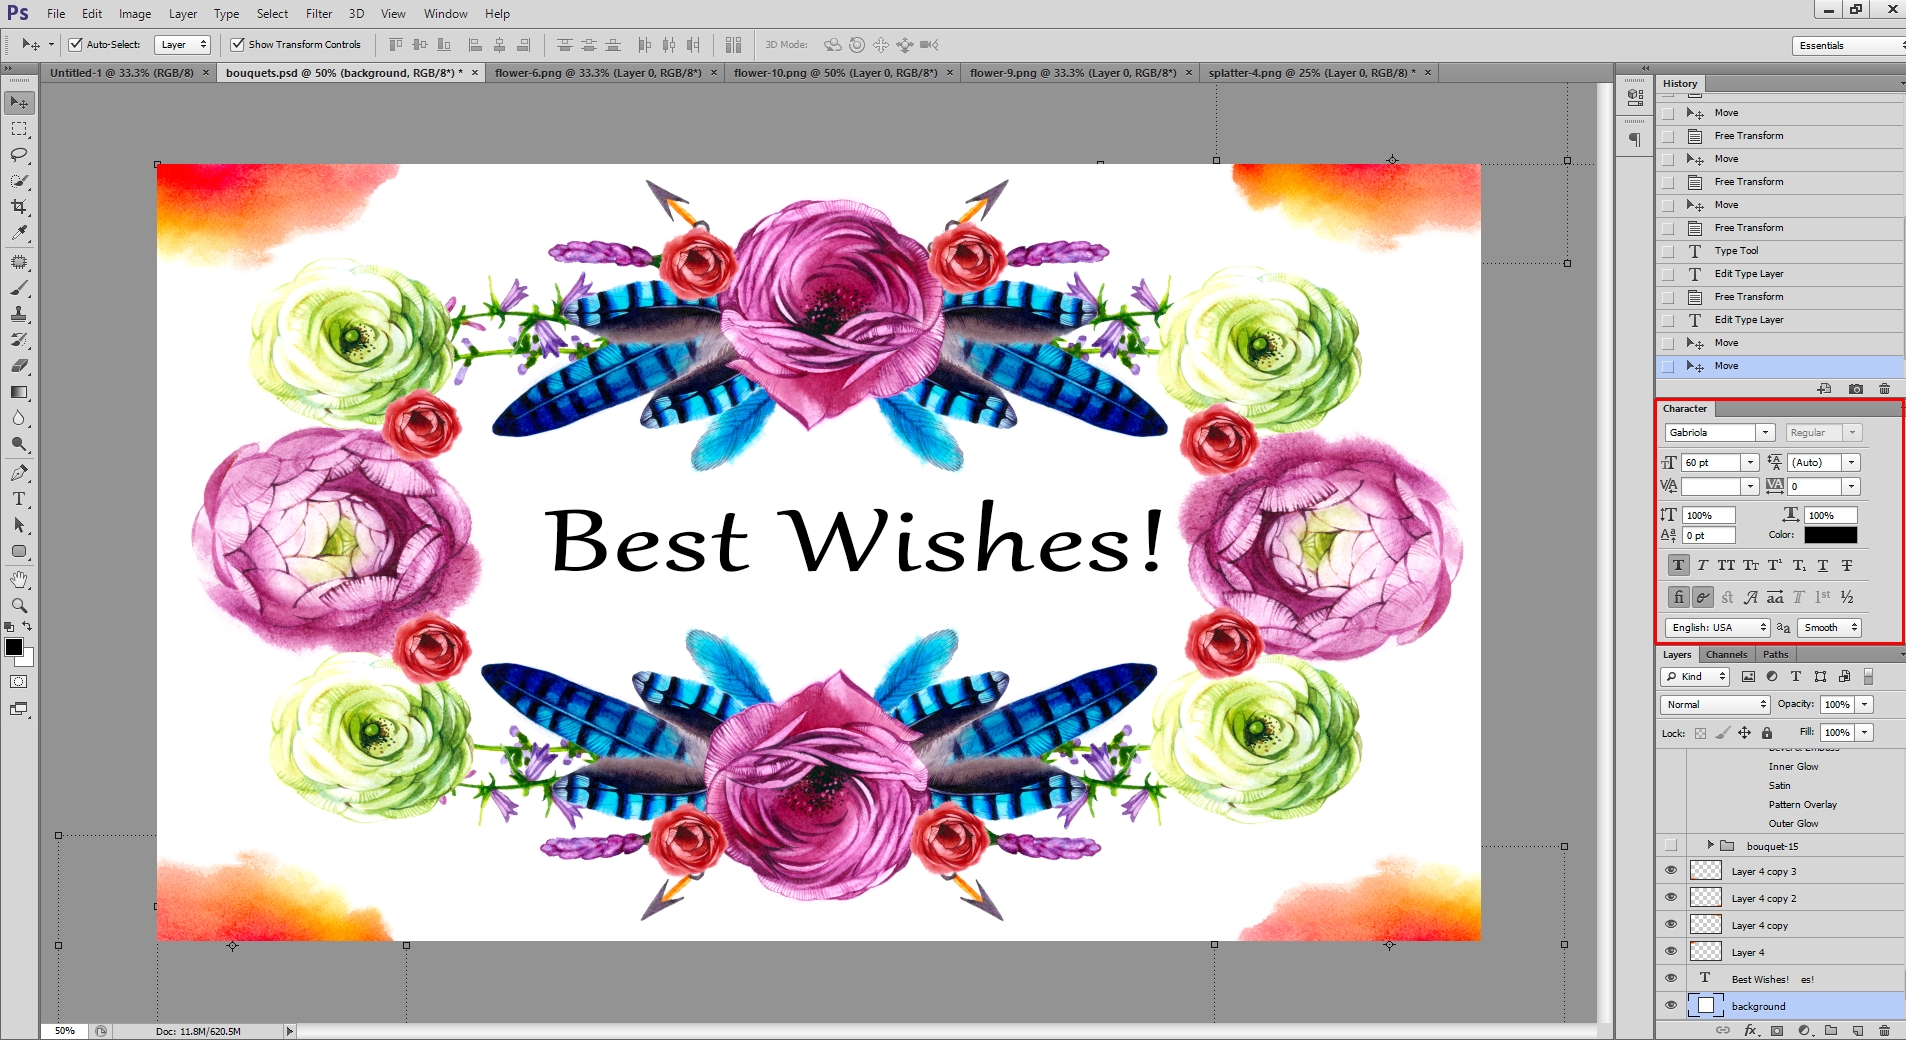
In order to write text on the card, click on the letter T in the left corner toolbar of your Photoshop. Then, with the left mouse button, select the area where you will place your text and start typing.
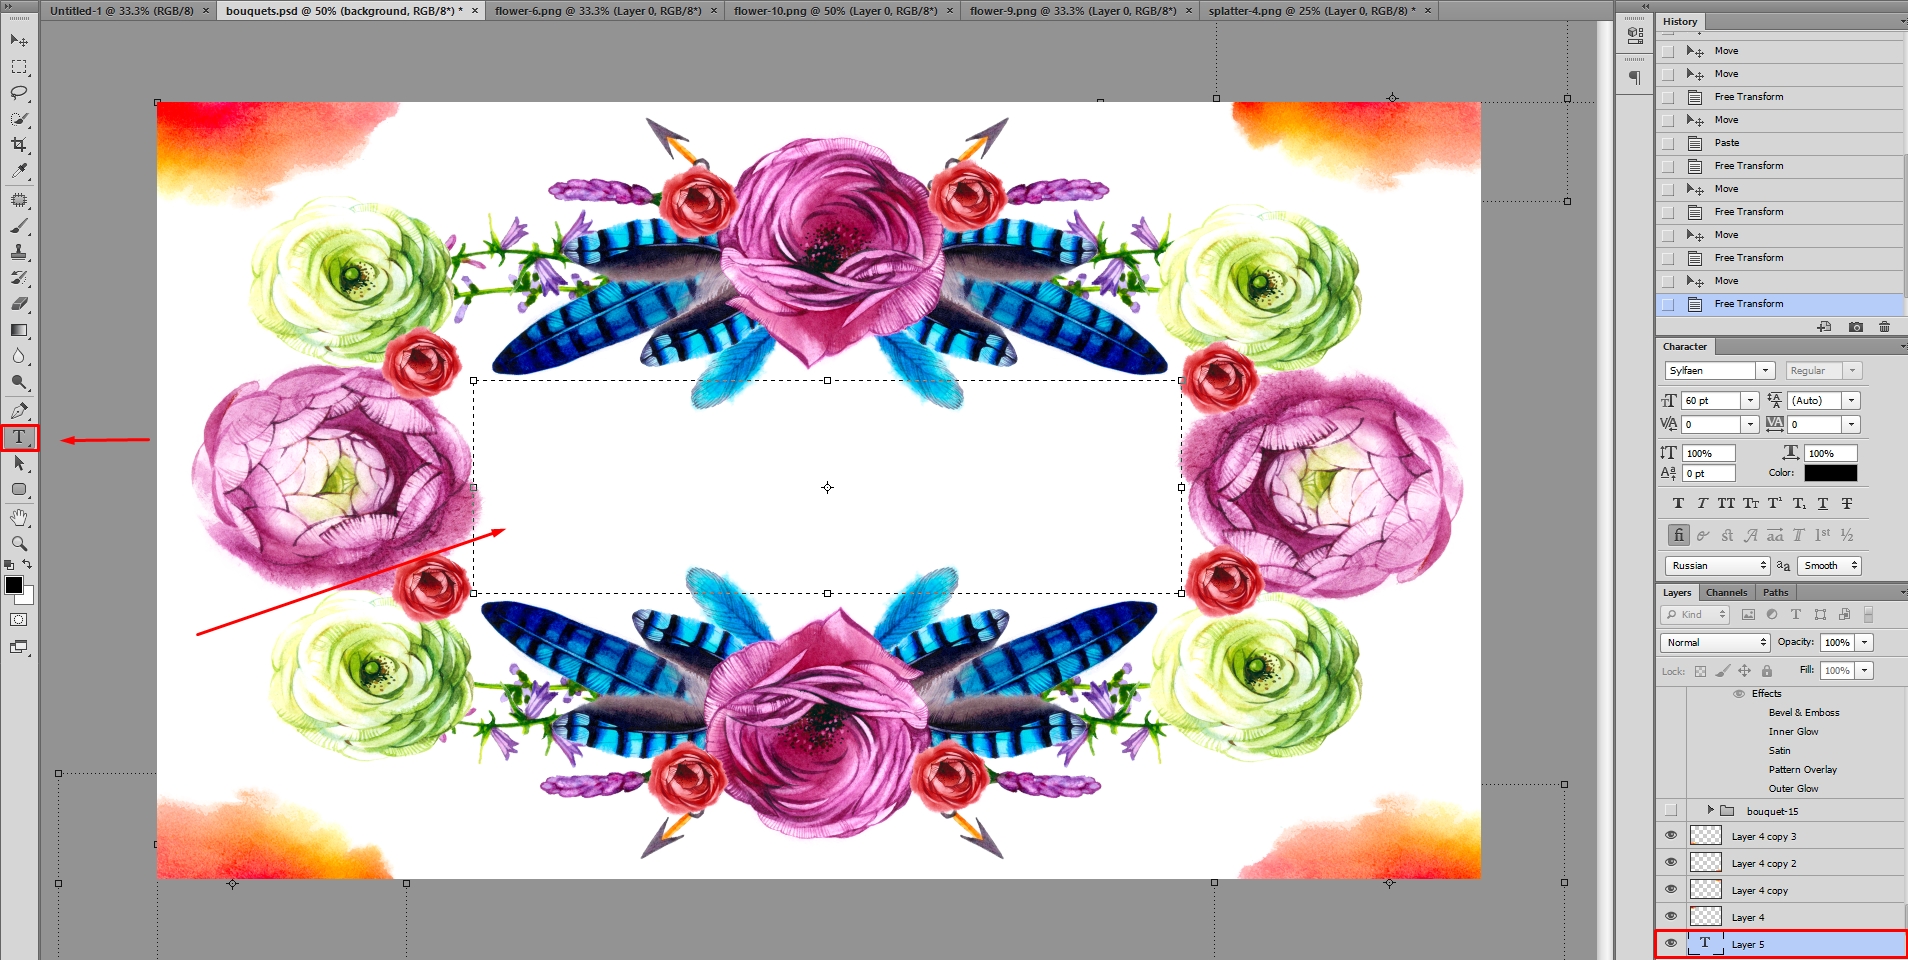
On the top or right side of your Photoshop toolbar, you can manage the text. In the relevant sections, you can choose the font, text size(pt), placement, etc.
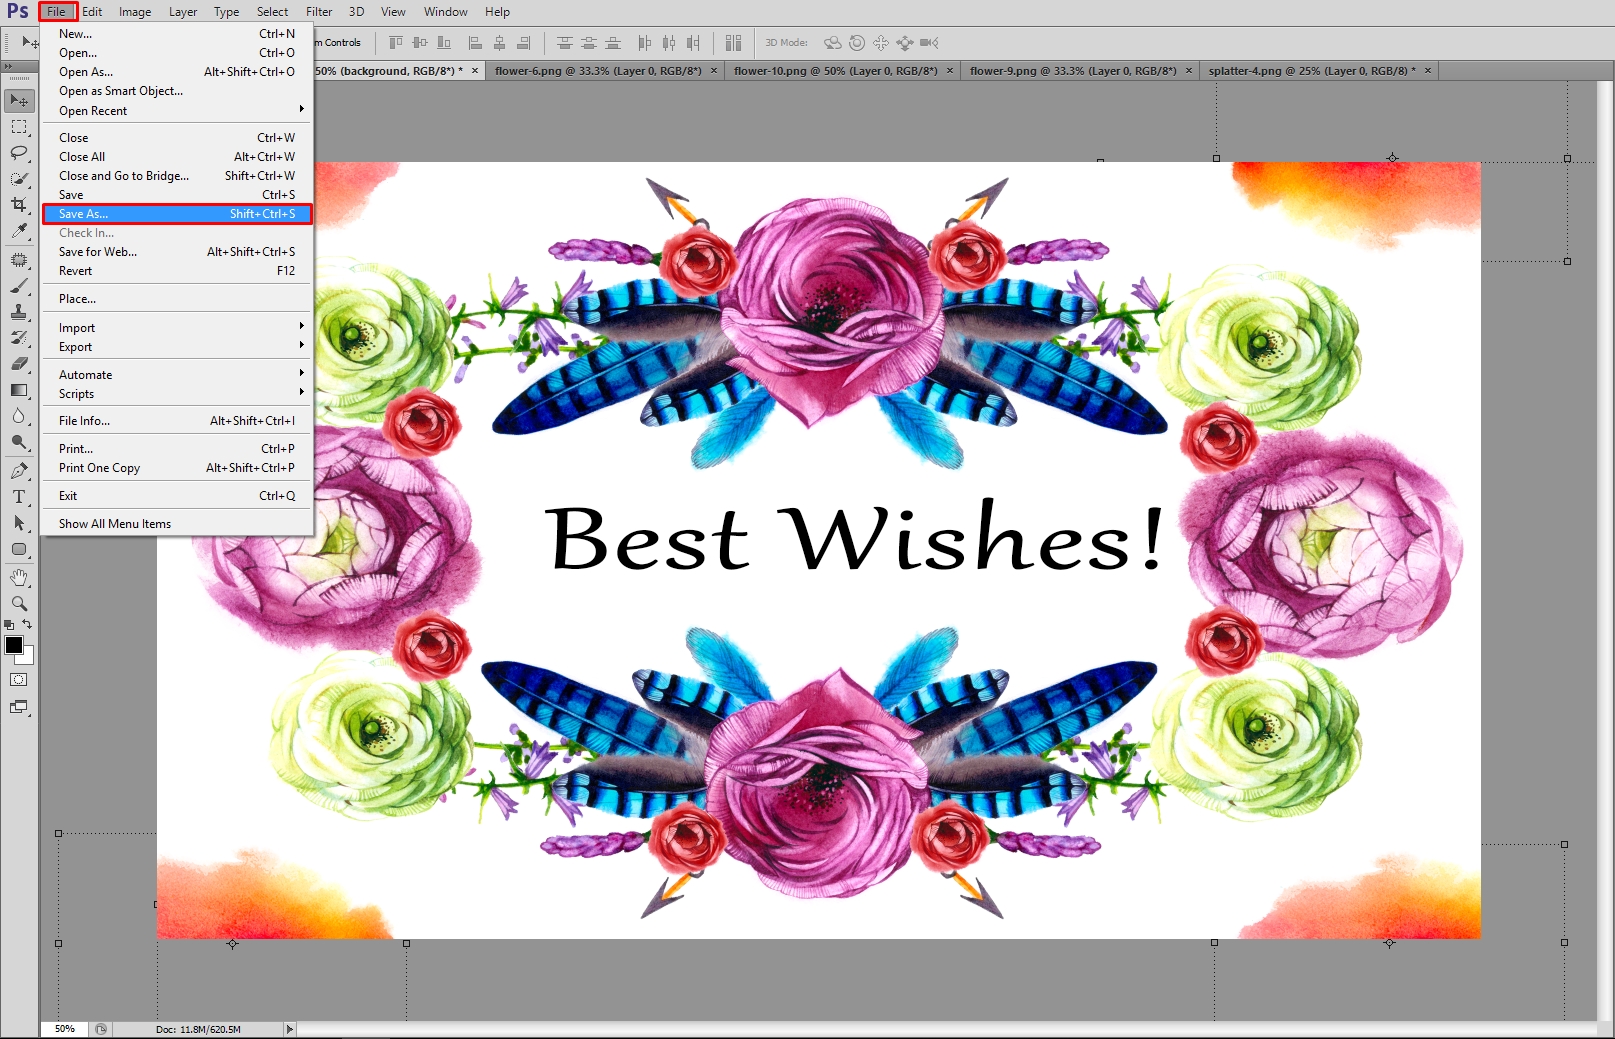
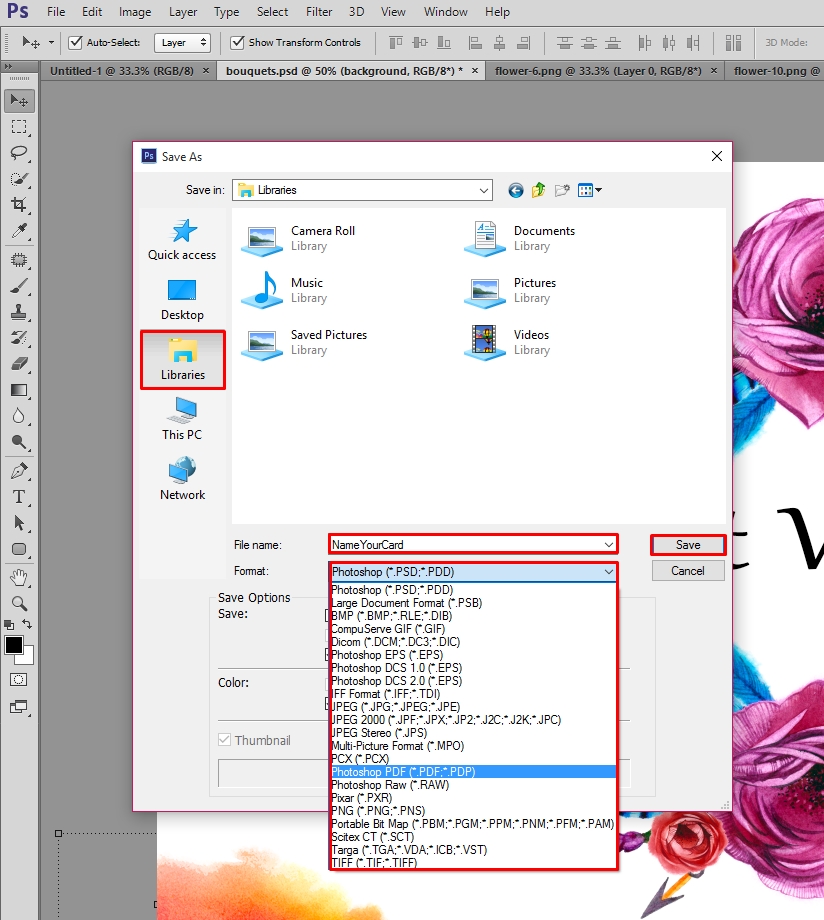
After you have your card completed, you need to save it. To do this, click File > Save As… and you will open a field where you can select the folder where you will save this image. Further, in the File Name field you need to enter your card name. Next, choose the format you want to save the image in. The most used formats are PSD, PNG, and PDF. But you can also save the picture in JPEG format, it would be better if you want to send it via the Internet or to share with friends on social networks.
After selecting the desired format, click Save. You have your own greeting card! You’re awesome! Share your work with friends, develop your design and just enjoy it.
We hope we have helped you to know more about Photoshop, about our Hand Drawn Watercolor Floral Kit, and now you can make everything you want using this little tutorial.

Subscribe to our Twitter to receive updates about latest releases, useful tips, and company news!