
Ads
User Guide
Ads version | 1.5.0 * |
WordPress | 5.3.2 * |
*When using other versions some differences are possible to occur
** Screenshots were taken from a PC
Table of Contents
2.1.1. Remote Work with Google Adsense
6.3. Manage the License Settings
You can download Ads Plugin here:
https://bestwebsoft.com/products/wordpress/plugins/google-adsense/
1. Introduction
Note: Сlick the “Save Changes” button in order to apply any changes. |
1.1. Open your WordPress Admin Dashboard and find the menu on the left.
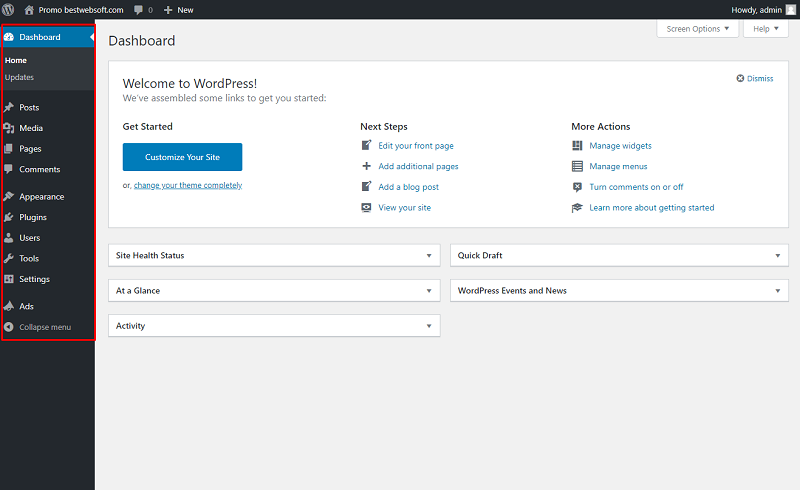
1.2. Open the “Ads” > “Settings” page on the dashboard.
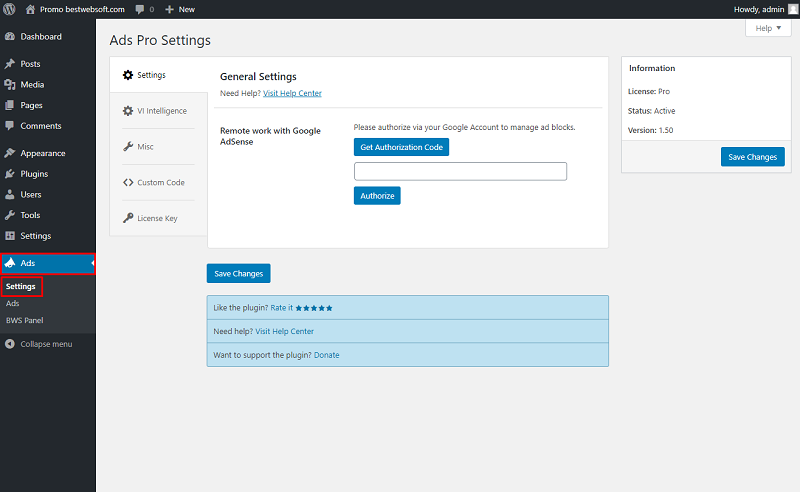
2. Settings
Use the options of the “Settings” page to make the global settings for the plugin.
2.1. General Settings
Authenticate your site by getting the “Authorization Code” via your Google Account to manage ad blocks.
2.1.1. Remote Work with Google AdSense
Use the “Remote work with Google AdSense” option to authorize via Google Account to manage blocks.

2.1.1.1. Click the “Get Authorization Code” button.
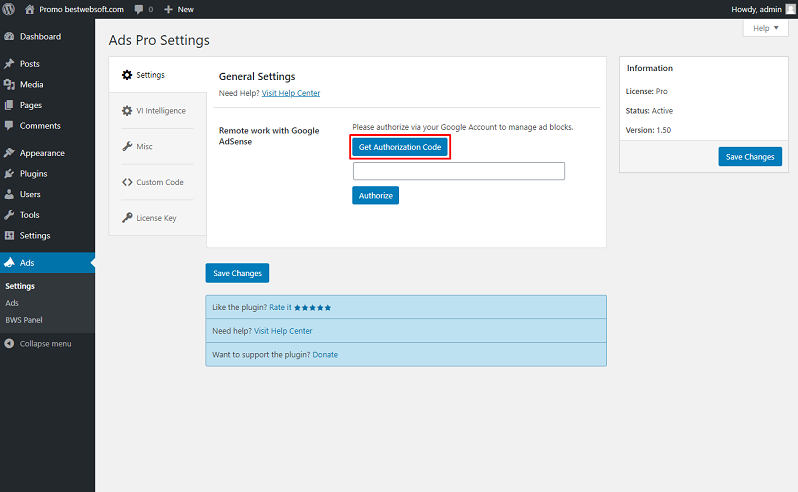
2.1.1.2. Paste the received code into the appropriate field and click the “Authorize” button.

2.1.2. Your Publisher ID
Note: For the Publisher ID assignment, you should have your personal Google AdSense Account. |
Use the “Your Publisher ID” option to allow Google Adsense to automatically post ads on your site.
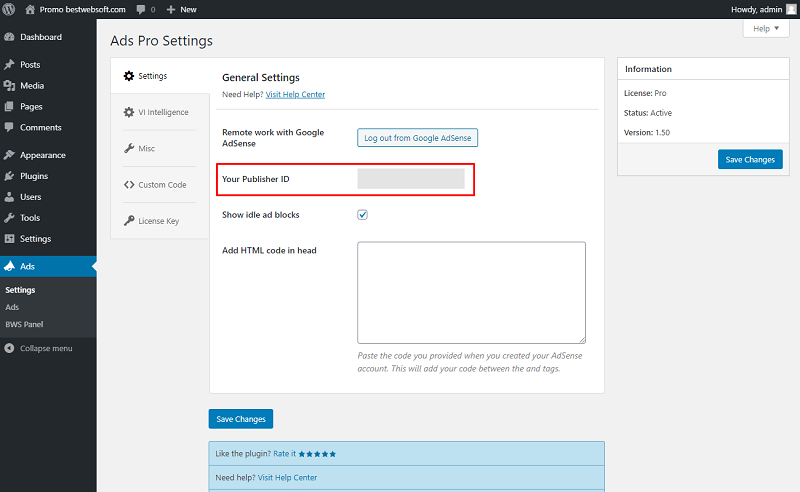
2.1.3. Show Idle Ad Blocks
Use the “Show Idle Ad Blocks” option to display ad blocks on your pages and posts.

2.1.3.1. After saving changes the ad blocks which are added in the Google AdSense will be displayed on the “Ads” page.
2.1.4. Add HTML Code in Head
Use the “Add HTML Code in Head” option to paste the code you provided when you created your AdSense account. This will add your code between the <head> and </head> tags.

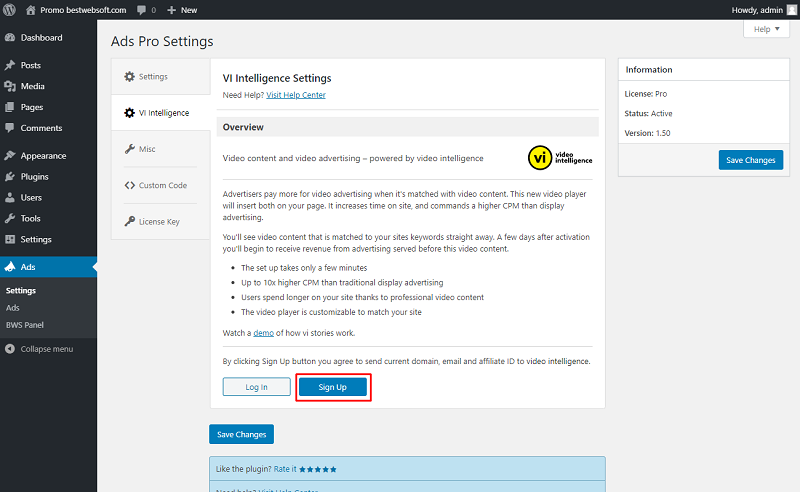
3. VI Intelligence
Use the options of the “VI Intelligence Settings” to login or sign in into your Video Intelligence account.
3.1. Log in, if you have your personal VI Intelligence account.

3.2. If you do not have a VI Intelligence account, click the “Sign Up” button and register.
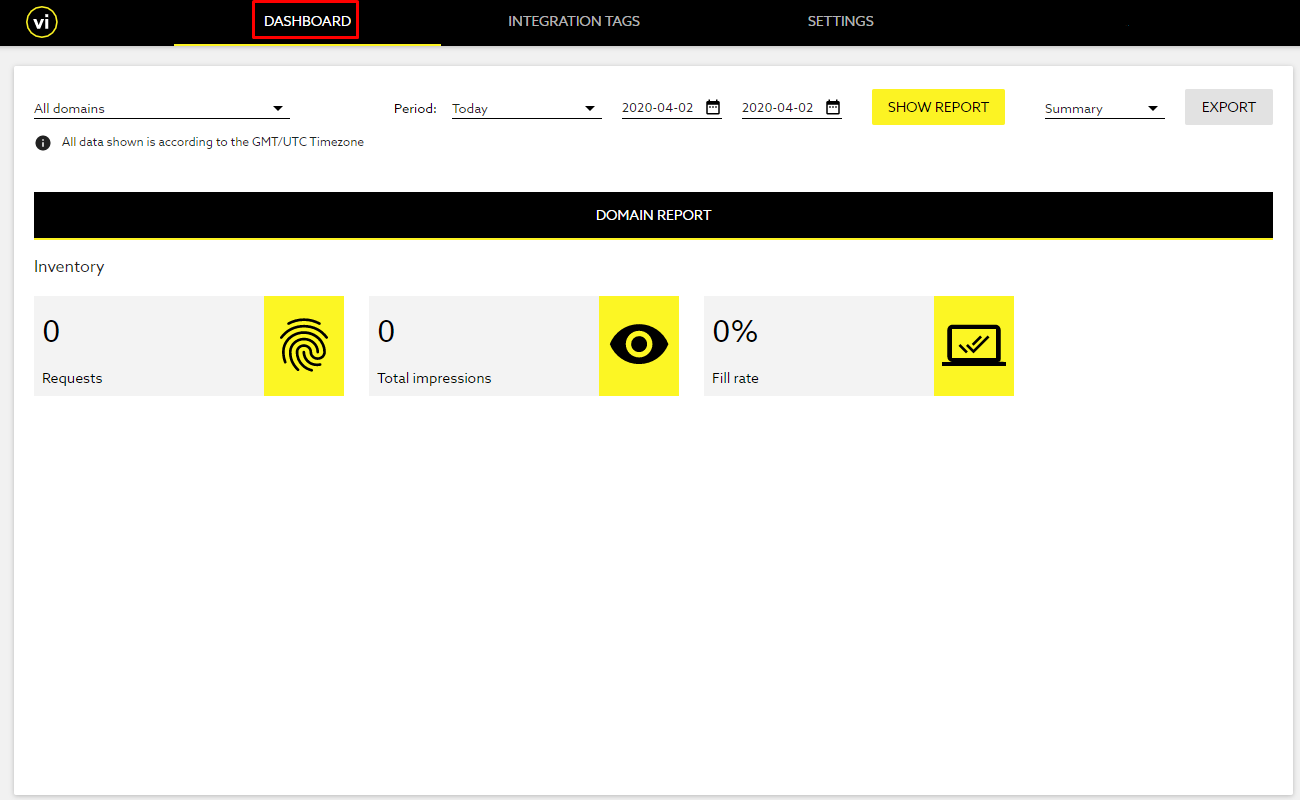
3.3. Click the “Publisher Dashboard” button to open the “VI Intelligence Dashboard” page.

3.4. The “VI Intelligence Dashboard” page will open.
4. Miscellaneous Settings
Use the options of the “Miscellaneous Settings” tab to make the settings regarding the track usage and default settings.
4.1. Track Usage
Enable the “Track Usage” option to allow tracking plugin usage anonymously.

4.2. Default Settings
Click the “Restore Settings” button to reset all the settings made previously and revert them to the default ones.

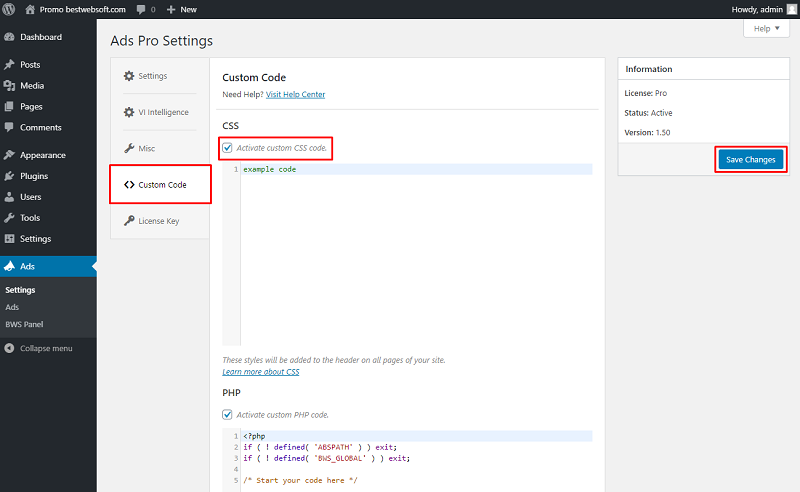
5. Custom Code
Use the “Custom Code” tab to insert a CSS, PHP or JavaScript code. To activate the inserted code, enable the “Activate custom … code” option and save changes.
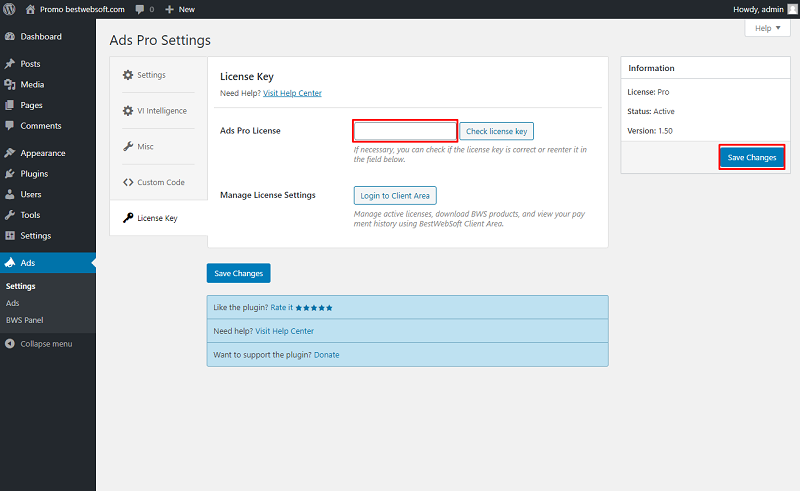
6. License Key
Use the “License Key” tab to activate or check the Pro plugin license.

6.1. Ads Pro License
After a successful plugin purchase, you will receive an email notification with a download link and a license key. Activate Pro license by pasting a license key into the “Ads Pro License” field and clicking the “Save Changes” button.
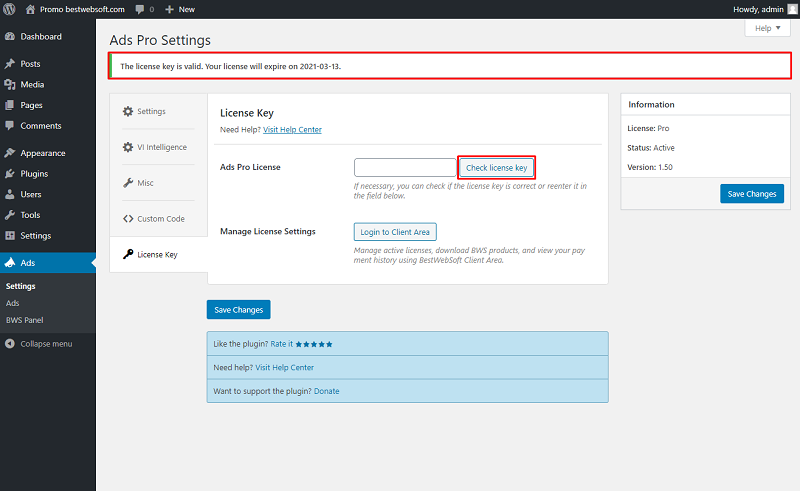
6.2. Check License Key
To check the license key, click the “Check license key” button. If the entered key is correct, the notification “The license key is valid. Your license will expire on XXXX-XX-XX” will be displayed in the upper left corner of the page.
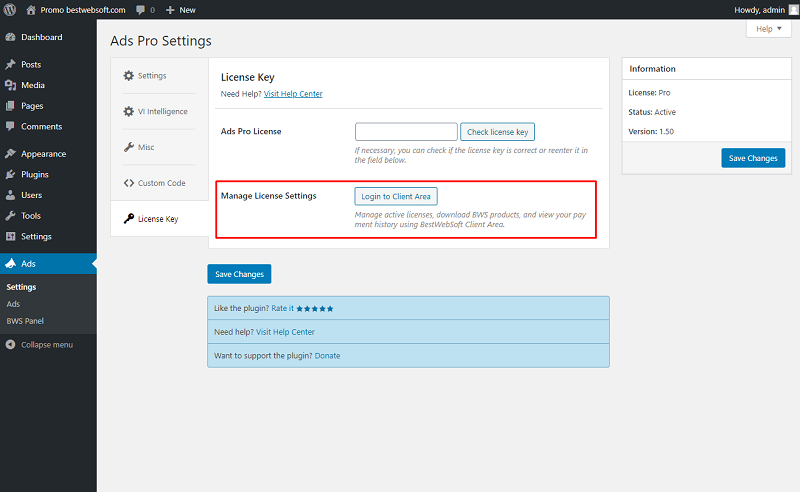
6.3. Manage the License Settings
Use the “Manage License Settings” option to change your license settings. Click the “Login to Client Area” button to open your personal Client Area dashboard located on the https://bestwebsoft.com/ website. Browse and download purchased products, change the license domain and copy the license keys.
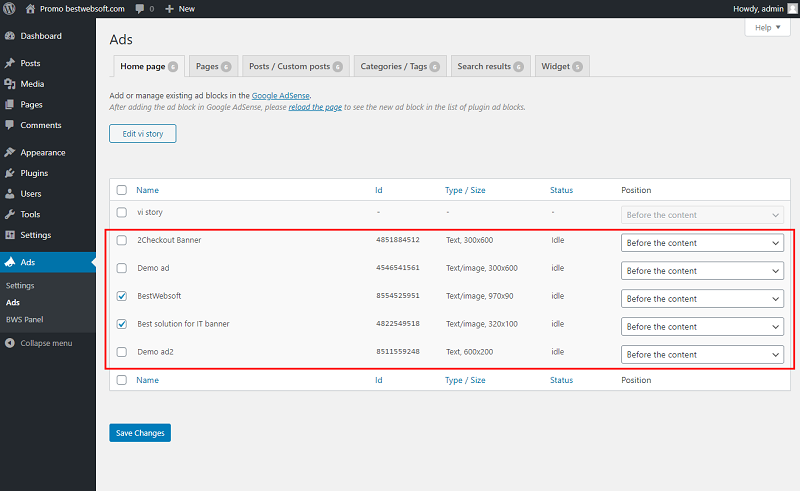
7. Ads
Open the “Ads” page to view and manage the existing ad block(s).
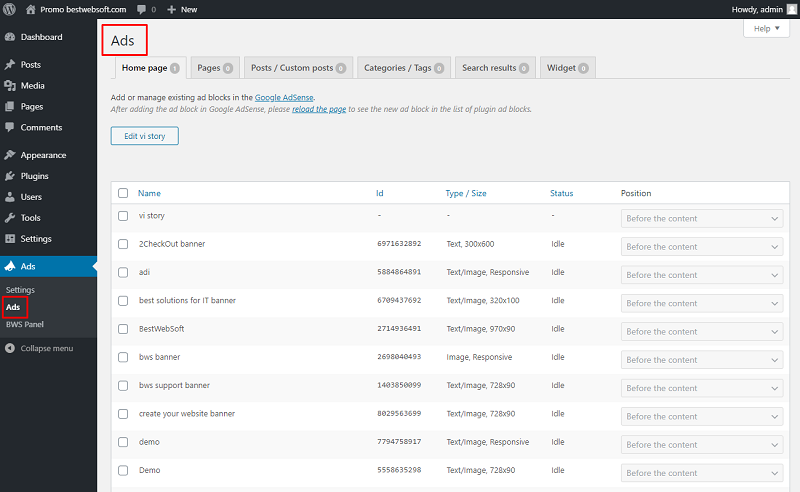
7.1. Choose where to display ads on the website by selecting the necessary tab.
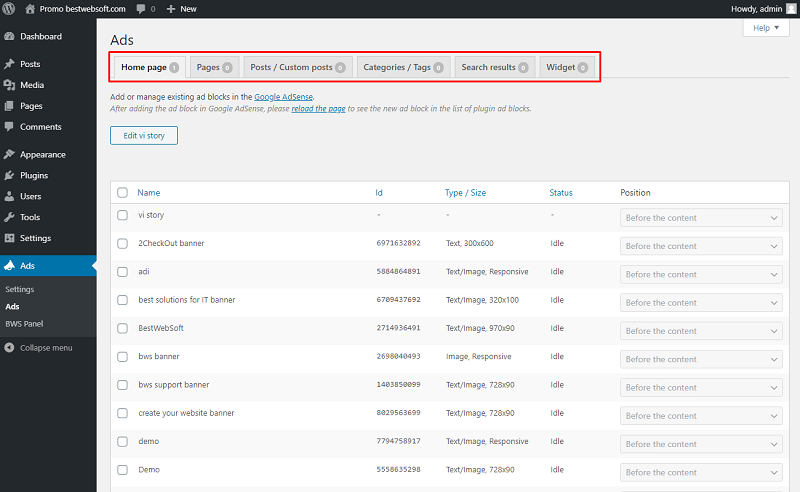
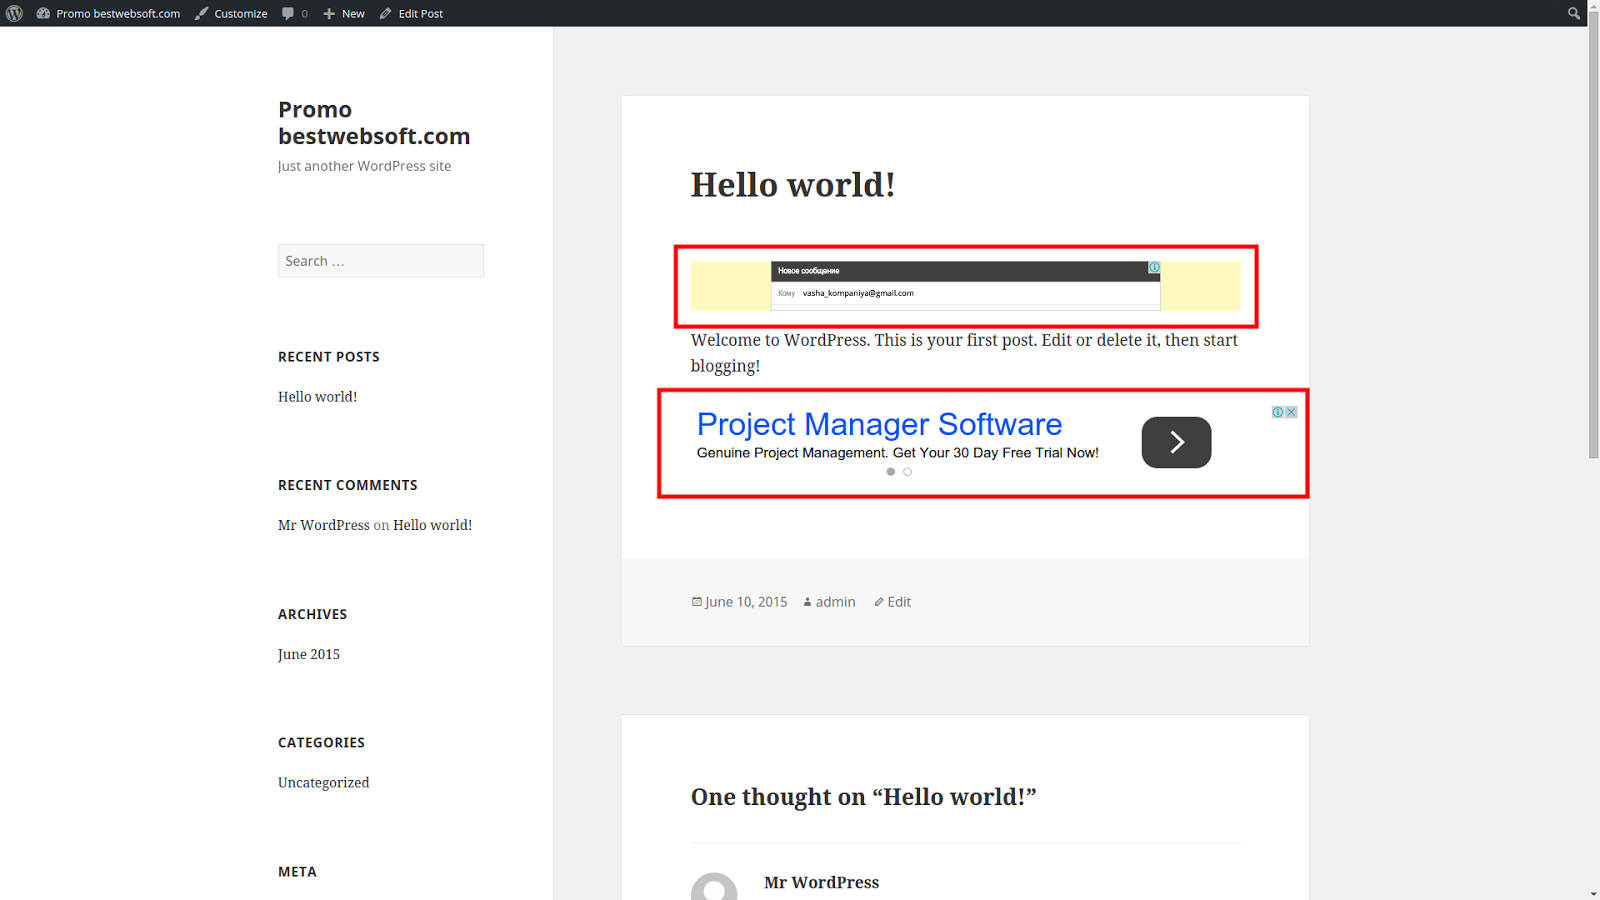
7.2. To display ads on the Home page enable the necessary ads in the table, choose the “Position” in the dropdown and click the “Save Changes” button.

7.3. After saving changes ads on the home page may look as follows.
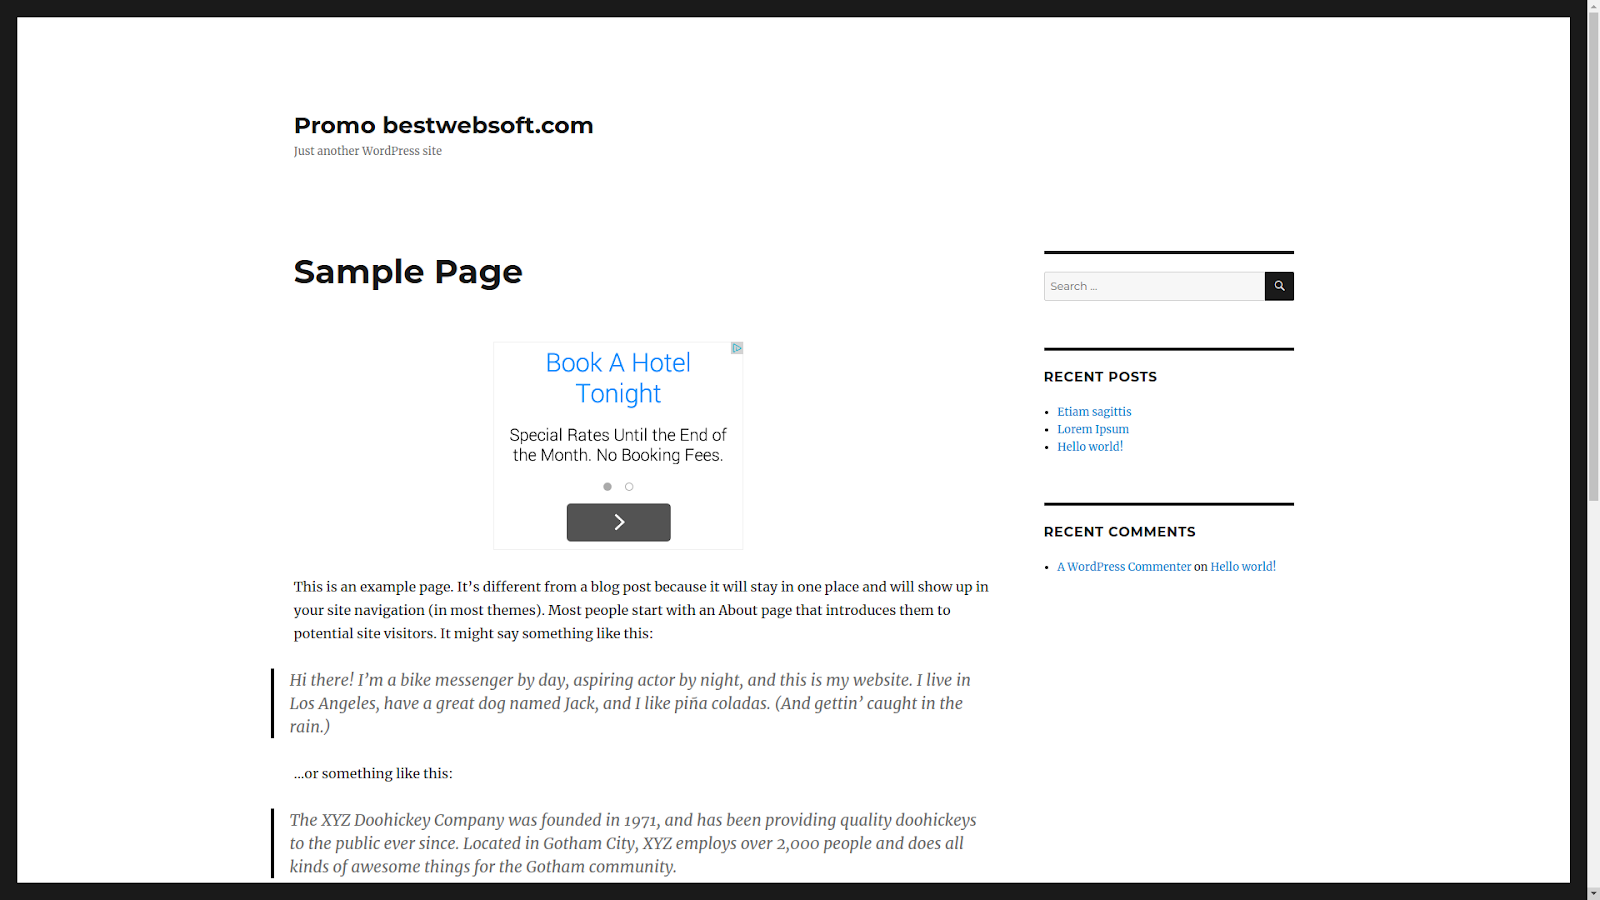
7.4. To add ads to the pages choose the “Pages” tab, enable the necessary ads, select the “Position” and click the “Save Changes” button.

7.5. After saving changes ads on the pages may look as follows.
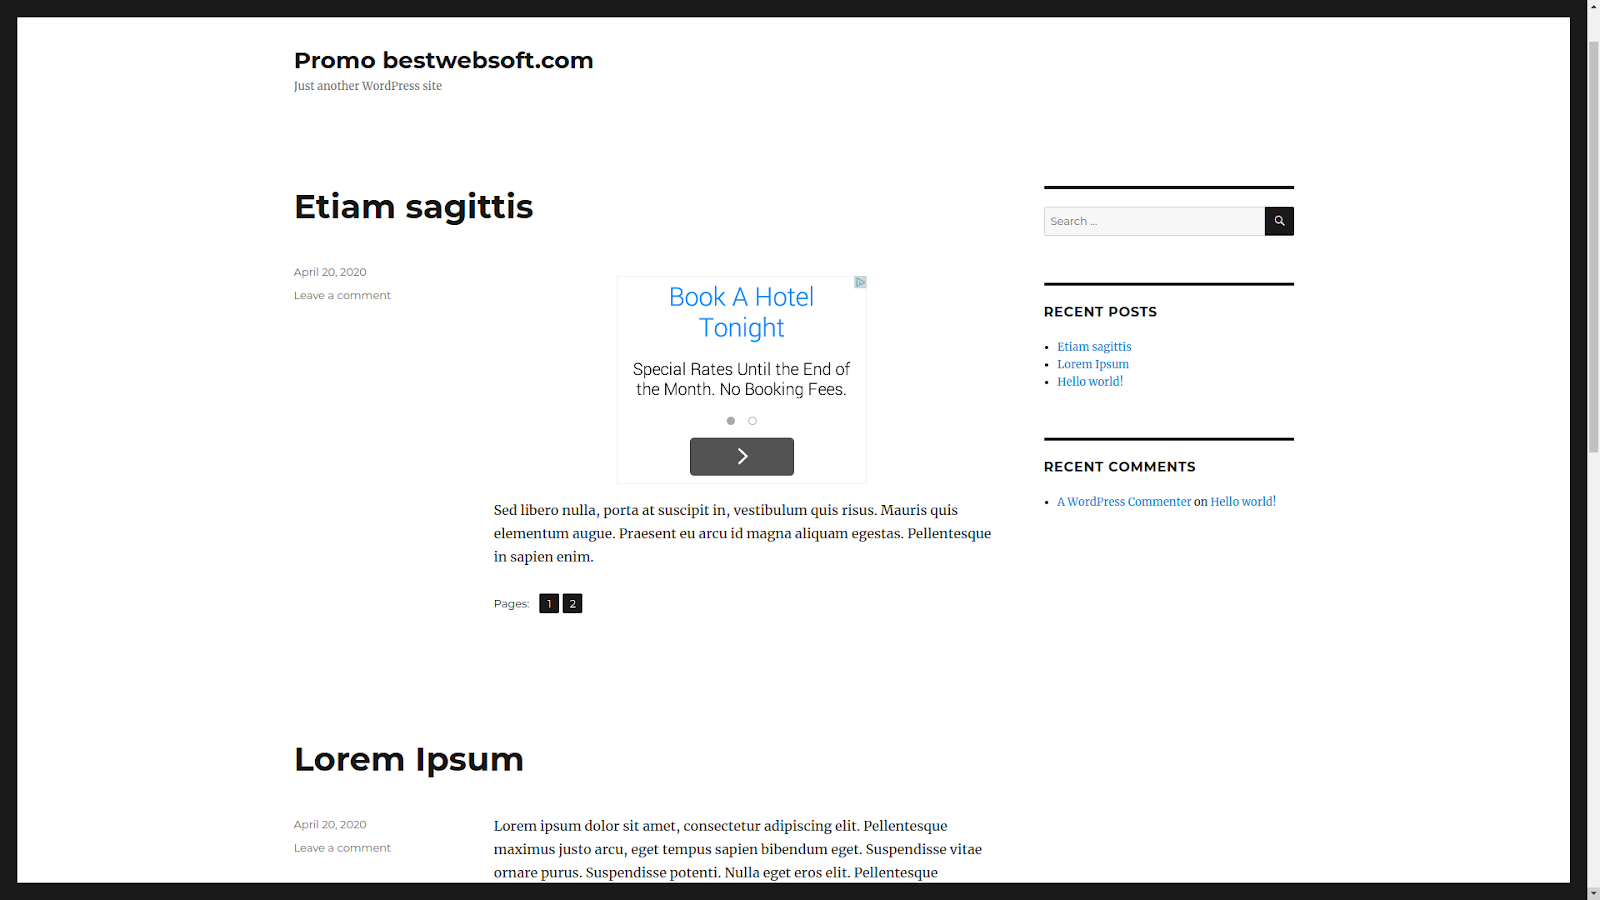
7.6. To add ads to the posts choose the “Posts / Custom posts” tab, enable the necessary ads, select the “Position” and click the “Save Changes” button.

7.7. After saving changes ads on the posts may look as follows.
7.8. To add ads to the categories choose the “Categories / Tags” tab, enable the necessary ads, select the “Position” and click the “Save Changes” button.

7.9. After saving changes ads on the categories may look as follows.
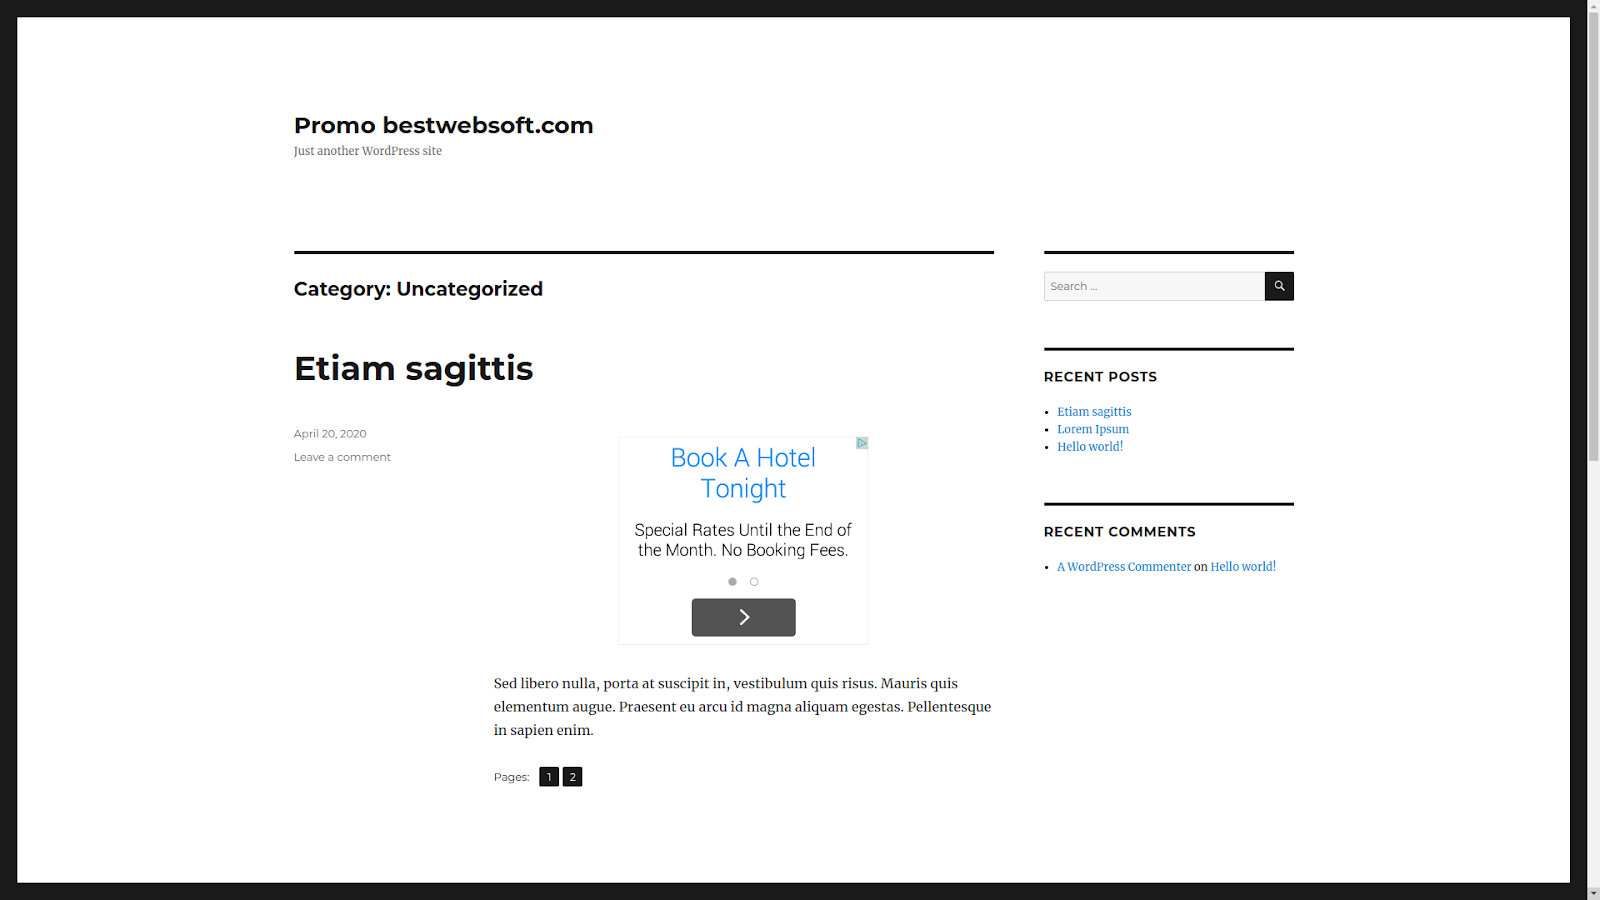
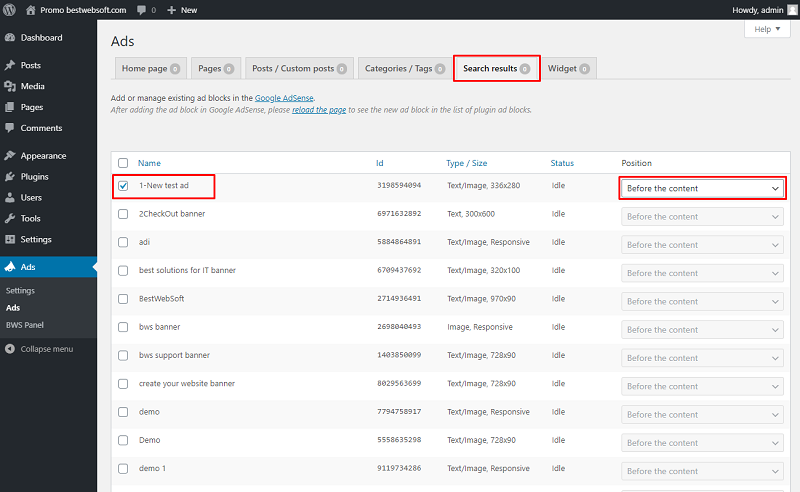
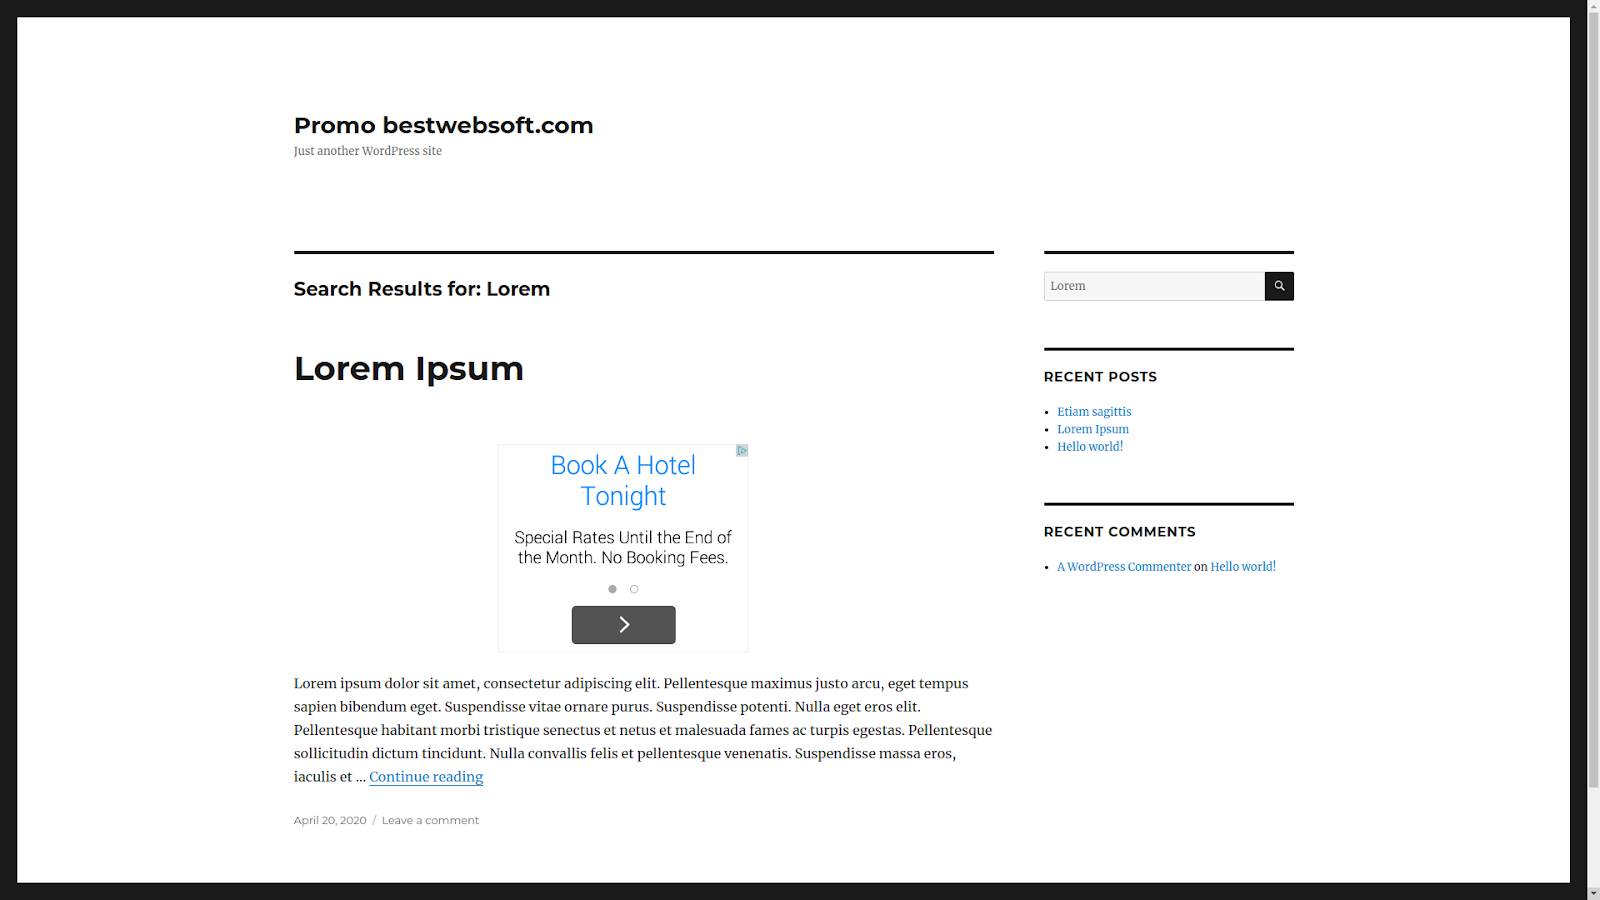
7.10. To add ads to the search results choose the “Search results” tab, enable the necessary ads, select the “Position” and click the “Save Changes” button.
7.11. After saving changes ads on the search results may look as follows.
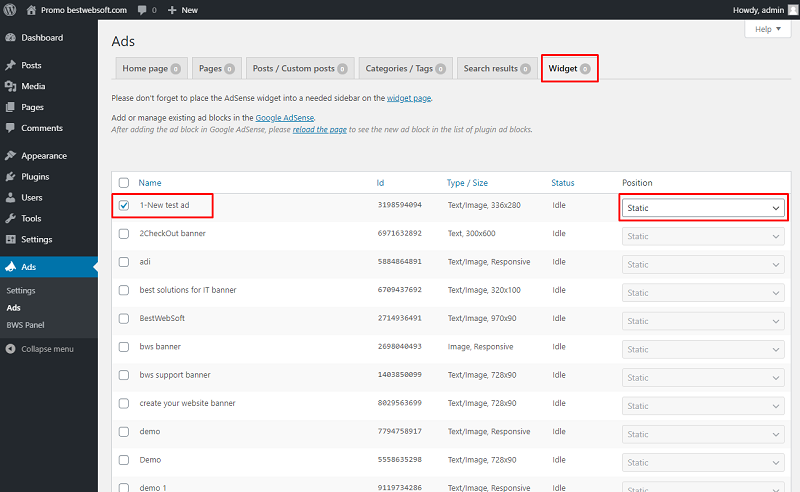
7.12. To add ads to the widgets choose the “Widget” tab, enable the necessary ads, select the “Position” and click the “Save Changes” button.
7.13. After saving changes ads on the widget may look as follows.

7.14. Click the ”Edit Vi Story” button to customize your video player.

7.15. Customize your video player by making changes in the dropdown to display ad and video blocks on your pages, posts or widgets.

7.16. After saving changes the page will look as follows.

Thank you!
Help & Support
Visit our Help Center if you have any questions — https://support.bestwebsoft.com/
Services
We provide additional services such as WordPress themes & plugins development,
graphic design, custom programming.
Contact us now to get a free quote — https://bestwebsoft.com/contacts/