Timesheet
User Guide
Timesheet | 1.1.2 * |
WordPress | 5.7.2 * |
*When using other versions some differences are possible to occur
** Screenshots were taken from a PC
Table of Contents
You can download Timesheet plugin here:
https://bestwebsoft.com/products/wordpress/plugins/timesheet/
1. Introduction
Note: Сlick the “Save Changes” button in order to apply any changes. |
1.1. Open your WordPress Admin Dashboard and find the menu on the left.

1.2. Open the ”Timesheet” > “Settings” page.

2. Settings
Use the options of the “Settings” page to change the global settings of the plugin.
2.1. Timeline
Use the ”Timeline” option to select the time span to be displayed in the timesheet table.

2.1.1. To set up a timesheet timeline change the hours in the appropriate hours’ boxes or use a special slider.

2.1.2. The adjusted timeline will look on the timesheet as follows.

2.2. Weekends
Use the “Weekends” option to enable the necessary rest days.

2.2.1. Adjusted weekends will look on the timesheet as follows.

2.3. Statuses
Use the “Statuses” option to add new statuses, enable or disable standard statuses, and customize the statuses color.

2.3.1. Use the “Name” field to create a new status.

2.3.2. Select the color of the new status by means of the color picker tool.

2.3.3. Click “Add status” to complete adding.

2.3.4. The new status will appear on the statuses list.

2.3.5. The added status will look on the timesheet as follows.

2.3.6. Disable the unnecessary statuses to remove them from the timesheet.

2.3.7. Change the color of the existing statuses by means of the color picker tool.

2.3.8. Enable the “All Day” status property to set the selected status as an activity for the all day.

2.3.9. The “All Day” activity may look on a timesheet as follows.

2.4. Date Format
Use the “Date Format” option to change the date display format.

2.4.1. Choose the “WordPress default” to use the default date format - month, day, year.

2.4.2. The default date format will look on the timesheet as follows.

2.4.3. Choose the “Custom” to set the desired date format in the field.

2.4.4. The custom date format will look on the timesheet as follows.

2.5. Edit Overdue Timesheets
Enable the “Edit Overdue Timesheets” option to allow overdue timesheets editing.
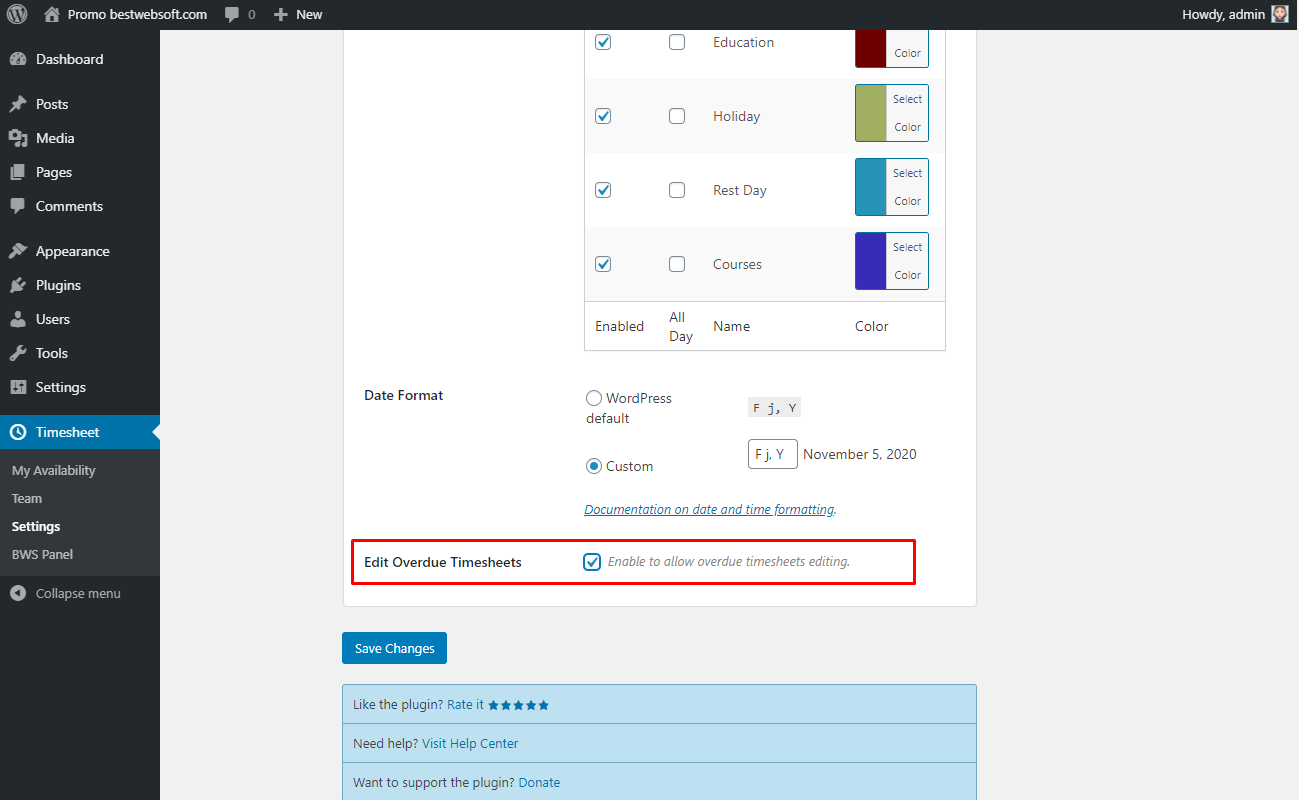
2.5.1. Timesheet past dates with enabled “Edit Overdue Timesheets” option will look as follows.

2.5.2. Timesheet past dates with disabled “Edit Overdue Timesheets” option will look as follows.

3. Display
Use the “Display” tab to enable timesheets and reports for specific users or user roles.
3.1. Enable timesheets and reports for specific users or user roles in the appropriate list.

4. Reminders
Use the “Reminders” tab to enable and make the setting of reminding emails.
4.1. Email Reminder
Enable the “Email Reminder” option to send an email reminder to a user if his work schedule isn't filled out.

4.1.1. Select the day from the dropdown menu and set the time of notification in the appropriate box.

4.1.2. Customize the subject of the email in the “Subject” field.

4.1.3. Customize the message of email in the “Massage” field.

Note: Pay attention to the Allowed Variables: {user_name} - the username {list_days} - days that are not filled by the user {ts_page} - the link to TS user page in the Dashboard {ts_page_link}Your text{/ts_page_link} - the link to TS user page in the Dashboard with your text |
4.1.4. Email reminder message may look in your incoming mailbox as follows.

5. Reports
Use the options of the “Report” tab to make the settings to emails with user reports.
Note: This is your personal reports settings. |
5.1. Email Reports
Use the “Email Reports” option to enable receiving reports by email.

5.1.1. Select the day and time of the report receiving emails.

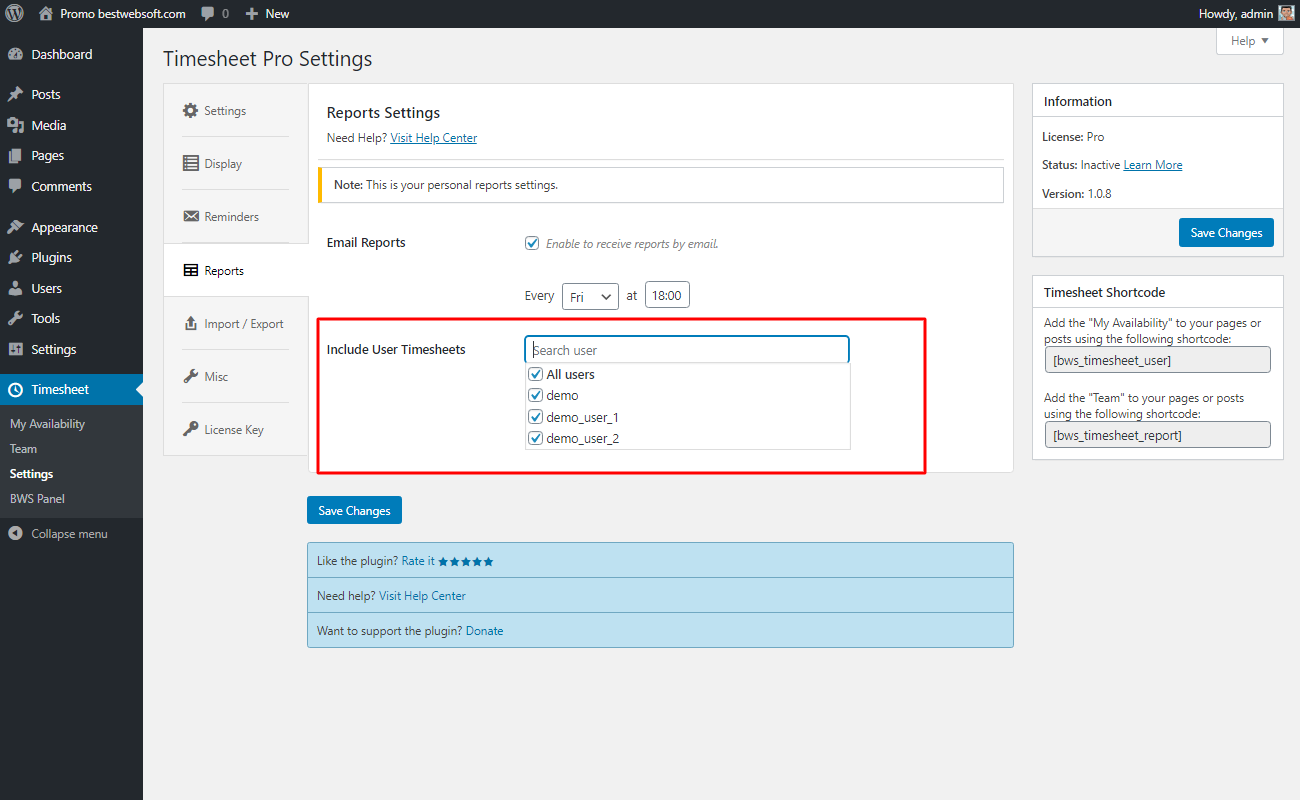
5.2. Include User Timesheets
Use the “Include User Timesheets” option to get a report of the user's timesheet.
5.2.1. Enter the necessary username to the field to receive reports of the users that are enabled in the field.
5.2.2. Email report massage may look in your incoming mailbox as follows.

6. Import / Export
Use the “Import / Export” tab to download and upload your data.
6.1. Export Data
Use the “Export Data” option to download data generated by the Timesheet plugin.

6.1.1. To export data in CSV format choose “CSV file format” and click the “Export” button.

6.1.2. Exported data in CSV format may look as follows.

6.1.3. To export data in XML format select “XML file format” and click the “Export” button.

6.1.4. Exported data in XML format may look as follows.

6.2. Import Data
Use the “Import Data” options to upload data to the timesheet.

6.2.1. Choose "Add and replace current data" to upload the file that will replace current data.

6.2.2. Choose “Clear the table and insert new” to upload the file that will clear the old data and insert new data. This option deletes all user data, and then imports the table from the file. If your file doesn't have the correct structure, the data will still be deleted.

6.2.3. Choose “Add missing data” to upload the file that will add missing data to the existing one.

6.2.4. After choosing the way to import data click the “Choose File” button to upload the file and click the “Import” button.

6.3. Export Button
Use the “Export Button” options to enable to display an export button in “My Availability” page.

6.3.1. “Export Button” may look as follows.

6.3.2. Exported data in CSV format may look as follows.

6.4. Export File Format
Use the “Export File Format” option to choose the preferred file format for exported files. You can choose between CSV and PDF formats.

7. Miscellaneous Settings
Use the “Miscellaneous Settings” tab, to enable tracking and to restore the settings of the plugin or to clear the timesheet for the selected time range.
7.1. Clear Timesheet
Use the “Clear Timesheet” option to clear the users timesheet. Select the necessary periodicity from the dropdown menu.

7.2. Track Usage
Enable the “Track Usage” option to allow tracking plugin usage anonymously.

7.3. Default Settings
Click the “Restore Settings” button to reset all the settings made previously and revert them to the default ones.

8. License key
Use the “License Key” tab to activate or check the Pro plugin license.
8.1. Timesheet Pro License
After a successful plugin purchase, you will receive an email notification with a download link and a license key. Activate Pro license by pasting a license key into the “Timesheet Pro License” field and clicking the “Save Changes” button.

8.2. Check License Key
To check the license key, click the “Check license key” button. If the entered key is correct, the notification “The license key is valid. Your license will expire on XXXX-XX-XX” will be displayed in the upper left corner of the page.

8.3. Manage License Settings
Use the “Manage License Settings” option to change your license settings. Click the “Login to Client Area” button to open your personal Client Area dashboard located on the https://bestwebsoft.com/ website. Browse and download purchased products, change the license domain and copy the license keys.

9. My Availability
Use the “My Availability” page to interact with the timesheet.

9.1. Choose the period of time for which the data will be shown and click the “Change date” button to display it.

9.2. Select the necessary status from the dropdown list to make this status active for selected cells.

9.3. Use the “Users” field to select the needed user to complete or edit his timesheet.

9.4. Click the “Rotate” button to rotate the table.

9.5. To make changes to the timesheet, select the necessary period by selecting the area and click the right mouse button on them, or select the status from the dropdown menu.

9.6. You will see your timesheet with scheduled hours.

9.7. You will see the table with the total hours below the timesheet table.

9.8. To edit time, select the necessary time, and click the right mouse button on them. Then click “Edit time”

9.9. Select the time period that should be edited.

9.10. Select the necessary status from the dropdown menu and click the “Apply” button.

9.11. Сlick the “Save Changes” button in order to save a timesheet.

10. Timesheet Team
Use the “Team” page to see and manage data of completed timesheets.

10.1. Choose the period of time or weeks and months which you want to see.

10.2. Сhoose the group by “Date” to group the displayed timesheet depending on the date.

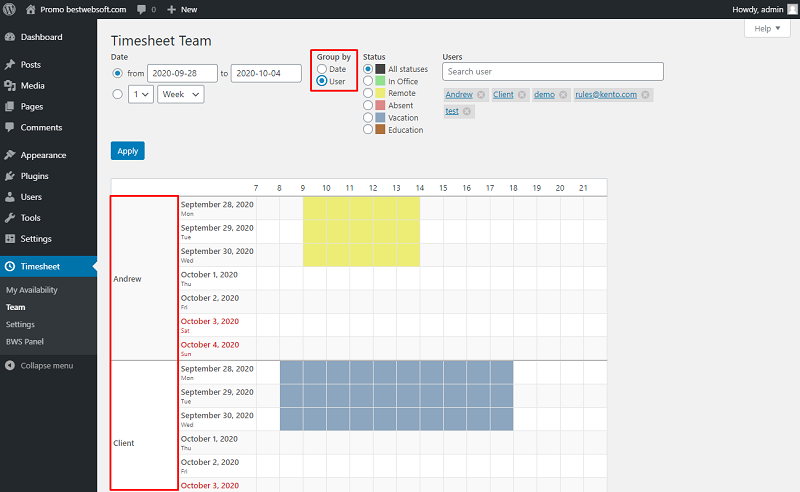
10.3. Сhoose the group by “User” to group the displayed timesheet depending on a user.
10.4. Choose the “Hourly” view to display the timesheet hourly.

10.5. Choose the “Daily” view to display the timesheet daily.

10.6. Choose the statuses that will be displayed. To display all, choose “All statuses”.

10.7. Use the search bar to choose a user and display his timesheet.

10.8. Click the “Apply” button to display the table with changed settings.

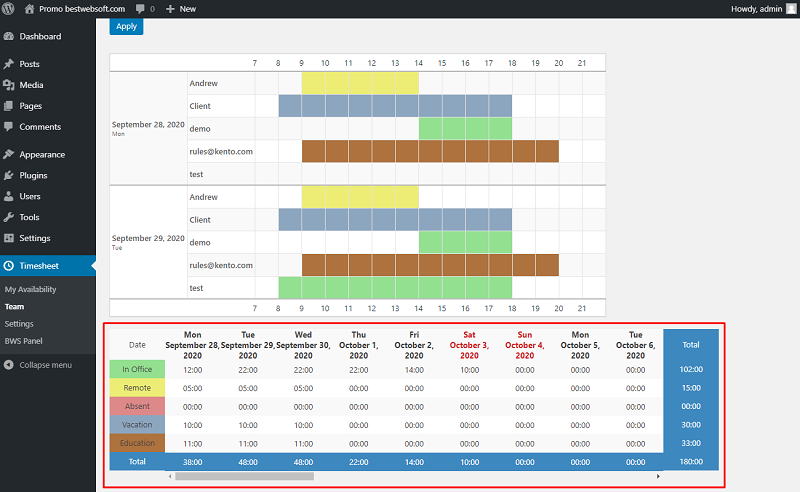
10.9. The results will be displayed in the timesheet table.

10.10. You will see the table with the total hours below the timesheet table.
11. Shortcode
Use the timesheet shortcodes to insert the “My Availability” and “Team” pages on your pages or posts.
11.1. To insert the “My Availability” page to the post, copy the “My Availability” shortcode from the corresponding field on the plugin “Settings” page.

11.2. Open the post in the edit mode, paste the shortcode in the post and click “Preview”.

11.3. The information from the “My Availability” page will look as follows.

11.4. To insert the “Team” page to a post copy “Team” shortcode from the corresponding field on the plugin “Settings” page.

.
11.5. Open the post in the edit mode, paste the shortcode in the post and click “Preview”.

11.6. The information from the “Team” page will look as follows.

Thank you!
Help & Support
Visit our Help Center if you have any questions — https://support.bestwebsoft.com/
Services
We provide additional services such as WordPress themes & plugins development,
graphic design, custom programming.
Contact us now to get a free quote — https://bestwebsoft.com/contacts/