Social Login
User Guide
Social Login | 1.4.3 * |
WordPress | 5.5.1 * |
*When using other versions some differences are possible to occur
** Screenshots were taken from a PC
Table of Contents
2.2.2. Enable Social Login for
2.3.1. Client ID & Client secret
2.5.1. Consumer Key (API Key) & Consumer Secret (API Secret)
2.6.1. Client ID & Client Secret
You can download Social Login Plugin here:
https://bestwebsoft.com/products/wordpress/plugins/social-login/
1. Introduction
Note: Сlick the “Save Changes” button in order to apply any changes. |
1.1. Open your WordPress Admin Dashboard and find the menu on the left.

1.2. Open the “Social Login” > “Settings” page on the dashboard.

2. Settings
Use the options of the “Settings” page to make the global settings for the plugin.

2.2. General
Use the options of the “General” section to make the most important settings for Social Login.
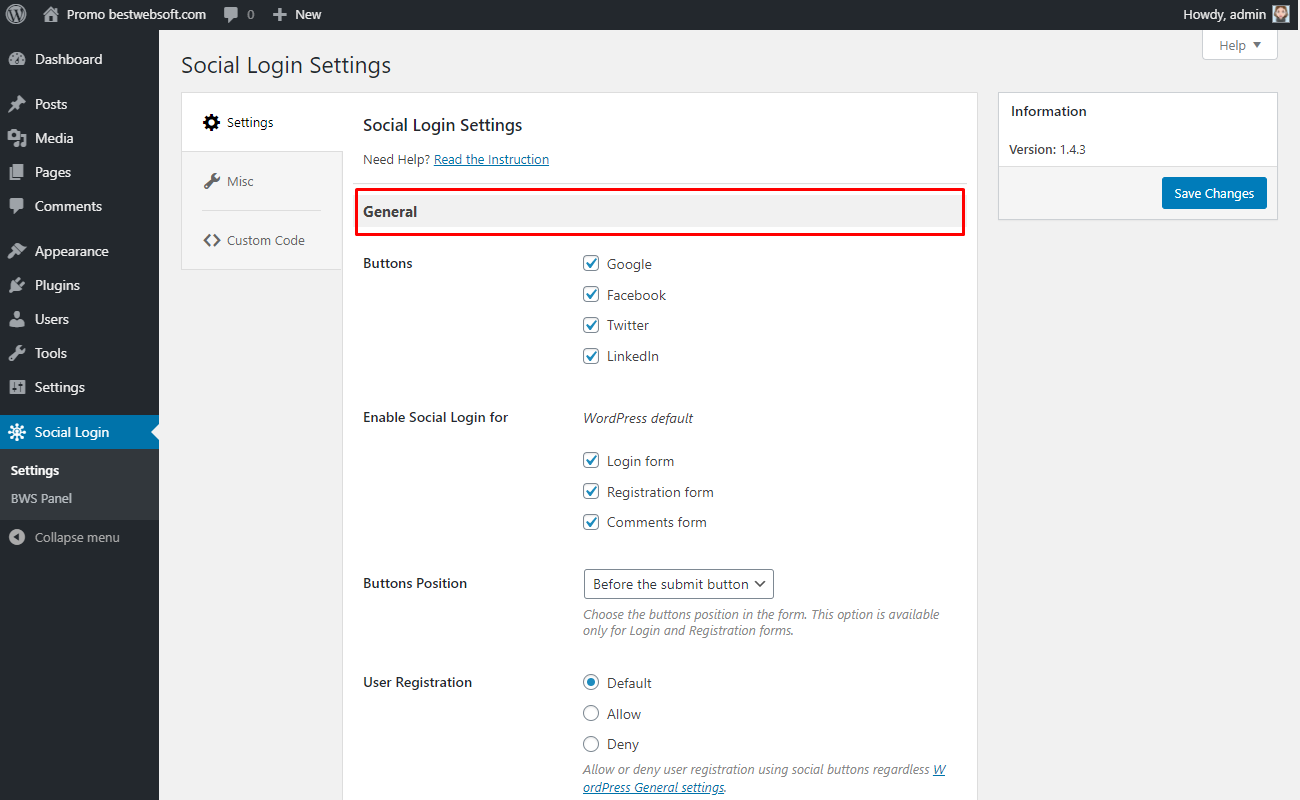
2.2.1. Buttons
Use the “Buttons” option to enable social login for the listed social networks.

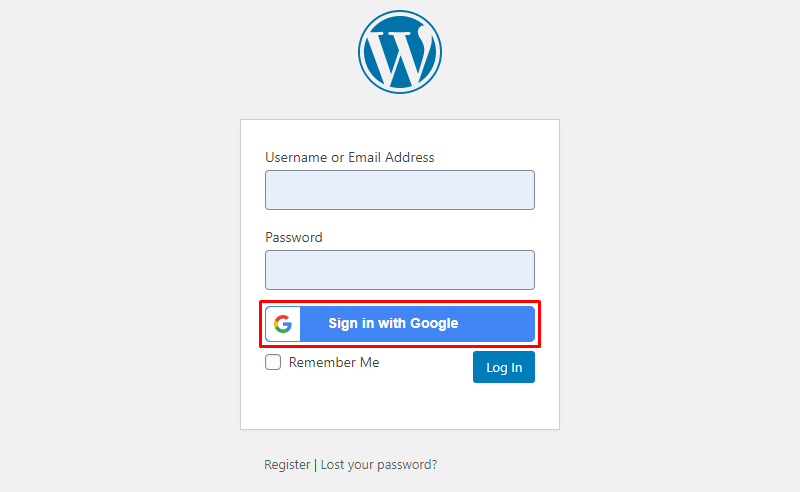
2.2.1.1. Google Social Login may look on the login page as follows.
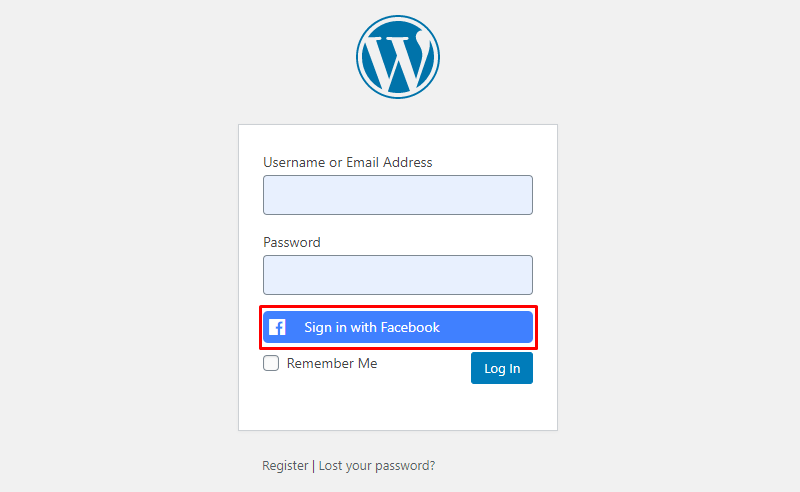
2.2.1.2. Facebook Social Login may look on the login page as follows.
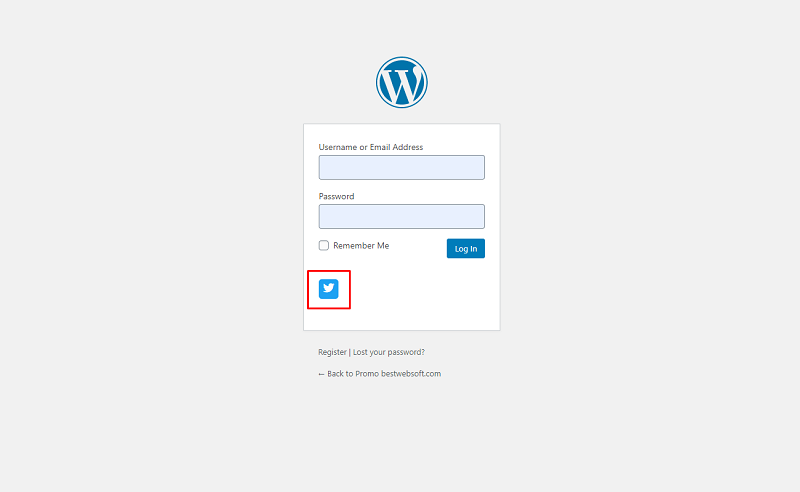
2.2.1.3. Twitter Social Login may look on the login page as follows.

2.2.1.4. LinkedIn Social Login may look on the login page as follows.

2.2.2. Enable Social Login for
Use the “Enable Social Login for” option to enable the social login for the necessary WordPress forms.

2.2.2.1. Login form with all social login buttons enabled may look as follows.

2.2.2.2. Registration form with all social login buttons enabled may look as follows.

2.2.2.3. Comments form with all social login buttons enabled may look as follows.

2.2.3. Buttons Position
Use the “Buttons Position” option to select the position of the buttons in the form. Choose the necessary position from the dropdown menu.
Note: This option is available only for Login and Registration forms. |

2.2.3.1. Buttons position “Before the submit button” may look on a form as follows.

2.2.3.2. Buttons position on “Top” may look on a form as follows.

2.2.3.3. Buttons position on “Bottom” may look on a form as follows.

2.2.4. User Registration
Use the “User Registration” option to allow or deny user registration using social buttons regardless WordPress General settings.

2.2.4.1. Сhoose “Default” to match the “User Registration” option with the “Membership” option on the WordPress General settings.

2.2.4.2. To enable or disable the “Membership” option open the “Settings” > ”General” page and make the necessary changes.

2.2.4.3. Сhoose “Allow” to ignore the “Membership” option and make the user registration with social buttons possible.

2.2.4.4. Сhoose “Deny” to ignore the “Membership” option and make the user registration with social buttons impossible.

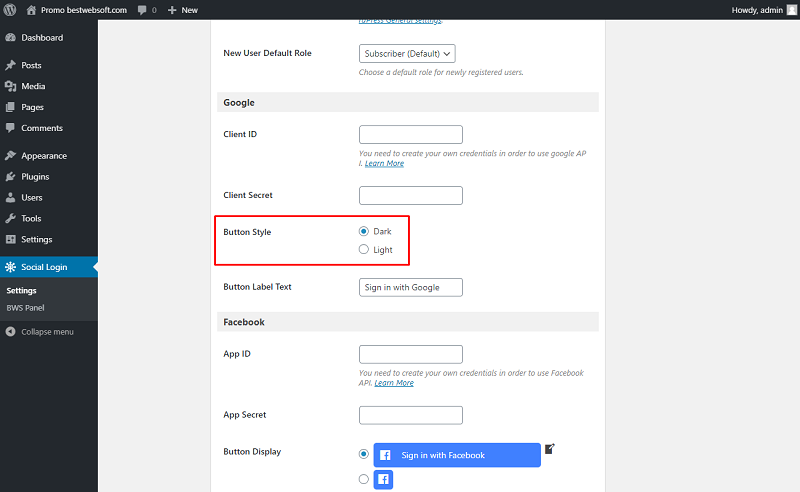
2.2.5. New User Default Role
Use the “New User Default Role” option to choose a default role for newly registered users.

2.2.5.1. Select the necessary user role from the dropdown menu and save changes.

2.3. Google
Use the options of the “Google” section to set up the user registration with Google Accounts.

2.3.1. Client ID & Client secret
It is necessary to enter in your OAuth Client ID and Client Secret in order to use Google API.

2.3.1.1. To create the keys open the Google API console. Login with your Google account if necessary.

2.3.1.2. Click “My Project” then click “New Project”.

2.3.1.3. Enter the “Project name” and “Location” and click the “Create” button.

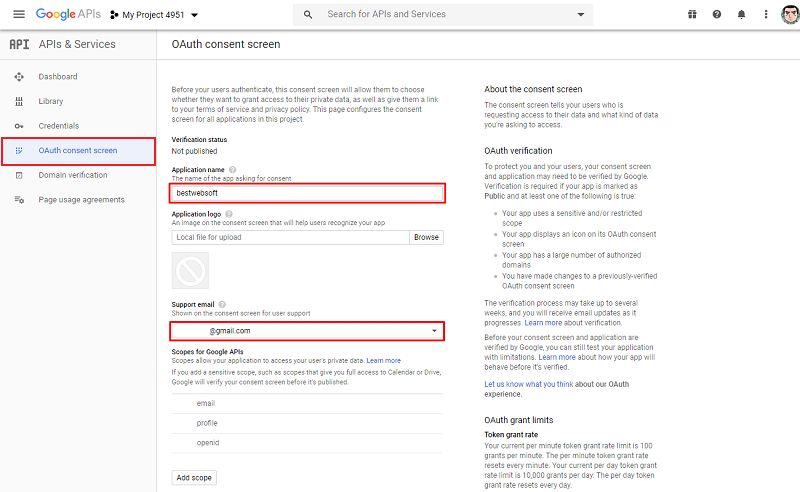
2.3.1.4. Open the “OAuth consent screen” tab, select the email address from the dropdown menu and fill in your product name (i.e. name of your website). Save changes.
2.3.1.5. Open the “Credentials” tab. Click “Create credentials” and select the “OAuth client ID” from the dropdown menu.

2.3.1.6. Select “Web application” for the application type. insert the HTTP origins that host your web application in the "Authorized JavaScript origins" field (e.x. https://www.demo.com) and URL that users will be redirected to after successful login in the "Authorized redirect URIs" field (e.x. https://www.demo.com/wp-admin). Click the “Create” button.

2.3.1.7. After that, the pop-up window with the Client ID and Client Secret keys will show up.

2.3.1.8. Copy and paste the keys into the corresponding fields on the plugin settings page.

2.3.2. Button Style
Use the “Button Style” option to choose the style for the Google authorization button.
2.3.2.1. The “Dark” style button may look on a page as follows.

2.3.2.2. “Light” style button may look on a page as follows.

2.3.3. Button Label Text
Use the “Button Label Text” option to enter a custom title for Google authorization button.

2.3.3.1. The custom text label may look on a page as follows.

2.4. Facebook
Use the options of the “Facebook” section to set up the user registration with Facebook Accounts.
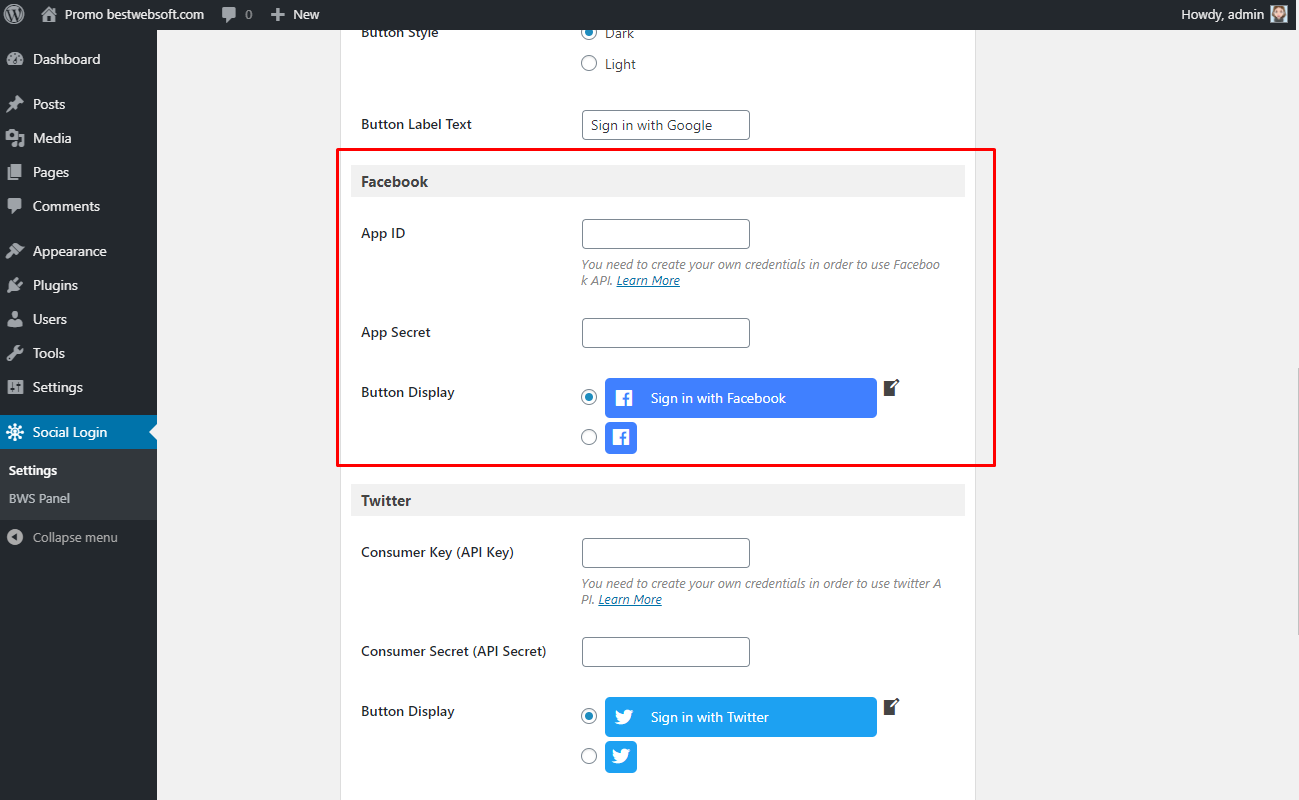
2.4.1. App ID & App Secret
It is necessary to enter in your App ID and App Secret in order to use Facebook API.

2.4.1.1. To create the keys open the Facebook for Developers page. Login with your Facebook account if necessary and open the “My Apps” page.

2.4.1.2. Click the “Add a New App” button.

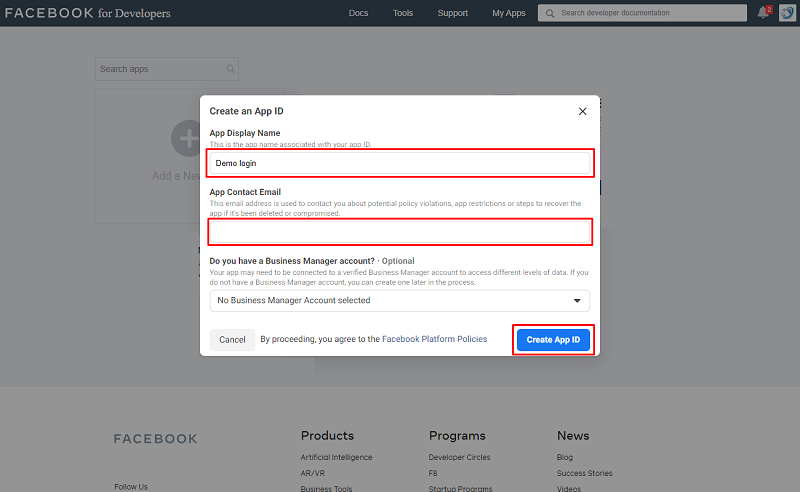
2.4.1.3. “Create an App ID” window will show up. Select the “For Everything Else” option.

2.4.1.4. Enter the “App Display Name”, “App Contact Email” and click the “Create App ID” button.
2.4.1.5. Find the “Facebook Login” block and click the “Set Up” button.

2.4.1.6. Open the “Facebook Login” > “Settings” page.

2.4.1.7. Enter URL that users will be redirected to after successful login in the "Valid OAuth Redirect URIs" field (e.x. https://www.demo.com/wp-admin). Click the “Save Changes” button.

2.4.1.8. Open the “Settings” > “Basic” page and copy the “App ID” and “App Secret” keys.
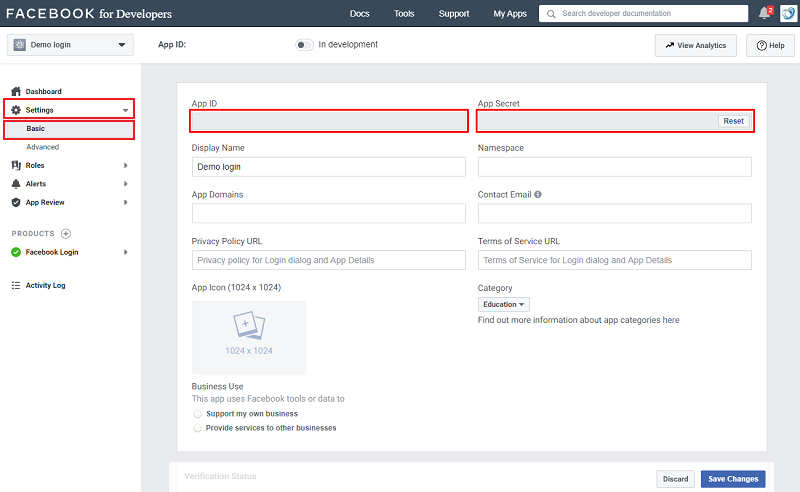
2.4.1.9. Paste the keys into the corresponding fields on the plugin settings page.

2.4.2. Button Display
Use the “Button Display” option to choose the size and customize the text for the Facebook authorization button.

2.4.2.1. To change the text of the Facebook login button hover the cursor and click on it, then enter the desired text.

2.4.2.2. The Facebook login button with custom text may look on a page as follows.

2.4.2.3. Square Facebook login button without text may look on a page as follows.

2.5. Twitter
Use the options of the “Twitter” section to set up the user registration with Twitter Accounts.

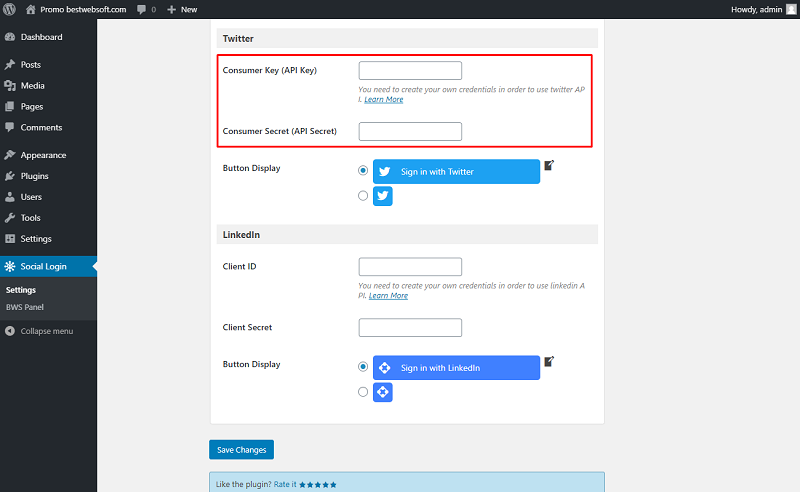
2.5.1. Consumer Key (API Key) & Consumer Secret (API Secret)
It is necessary to fill in your Consumer Key (API Key) and Consumer Secret (API Secret) in order to use Twitter API.
2.5.1.1. To create the keys open the twitter API console. Login with your Twitter account if necessary and click the “Create an app” button.

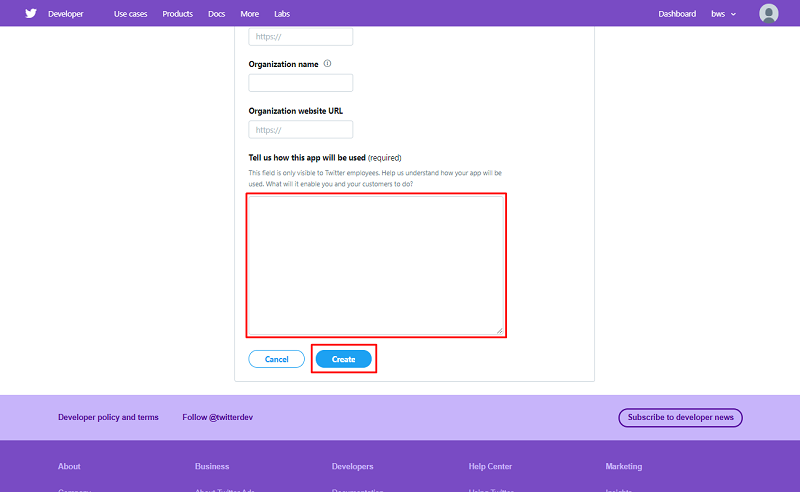
2.5.1.2. Enter the “App name”, “Application description”, “Website URL” (e.x. https://www.demo.com), “Callback URLs” that users will be redirected to after successful login (e.x. https://www.demo.com/wp-admin).

2.5.1.3. Enter the information in the “Tell us how this app will be used” field. Click the “Create” button.
2.5.1.4. Select the “Keys and tokens” tab and copy the “API key” and “API secret key”.

2.5.1.5. Paste the keys into the corresponding fields on the plugin settings page.

2.5.2. Button Display
Use the “Button Display” option to choose the size and customize the text for the Twitter authorization button.

2.5.2.1. To change the text of the Twitter login button hover the cursor and click on it, then enter the desired text.

2.5.2.2. The Twitter login button with custom text may look on a page as follows.

2.5.2.3. Square Twitter login button without text may look on a page as follows.
2.6. LinkedIn
Use the options of the “LinkedIn” section to set up the user registration with LinkedIn Accounts.
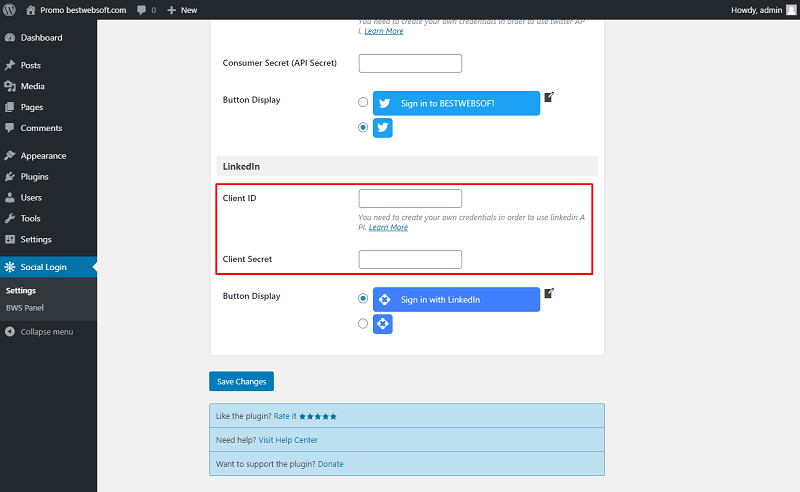
2.6.1. Client ID & Client Secret
It is necessary to enter in your Client ID and Client ID in order to use LinkedIn API.
2.6.1.1. To create the keys open the LinkedIn API console. Login with your LinkedIn account if necessary and click one of the “Create app” buttons.

2.6.1.2. Enter the “App name”, “LinkedIn Page” of your company, upload the “All logo” that users will see when they authorize with your app.

2.6.1.3. Agree with “Legal agreement” and click the “Create app” button.

2.6.1.4. Select the “Auth” tab and copy the “Client ID” and “Client Secret” keys.

2.6.1.5. Paste the keys into the corresponding fields on the plugin settings page. Save changes.

2.6.2. Button Display
Use the “Button Display” option to choose the size and customize the text for the LinkedIn authorization button.

2.6.2.1. To change the text of the LinkedIn login button hover the cursor and click on it, then enter the desired text.

2.6.2.2. The LinkedIn login button with custom text may look on a page as follows.

2.6.2.3. Square LinkedIn login button without text may look on a page as follows.

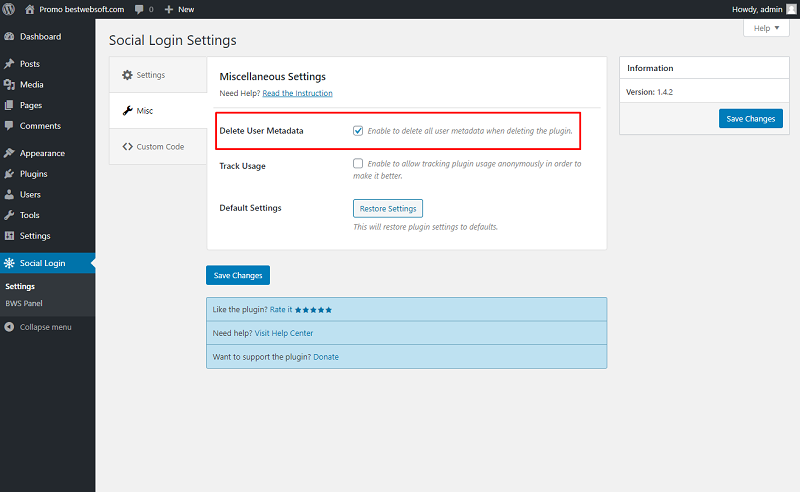
3. Miscellaneous Settings
Use the options of the “Miscellaneous Settings” tab to make the settings regarding the track usage, default settings, and delete user metadata option.
3.1. Delete User Metadata
Enable the “Delete User Metadata” option to delete all user metadata when deleting the plugin.
3.2. Track Usage
Enable the “Track Usage” option to allow tracking plugin usage anonymously.
3.3. Default Settings
Click the “Restore Settings” button to reset all the settings made previously and revert them to the default ones.

4. Custom Code
Use the “Custom Code” tab to insert a CSS, PHP or JavaScript code. To activate the inserted code, enable the “Activate custom … code” option and save changes.

Thank you!
Help & Support
Visit our Help Center if you have any questions — https://support.bestwebsoft.com/
Services
We provide additional services such as WordPress themes & plugins development,
graphic design, custom programming.
Contact us now to get a free quote — https://bestwebsoft.com/contacts/