PDF & Print
User Guide
PDF & Print | 2.2.8 * |
WordPress | 5.8 * |
Advanced Custom Fields | 5.9.0 * |
WooCommerce | 4.2.2 * |
*When using other versions some differences are possible to occur
** Screenshots were taken from a PC
Table of Contents
2.7. Default PDF Button Action
3.11. WooCommerce Product Details
6.3. Disable the "Show PDF & Print Custom Fields" option
7. Unique Settings for a Particular Post or Page
7.1. Unique Page Layout and Page Size
7.4. Show PDF & Print Custom Fields
7.6. PDF & Print Advanced Custom Fields
10. Add PDF & Print Buttons Widget
You can download the PDF & Print plugin here https://bestwebsoft.com/products/wordpress/plugins/pdf-print/.
1. Introduction
Note: Сlick the “Save Changes” button in order to apply any changes. |
1.1. Open your WordPress Admin Dashboard and find the menu on the left.

1.2. Open the “PDF & Print” > “Settings” page on your dashboard.

1.3. You will see the “PDF & Print Settings” page.

2. Settings
Use the options of the “Settings” page to make the global settings for the plugin.
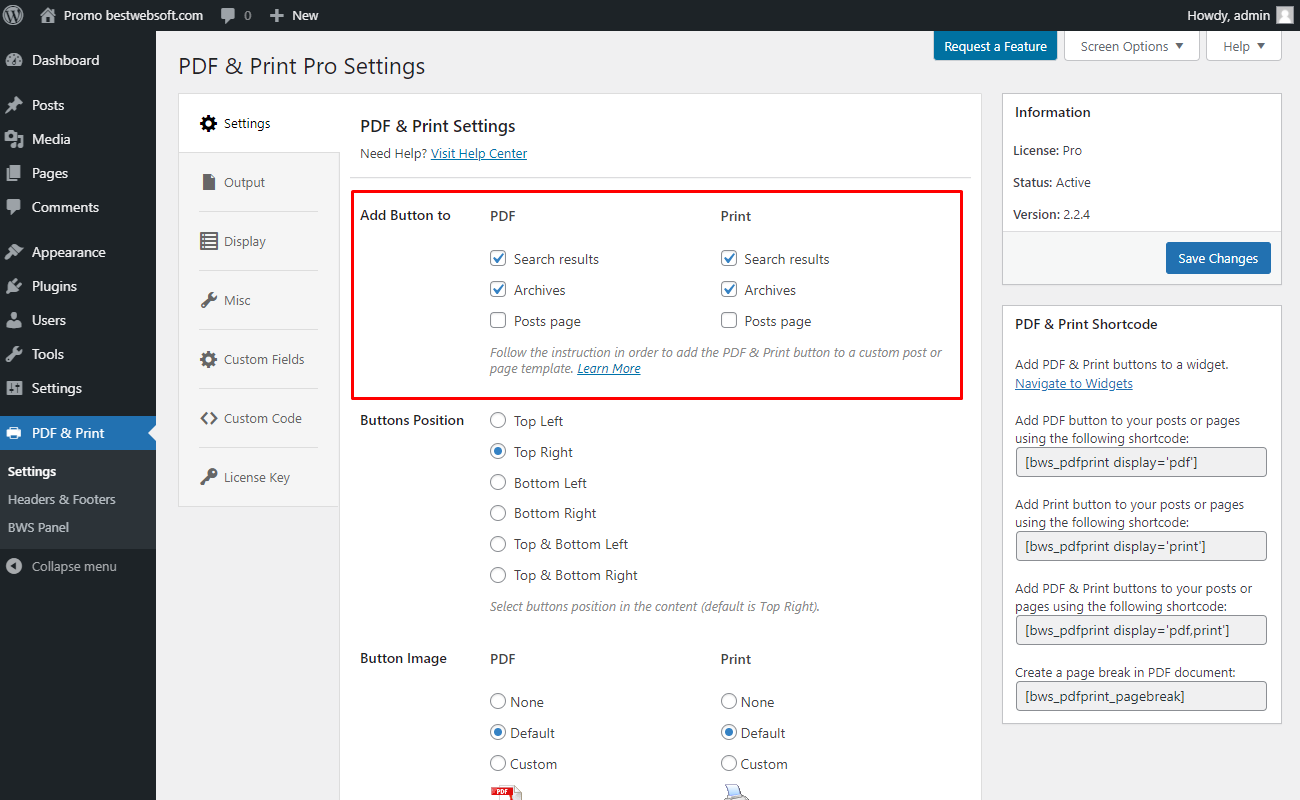
2.1. Add Button to
Use the “Add Button to” option to enable display of PDF & Print buttons on “Search results” , “Archives” and “Posts pages”.
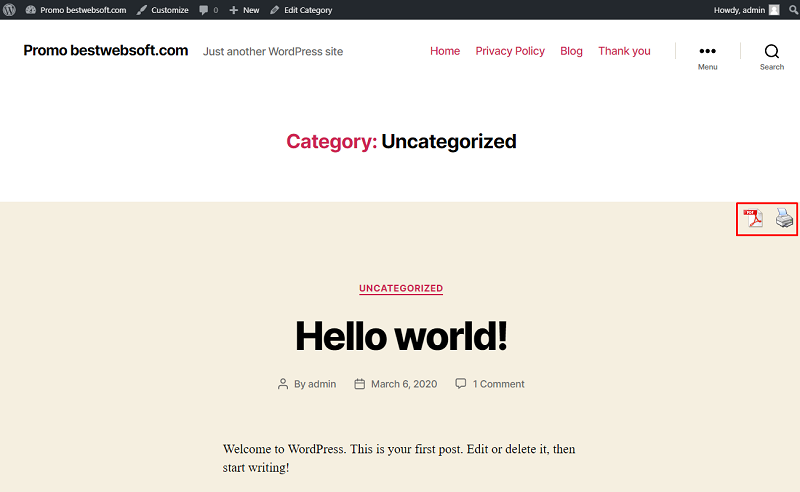
2.1.2. PDF & Print buttons will look on an archive page as follows.

Note: The “PDF” button placed within the chosen month will generate a PDF file with all the published posts in the associated month. The “PDF” button placed within a particular post will generate a PDF file with a content associated with this particular post. |
2.2. Buttons Position
Use the “Buttons Position” to choose the position in the content.

2.2.1. Top left position of buttons will look on a page as follows.

2.2.2. Top right position of buttons will look on a page as follows.
2.2.3. Bottom left position of buttons will look on a page as follows.

2.2.4. Bottom right position of buttons will look on a page as follows.

2.2.5. Top & Bottom Left position of buttons will look on a page as follows.

2.2.6. Top & Bottom Right position of buttons will look on a page as follows.

2.3. Button Image
Use the “Button Image” option to choose the images you prefer for the PDF & Print buttons.
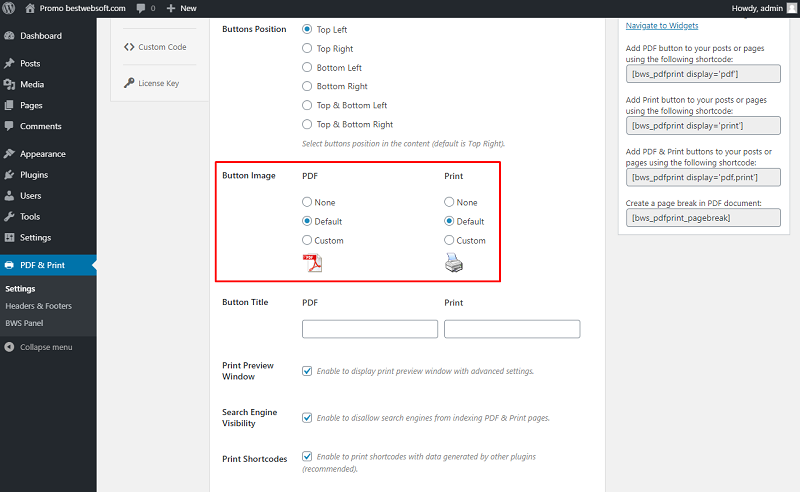
2.3.1. Choose “None” to hide the button images completely.

2.3.2. Choose the “Default” to display the button images set by default.

2.3.3. Choose the “Custom” to set the custom images of the buttons.

Note: We recommend using 100x100 px images to achieve the best result. |
2.3.4. After saving changes the custom icons placed on a post/page may look as follows.

2.4. Button Title
Use the “Button Title” option to specify a custom title displayed for each button.

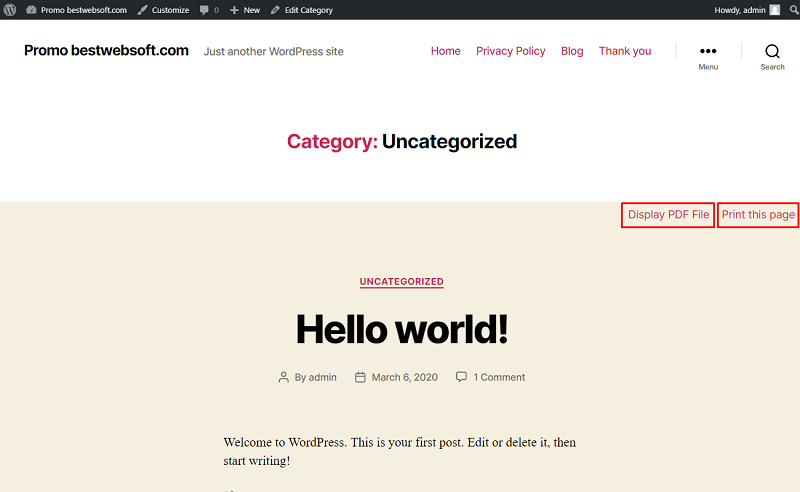
2.4.1. After saving changes the custom titles placed on a post/page may look as follows.

2.4.2. In case the “Button Images” option is set to “None”, titles with no images will be displayed instead of icons.
2.5. Print Preview Window
Enable the “Print Preview Window” option to display a print preview window with the advanced settings.

2.5.1. Click the “Print” button to display a default print preview window.

2.6. Search Engine Visibility
Enable the “Search Engine Visibility” option to disallow search engines from indexing PDF & Print pages.

2.7. Default PDF Button Action
Use the “Default PDF Button Action” option to choose the default action that will be applied when a user clicks the PDF button.

2.7.1. Choose the “Download PDF” if you want to download a PDF-file on a local drive.

2.7.2. Choose the “Open PDF” if you want to open a PDF file preview in a separate browser window.

2.8. Enable Buttons for
Use the “Enable Buttons” option for setting the “PDF” & “Print” buttons visibility for particular user roles.

3. Output
Use the options of the “Output” tab to make the settings regarding the output of the document.
3.1. Full Page Capture to PDF
Enable the “Full Page Capture to PDF” option to render the PDF files using the same fonts and styles as displayed on the page.

3.1.1. After saving changes the PDF file will be displayed with the original page styles and layout.

3.2. Default PDF File Name
Use the “Default PDF File Name” option to define the title for the generated PDF file.

3.2.1. Choose the “Post/page slug” to apply the title of the original post/ page automatically.

3.2.2. Choose the “Custom” to enable entering a custom PDF file name.

3.3. Layout
Use the “Layout” option to choose the default layout (Portrait/Landscape) for all generated PDF and print files.

3.3.1. The portrait layout will turn the page vertically.
3.3.2. The landscape layout will turn the page horizontally.

3.4. Default PDF Page Size
Use the “Default PDF Page Size” option to set the default size for the PDF document.
3.4.1. Click the “Apply to all” button to overwrite the existing size values for all post types.
Note: The “A4” size is set by default. |

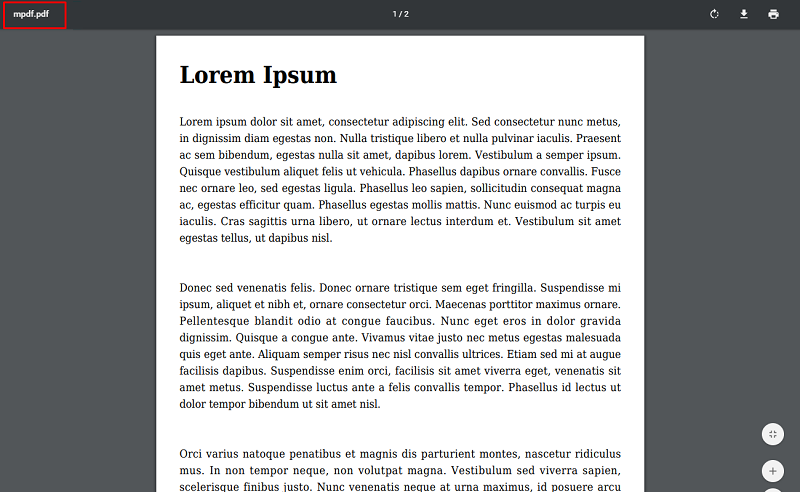
3.4.2. The “A8” format, for example, will display the PDF page as follows.

3.5. Margins
Use the “Margins” option to set the margins of the PDF page.

3.5.1. The “Top”, “Bottom”, “Left” and “Right” margins help to align the content position in the generated PDF file.

3.6. Print Shortcodes
Enable the “Print Shortcodes” option to print shortcodes data generated by other plugins.

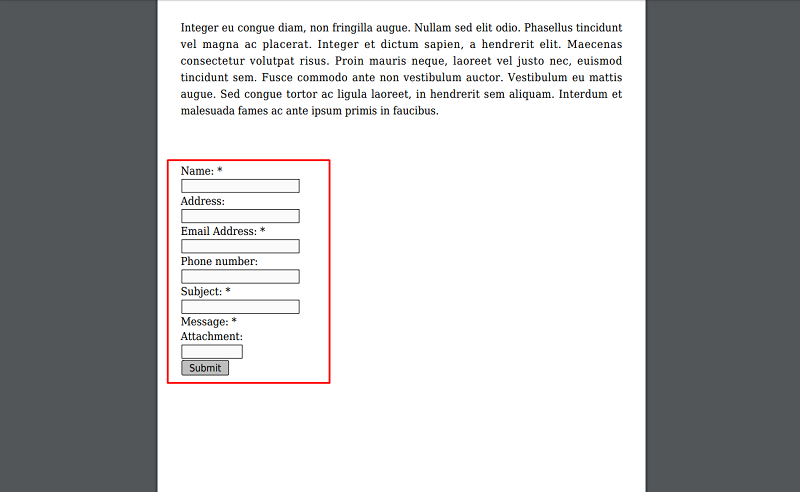
3.6.1. When this option is enabled the data added by means of another plugin’s shortcode will be displayed at PDF file as follows.
3.6.2. Data added by means of another plugin’s shortcode will be displayed at Print file as follows.

3.7. Remove Links
Enable the “Remove Links” option to remove links from PDF and Print documents.

3.8. Link Annotations
Enable the “Link Annotations” option to remove hover link styles in PDF documents.
Note: This option is available if the “Remove Links” option is disabled. |

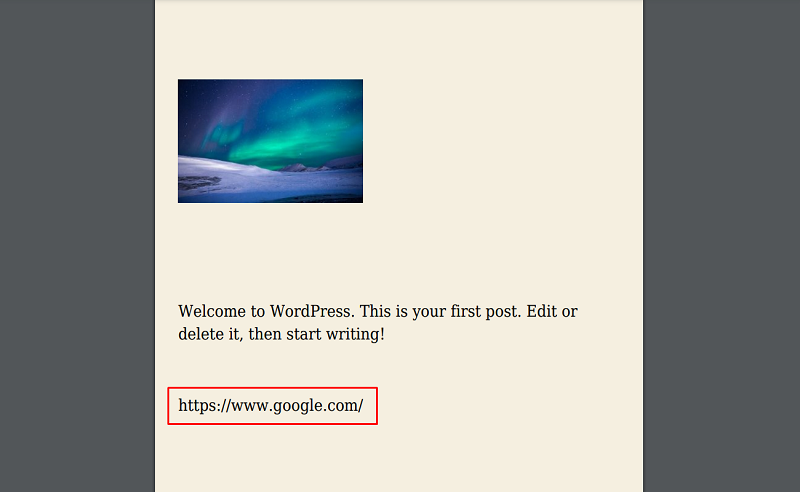
3.8.1. As a result, links will look at PDF as follows.
3.9. Additional Elements
Enable the “Additional Elements” option to add custom elements along with the generated content inside the PDF document.

3.9.1. Enable the “Title” option to add the title above the content of a post/page into the PDF document.

3.9.2. Enable the “Featured image” option to add a featured image of a post/page into the PDF document.

3.9.3. Featured image may look on the PDF file as follows.

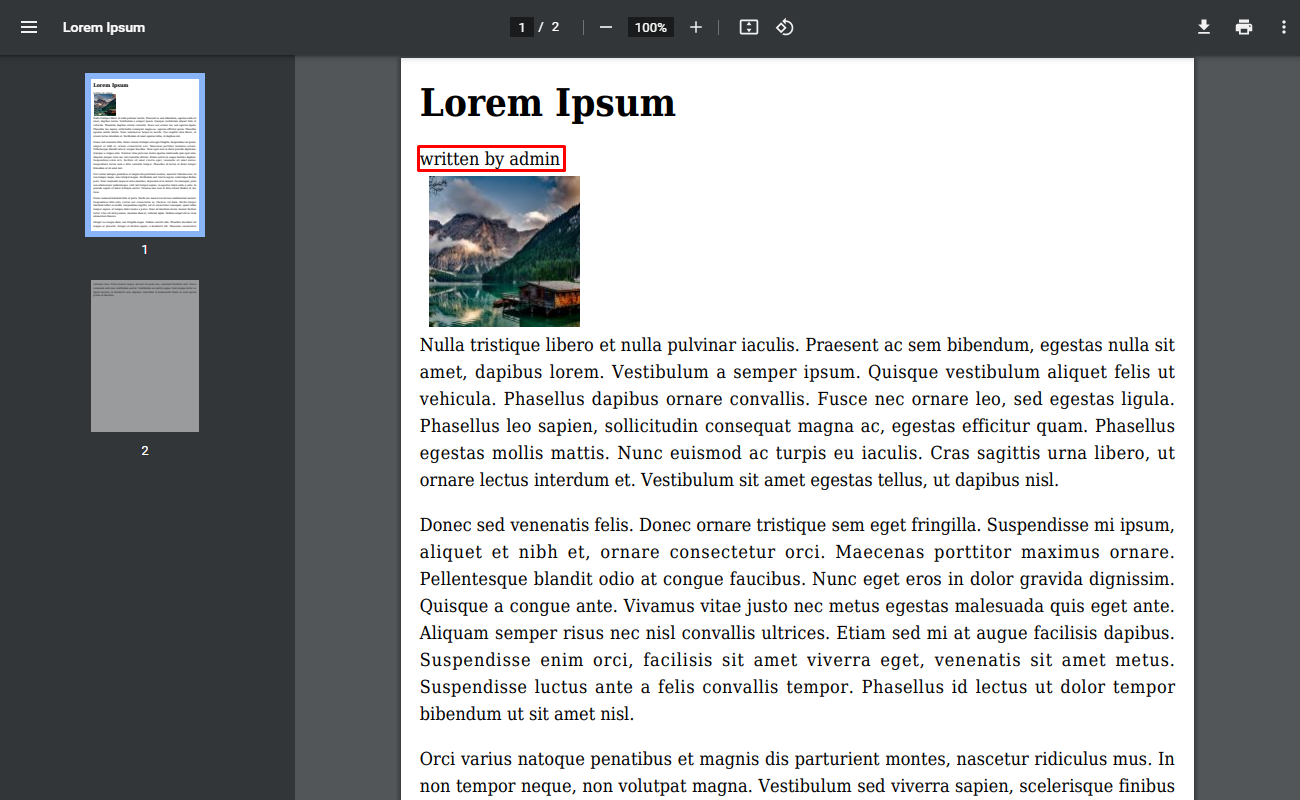
3.9.4. Enable the “Author” option to add the author's name of a post into the PDF document.

3.9.5. The Author's name may look on the PDF file as follows.
3.9.6. Enable the “Date” option to add the publish date of a post into the PDF document.

3.9.7. The publish date may look on the PDF file as follows.

3.10. Featured Image Size
Use the “Featured Image Size” option to set the size of the featured image.

3.10.1. For example thumbnail image size may look in a PDF file as follows.

3.11. WooCommerce Product Details
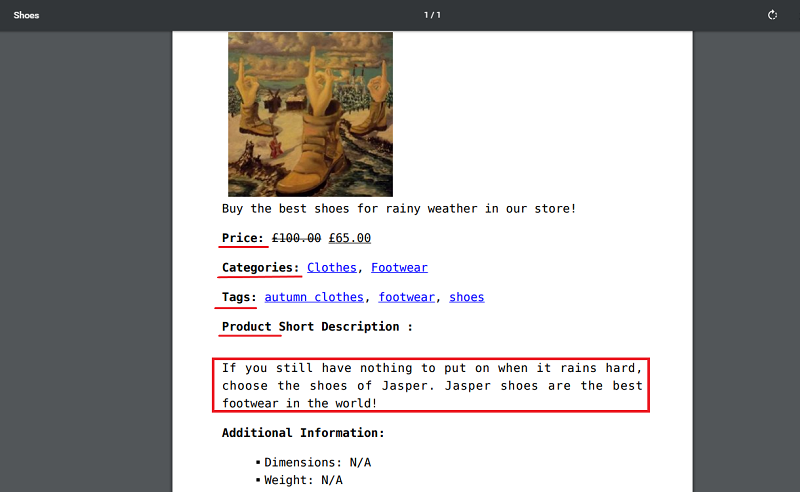
Use the “WooCommerce Product Details” to enable the required product data to include it into the PDF document printed on the WooCommerce product page.
Note: Download, activate and install WooCommerce to use the available option. |

3.11.1. After saving changes the chosen parameters will be displayed on the PDF-page.
3.12. Watermark Protection
Use the “Watermark Protection” option to protect your PDF document with any watermark.

3.12.1. Choose “None” if you don’t want to use watermark protection at all.

3.12.2. Choose “Text” to enter the text, which will cover the content of the PDF page across.

3.12.3. After saving changes the PDF page with watermark may look as follows.

3.12.4. Choose “Image” to upload the preferred image, which will cover the content of the PDF page.

3.12.5. After saving changes the PDF document may look as follows.

Note: Use the following image properties: [max size: 1 MB; allowed types: JPG, JPEG, PNG, GIF]. |
3.13. Watermark Opacity
Use the “Watermark Opacity” option to change the opacity of the applied image.

3.13.1. After saving changes watermark with opacity set to [1] in the PDF document may look as follows.

3.14. Prevent Copying
Enable the “Prevent Copying” option to prevent unauthorized copying your PDF page.

3.15. Advanced Custom Fields
Enable the “Advanced Custom Fields” options to include available custom fields and their names into the PDF document.
Note: Download, activate and install “Advanced Custom Fields” plugin to use its options. |

3.15.1. After saving changes the necessary custom fields will be displayed in the PDF document.

3.16. Additional Fonts
Use the “Additional Fonts” option to add any new fonts. Activate the option by clicking the “Load Fonts” button in order to get an ability to change the font of the text on the PDF page.

3.16.1. After the fonts are downloaded, the PDF page’s font may look as follows.

3.17. Default CSS
Enable “Default CSS” option to apply CSS from the current theme.
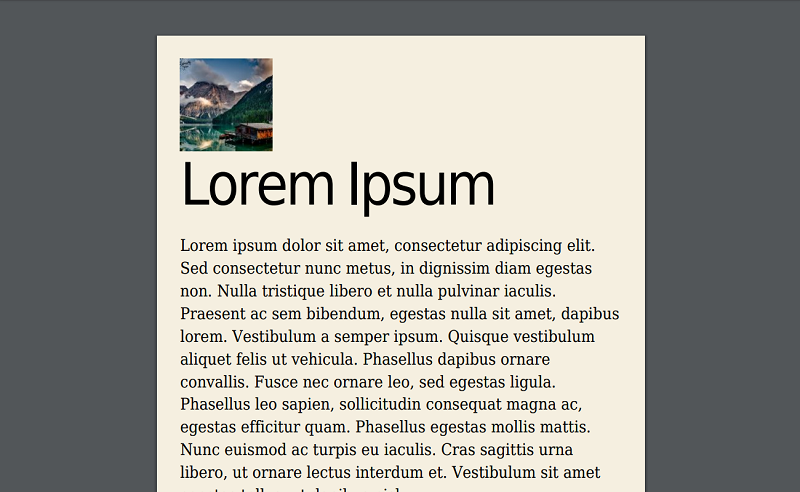
3.17.1. After saving changes, the PDF document may look as follows.

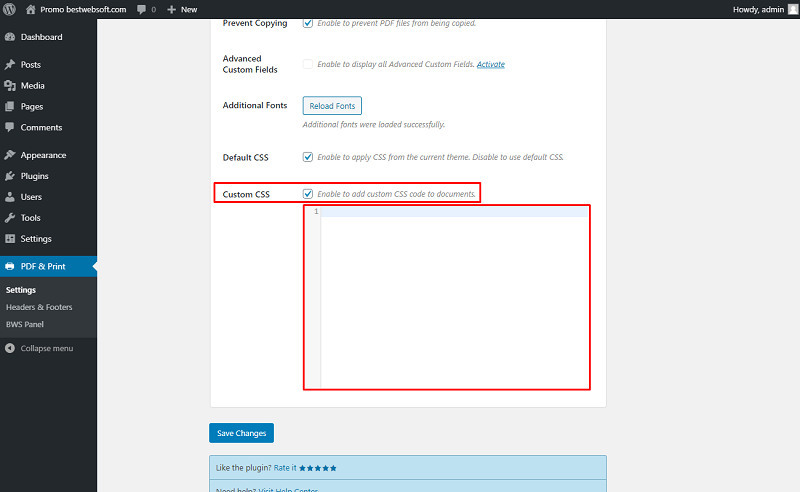
3.18. Custom CSS
Use the “Custom CSS” option to add custom CSS code to documents.
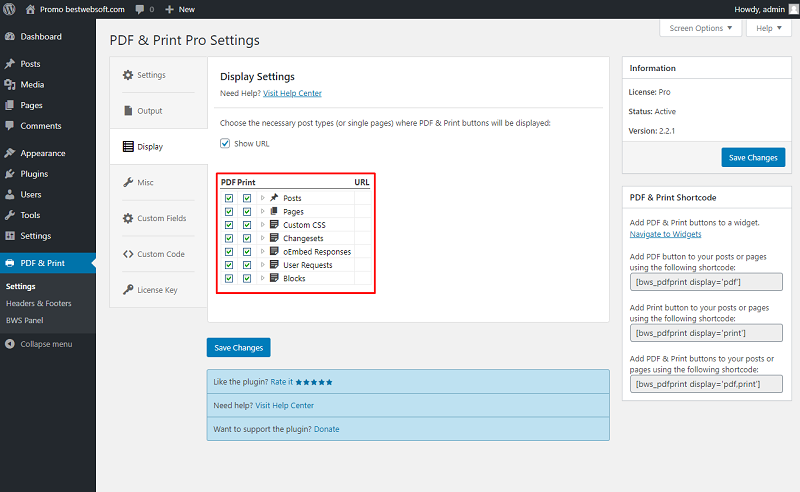
4. Display Settings
Use the “Display” tab to choose separate post types or single pages where PDF & Print buttons will be displayed. Enable required pages and post types you suppose to have the PDF & Print buttons.
4.1. Enable the “Show URL” option in the “Display Settings” tab to show the URL of each post and page in the list below.
Note: The categories can be configured independently. |

4.2. Enable the necessary post types (or single pages) that will be added to search in the list.
5. Miscellaneous Settings
Use the “Miscellaneous” tab to make the settings regarding track usage, default settings, and upgrade the mPDF library.
5.1. Upgrade the mPDF library
Use the “Upgrade the mPDF library” option to upgrade the mPDF library to version 7.1.5. This action is recommended for the plugin to function properly.

5.2. Track Usage
Enable the “Track Usage” option to allow tracking plugin usage anonymously.

5.3. Default Settings
Click the “Restore Settings” button to reset all the settings made previously and revert them to the default ones.

5.3.1. Click the “Yes, restore all settings” button to confirm the procedure.

6. Custom Fields
Use the “Custom Fields” tab to add custom fields and custom data before/after PDF & Print document's content
6.1. Custom Fields Settings
Note: The custom fields settings are applied to all PDF & Print documents. |
Open the “Custom Fields” tab to see the list of available post types.
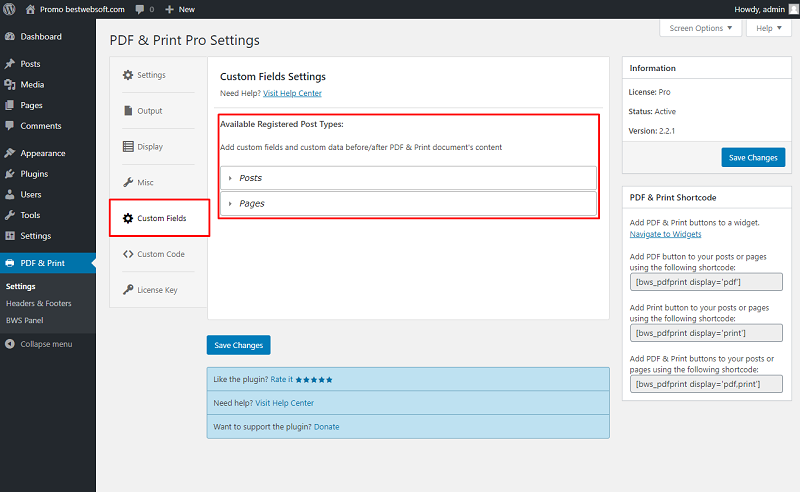
6.1.1. Open the “Posts” or “Pages” section to view the available fields and options.
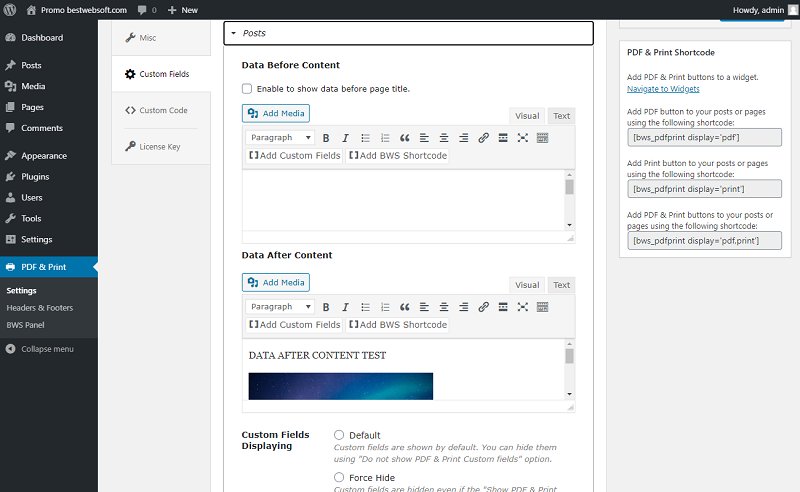
6.1.2. Enable the appropriate checkbox to show “Data Before Content” before the page title.
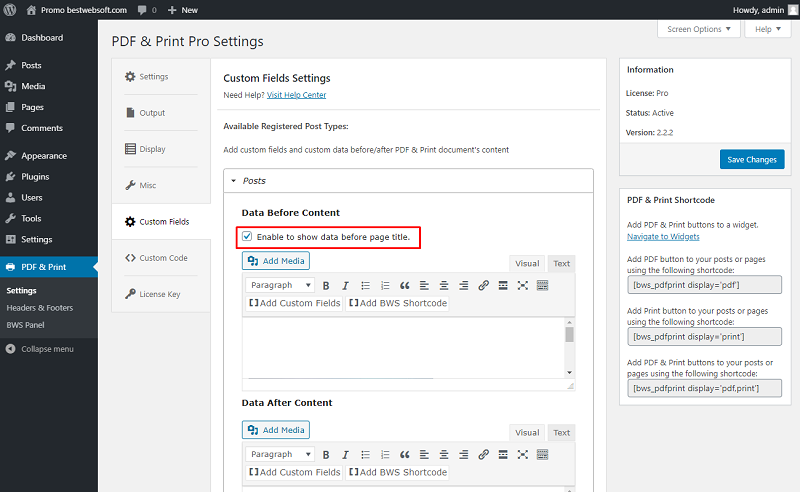
6.1.3. Add the necessary content in “Data Before Content” and “Data After Content” and save changes.

6.1.4. After saving changes the custom fields will be displayed in the PDF document.

6.1.5. The “Data Before Content” before page title may be displayed in the PDF document as follows.

6.2. Custom Fields Displaying
Use the “Custom Fields Displaying” option to choose the default action of custom fields displaying.

6.2.1. Choose “Default” to show custom fields by default. You can hide them using "Do not show PDF & Print Custom fields" option.

6.2.2. Choose “Force Hide” to hide custom fields even if the "Show PDF & Print Custom Fields" option is enabled.

6.2.3. Choose “Force Show” to make Custom fields visible even if the "Show PDF & Print Custom Fields" option is disabled.
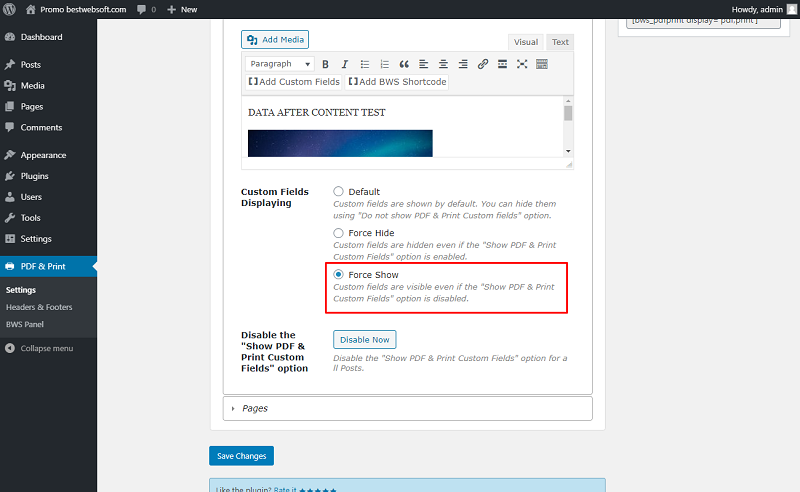
6.3. Disable the "Show PDF & Print Custom Fields" option
Use the “Disable the "Show PDF & Print Custom Fields"” option to disable custom fields for all posts. To disable them click the “Disable Now” button.

7. Unique Settings for a Particular Post or Page
Use the “PDF & Print” options on each post/page to make settings for each post/page individually.
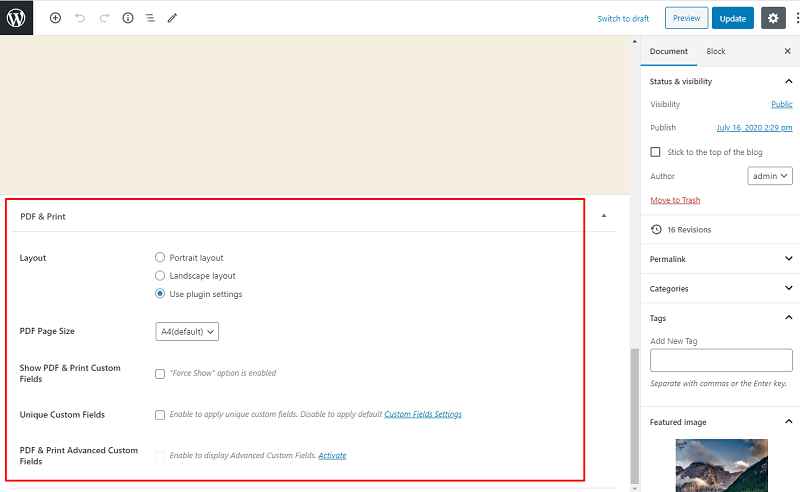
7.1. Unique Page Layout and Page Size
Use the “Edit” page to configure the layout settings for individual posts and pages.

7.1.1. Make the preferred settings in the “PDF & Print” section at the bottom of the page.
7.2. Layout
Use the “Layout” option to set a Portrait/Landscape layout or “Use plugin settings” for the PDF document and its print version.

7.2.1. The Portrait layout will look on the page as follows.

7.2.2. The landscape layout will look on the page as follows.

7.3. PDF Page Size
Use the “PDF Page Size” option to set the page size for the individual post/page.
Note: Change the default page size using the following steps: Set Default PDF Page Size. |

7.4. Show PDF & Print Custom Fields
Enable the “Show PDF & Print Custom Fields” option to enable the display of PDF & Print Custom fields.

7.5. Unique Custom Fields
Enable the “Unique Custom Fields” option to create unique custom fields for individual pages and posts. If the option is disabled, PDF & Print Custom Fields Settings will be applied unless the “Show PDF & Print Custom fields” option is enabled.

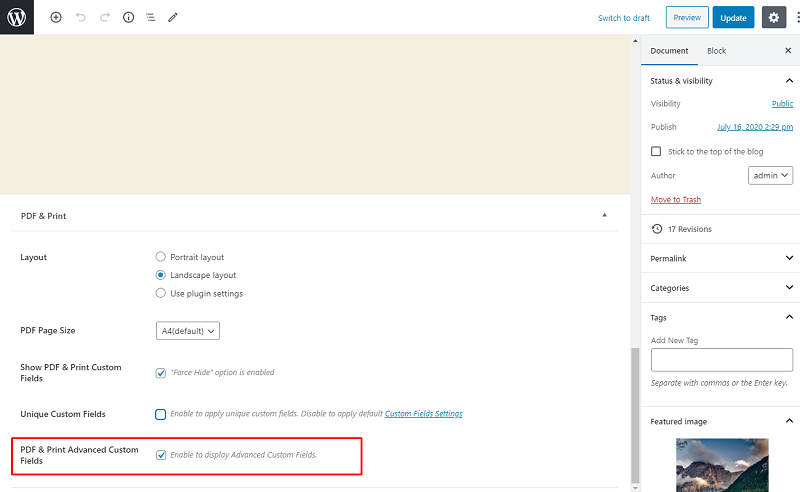
7.6. PDF & Print Advanced Custom Fields
Enable the “PDF & Print Advanced Custom Fields” option to display the Advanced Custom Fields.
Note: Download, activate and install “Advanced Custom Fields” plugin to use its options. |
8. Custom Code
Use the “Custom code” tab for inserting a CSS, PHP or JavaScript code. To activate the inserted code, enable the “Activate custom… code” option and save changes.

9. License Key
Use the “License Key” tab to activate or check the Pro plugin license.
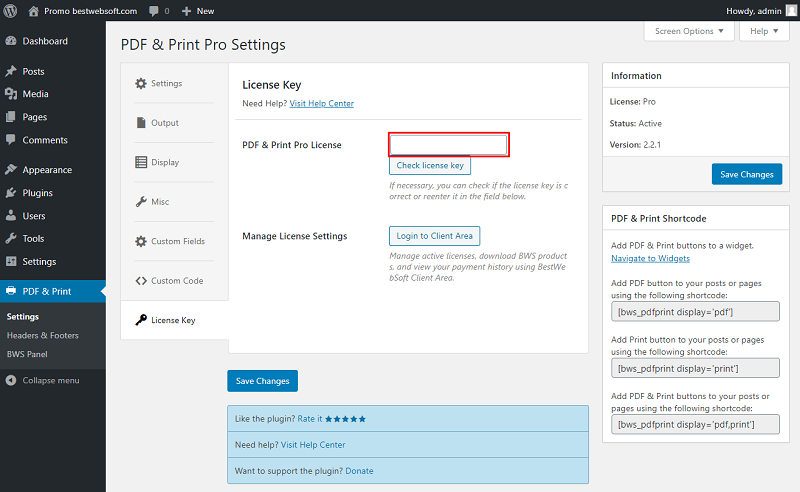
9.1. Pro License
After a successful plugin purchase, you will receive an email notification with a download link and a license key. Activate Pro license by adding a license key into the field “PDF & Print Pro License” and clicking the “Save Changes” button.
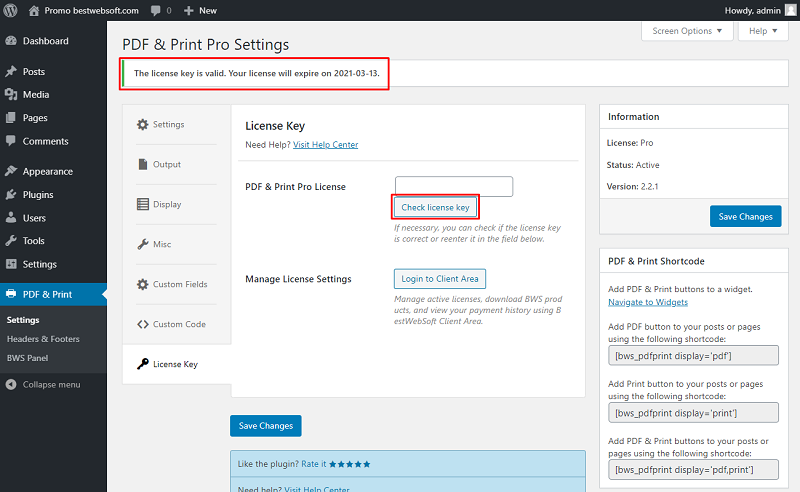
9.2. Check License Key
To check the license key, click the “Check license key” button. If the entered key is correct, the message “The license key is valid. Your license will expire on XXXX-XX-XX” will be displayed.
9.3. Manage License Settings
Use the “Manage License Settings” option to change your license settings. Click the “Login to Client Area” button to open your personal Client Area dashboard located on the https://bestwebsoft.com/ website. Browse and download purchased products, change the license domain and copy the license keys.

10. Add PDF & Print Buttons Widget
It is possible to add PDF & Print Buttons widget on a post/page. This can be implemented in several steps.
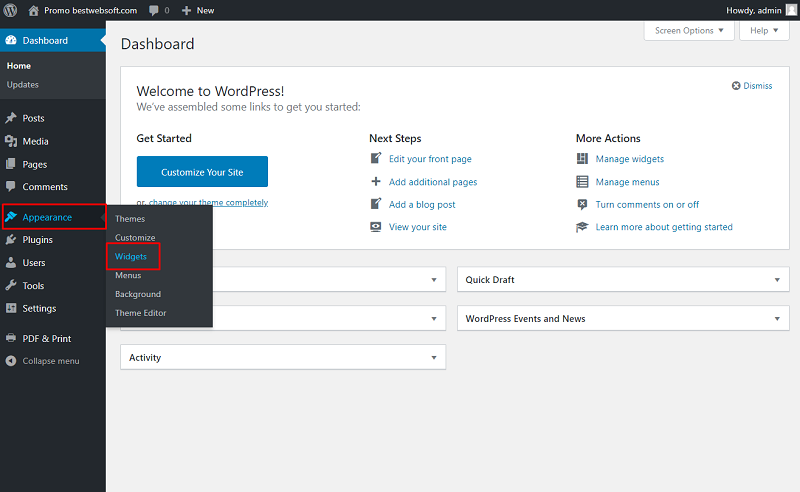
10.1. Open the “Appearance” > “Widgets” page.
10.2. Expand the necessary widget area and click the “Add block” button “PDF & Print Buttons” widget.

10.3. Search for “PDF & Print Buttons” and click on the widget.

10.4. Enter the preferred title, enable PDF & Print buttons, and click the “Update” button.

10.5. After saving changes the widget with PDF & Print buttons will look on a page as follows.

11. Headers & Footers
Use the “Headers & Footers” page to create custom headers and footers displayed by necessity in the PDF document.
11.1. Open the ”PDF & Print” > “Headers & Footers” page.

11.2. Click the “Add New” button.

11.3. Enter the title and the description.
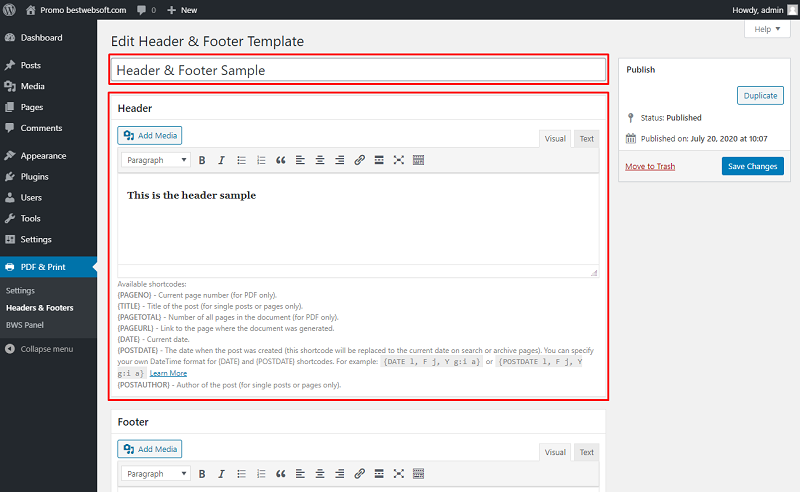
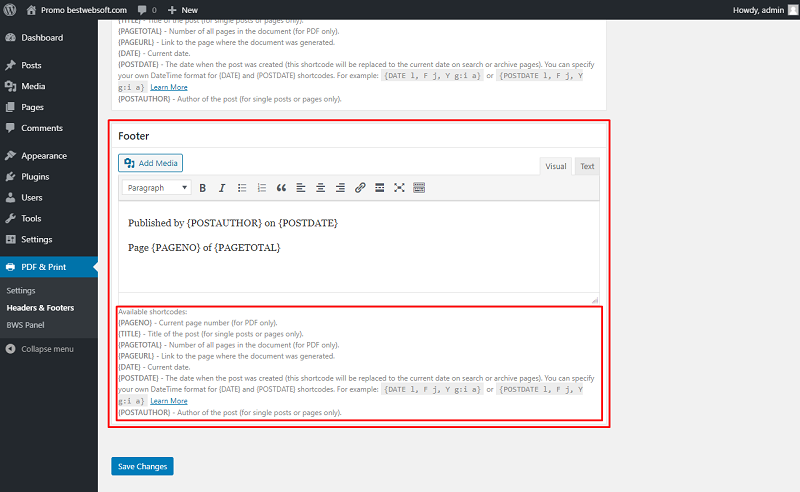
11.4. Use the available shortcodes to add dynamic data in the description.
Note: Available shortcodes: {PAGENO} - Current page number (for PDF only). {TITLE} - Title of the post (for single posts or pages only). {PAGETOTAL} - Number of all pages in the document (for PDF only). {PAGEURL} - Link to the page where the document was generated. {DATE} - Current date. {POSTDATE} - The date when the post was created (this shortcode will be replaced to the current date on search or archive pages). You can specify your own DateTime format for {DATE} and {POSTDATE} shortcodes. For example: {DATE l, F j, Y g:i a} or {POSTDATE l, F j, Y g:i a} {POSTAUTHOR} - Author of the post (for single posts or pages only). |
11.5. Enable the “PDF” and “Print” options to include a particular header or footer into the PDF-document.

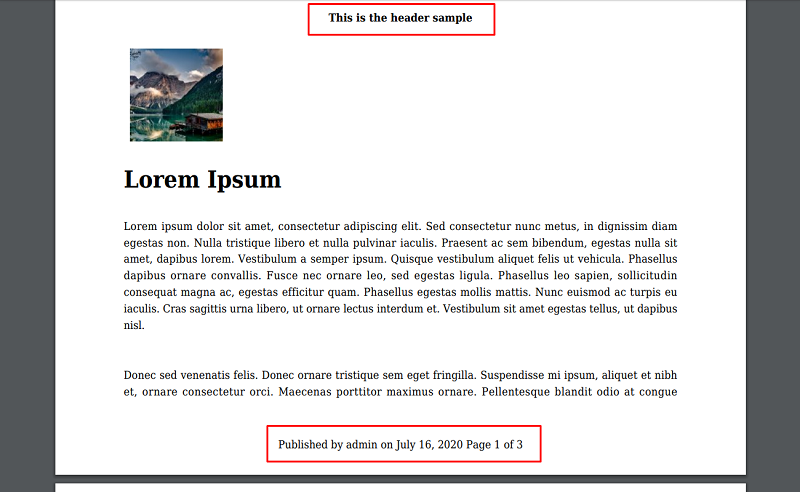
11.6. After saving changes the created header/footer may look on a page as follows.
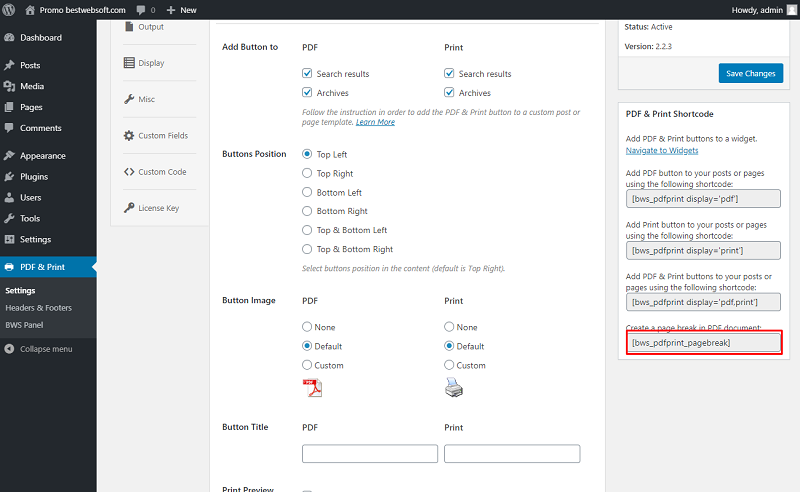
12. Shortcodes
Use the shortcodes to add PDF & Print button to your posts or pages and create a page break in PDF document. Available shortcodes are displayed on “PDF & Print” > “Settings” page.
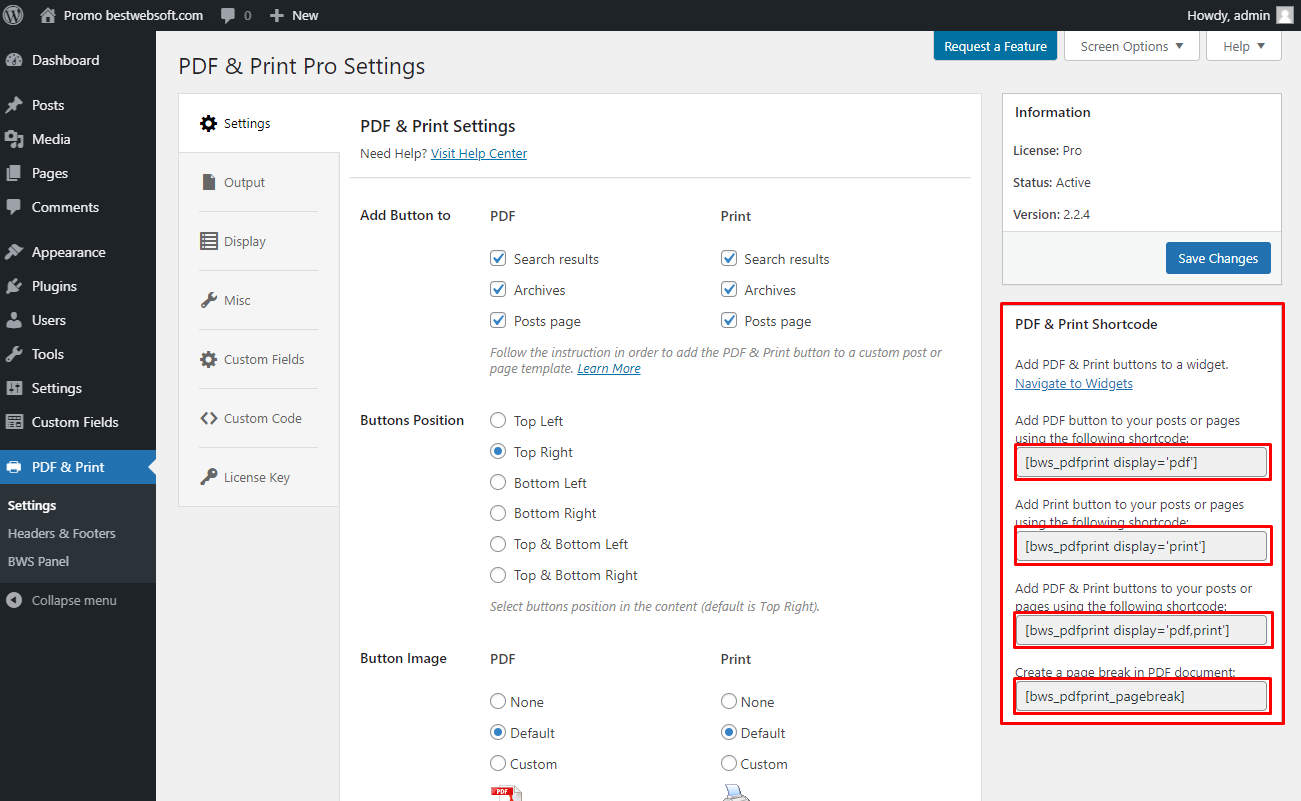
12.1. To display PDF, Print or both buttons, copy the necessary shortcode, create a new post or page or open the existing in the “Edit” mode and insert copied earlier shortcode to the necessary place.

15.3. Click “Publish...” and then “Preview” buttons in order to see the post. The PDF & Print buttons will look on a page as follows.

15.4. To create a page break in PDF document, copy the appropriate shortcode from the “PDF & Print” > “Settings” page.
15.5. Create a new post or page or open the existing in the “Edit” mode and insert copied earlier shortcode to the place where you want to split the pages.

15.6. As a result PDF documents with created page break may look as follows.

Thank you!
Help & Support
Visit our Help Center if you have any questions — https://support.bestwebsoft.com/
Services
We provide additional services such as WordPress themes & plugins development,
graphic design, custom programming.
Contact us now to get a free quote — https://bestwebsoft.com/contacts/