Captcha
User Guide
Captcha | 5.1.5 * |
WordPress | 5.8.0 * |
Contact Form | 4.2.4 * |
Car Rental V2 Pro | 1.0.4 * |
Subscriber | 1.4.8 * |
Contact Form 7 | 5.4.2 * |
Jetpack | 10.0.0 * |
Mailchimp for WordPress WPForms | 4.8.6 * 1.6.8.1 * |
Ninja Forms | 3.3.20 * |
Gravity Forms | 2.4.20 * |
bbPress | 2.6.6 * |
BuddyPress | 9.0.0 * |
WooCommerce | 5.5.2 * |
wpForo | 1.9.9 * |
Limit Attempts | 1.2.9 * |
*When using other versions some differences are possible to occur
** Screenshots were taken from a PC
Table of Contents
2.1.8. MailChimp for WordPress
2.7. Use Several Image Packages At The Same Time
2.16. Slide Captcha Appearance
2.17. WordPress - Login Form Settings
2.18. WordPress - Registration Form
2.19. WordPress - Reset Password Form
2.20. WordPress - Comments Form
2.20.1. Hide from Registered Users
3.3. Captcha Time Limit Exceeded
3.4. Answer Time Limit Exceeded
You can download Captcha Plugin here:
https://bestwebsoft.com/products/wordpress/plugins/captcha/
1. Introduction
Note: Сlick the “Save Changes” button in order to apply any changes. |
1.1. Open your WordPress Admin Dashboard and find the menu on the left.
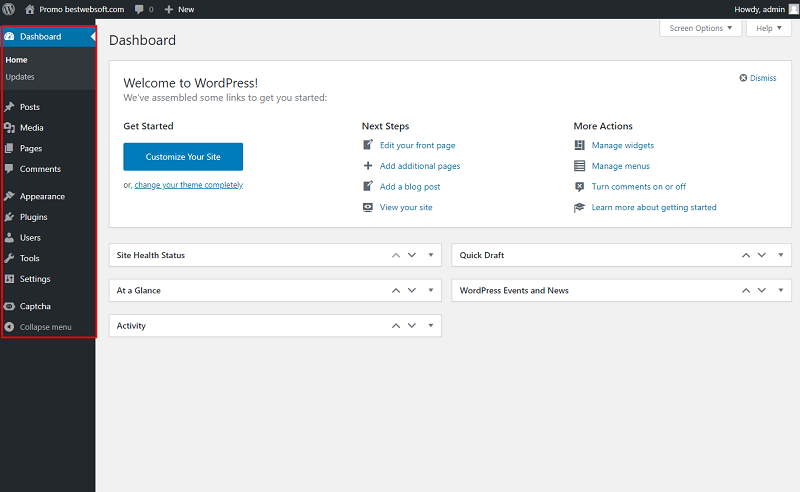
1.2. Open the “Captcha” > “Settings” page on the dashboard.

2. Settings
Use the options of the “Settings” page to make the global settings for the plugin.
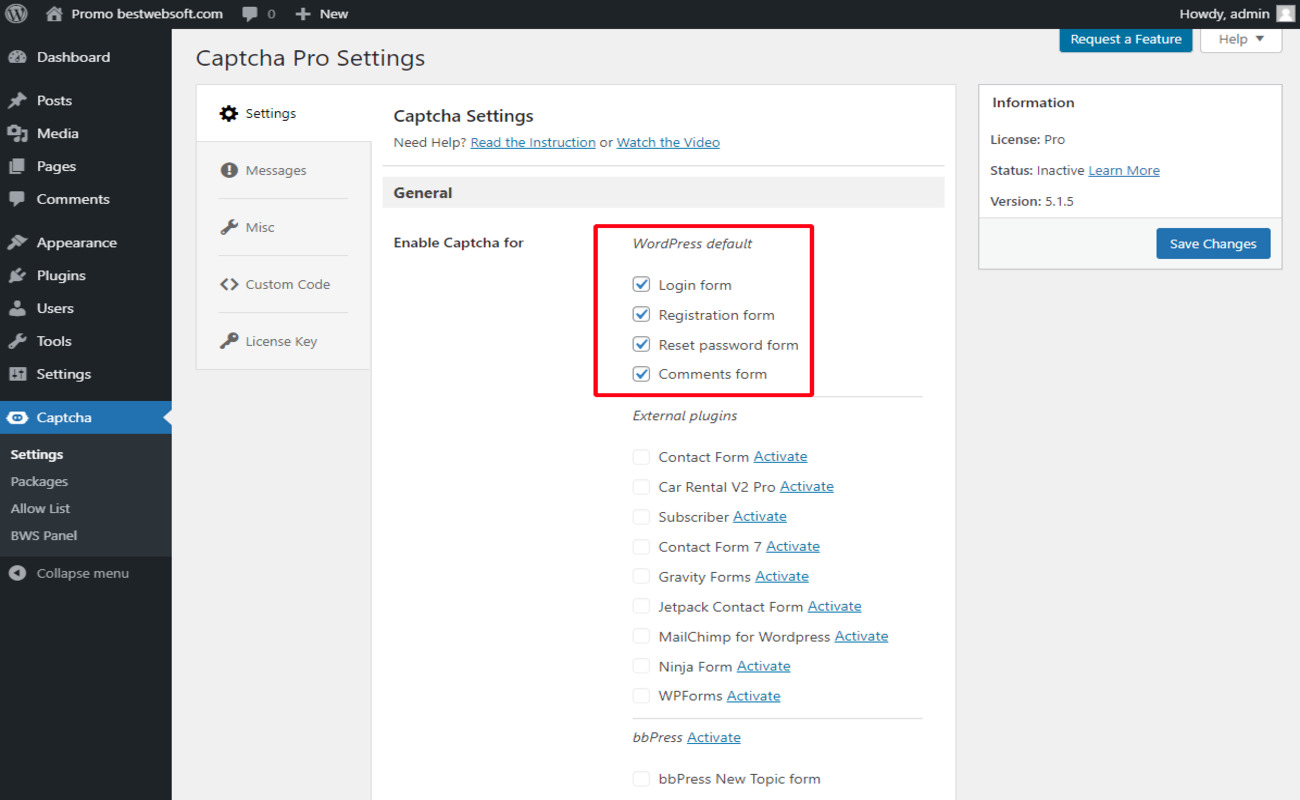
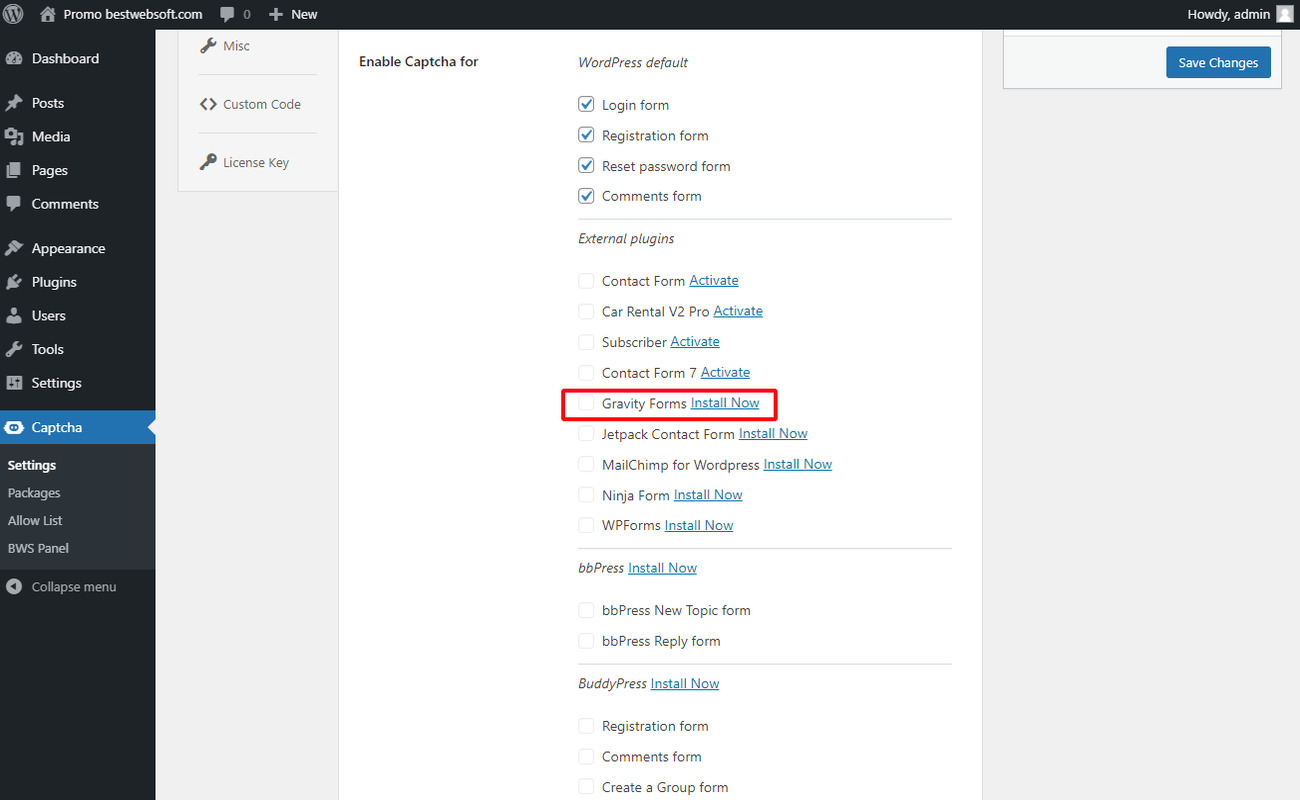
2.1. Enable Captcha for
Use the “Enable Captcha for” option to show Captcha for WordPress and custom forms generated by external plugins.

2.1.1. WordPress Default
Enable the necessary WordPress default forms to display Captcha.
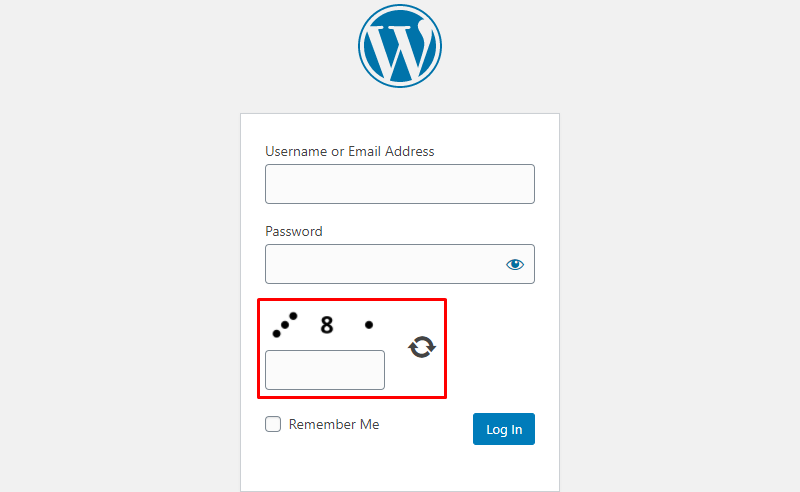
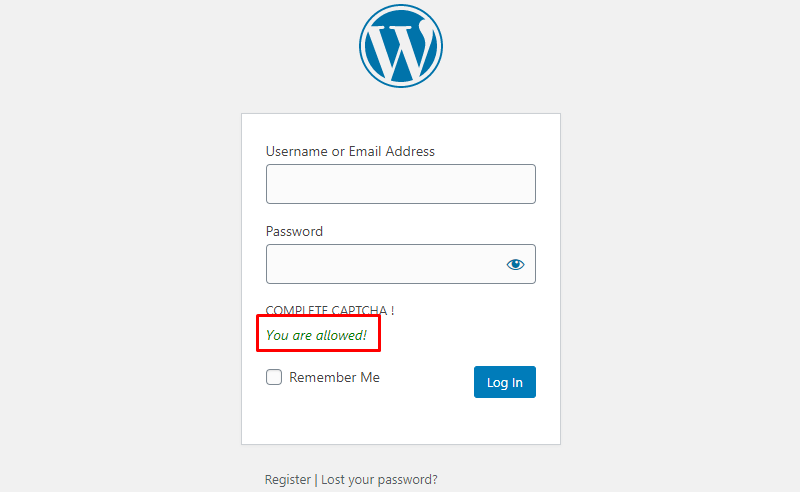
2.1.1.1. The WordPress “Login Form” with Captcha will look on a page as follows.
2.1.1.2. The WordPress “Registration Form” with Captcha will look on a page as follows.

2.1.1.3. The WordPress “Reset Password Form” with Captcha will look on a page as follows.

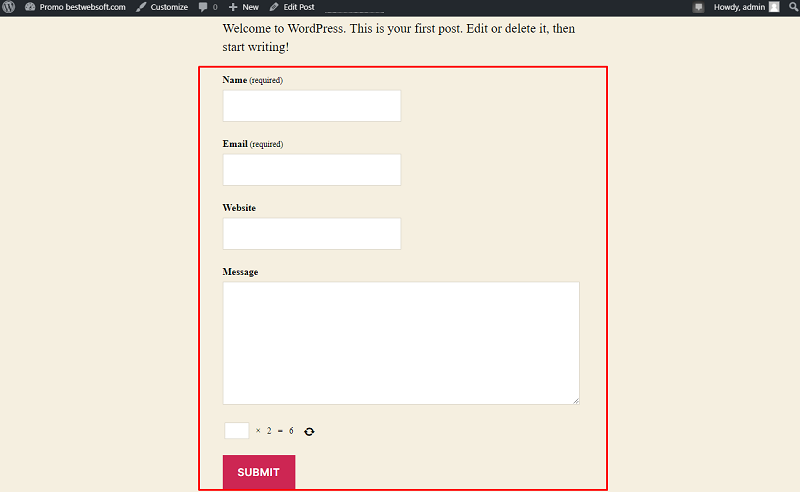
2.1.1.4. The WordPress “Comments Form” with Captcha will look on a page as follows.

2.1.2. Contact Form
Captcha by BestWebSoft is compatible with “Contact Form by BestWebSoft”. Download and install the plugin by clicking the “Install Now” link in the “External Plugins” section.
You can download the Contact Form plugin here
https://bestwebsoft.com/products/wordpress/plugins/contact-form/

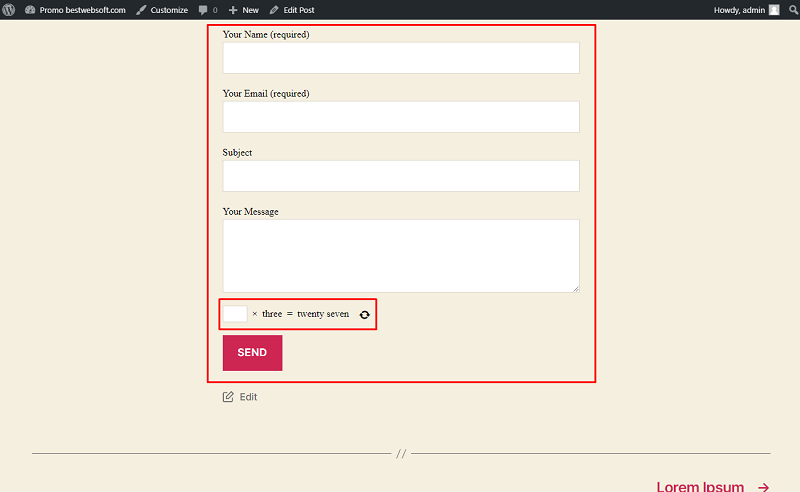
2.1.2.1. After a successful download and activation of the “Contact Form” plugin enable Captcha for “Contact Form”.

2.1.2.2. After saving changes the “Contact Form” with Captcha will look as follows.

2.1.3. Car Rental V2 Pro
Captcha by BestWebSoft is compatible with “Car Rental V2 Pro by BestWebSoft”. Download and install the plugin by clicking the “Install Now” link in the “External Plugins” section.
You can download the Car Rental V2 Pro plugin here
https://bestwebsoft.com/products/wordpress/plugins/car-rental-v2/

2.1.3.1. After a successful download and activation of the “Car Rental V2 Pro” plugin enable Captcha for “Car Rental V2 Pro”.

2.1.3.2. After saving changes the “Car Rental” checkout page with Captcha will look as follows.

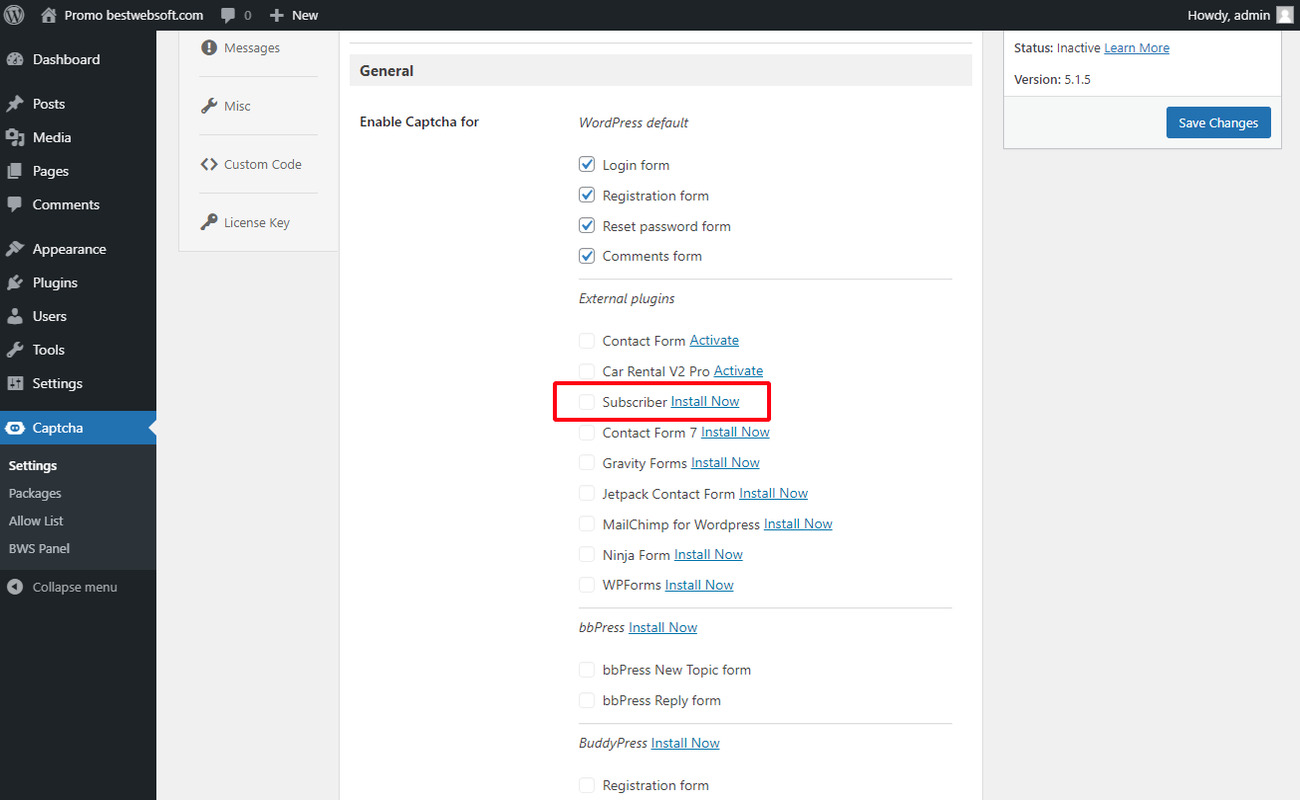
2.1.4. Subscriber
Captcha by BestWebSoft is compatible with the “Subscriber by BestWebSoft” plugin. Download and install the plugin by clicking the “Install Now” link in the “External Plugins” section.
You can download the Subscriber plugin here
https://bestwebsoft.com/products/wordpress/plugins/subscriber/
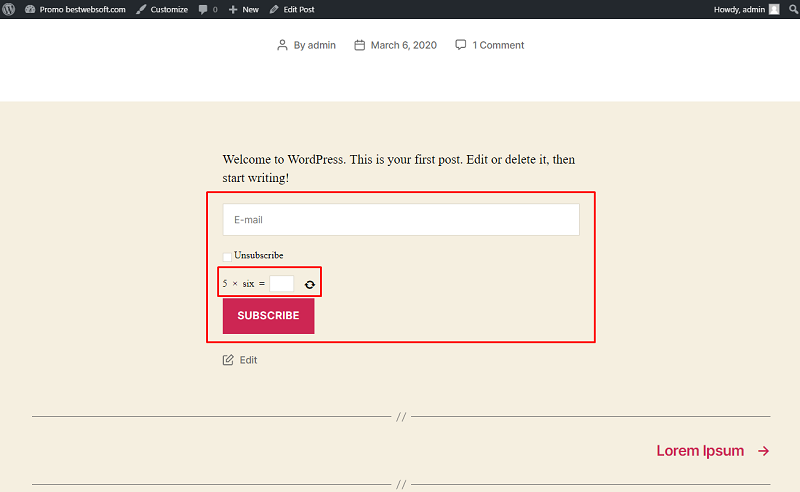
2.1.4.1. After a successful download and activation of the “Subscriber” plugin enable Captcha for the “Subscriber” form.

2.1.4.2. After saving changes the “Subscriber” form with Captcha will look as follows.
2.1.5. Contact Form 7
Captcha by BestWebSoft is compatible with the “Contact Form 7” plugin. Download the plugin by clicking the “Install Now” link in the “External Plugins” section.
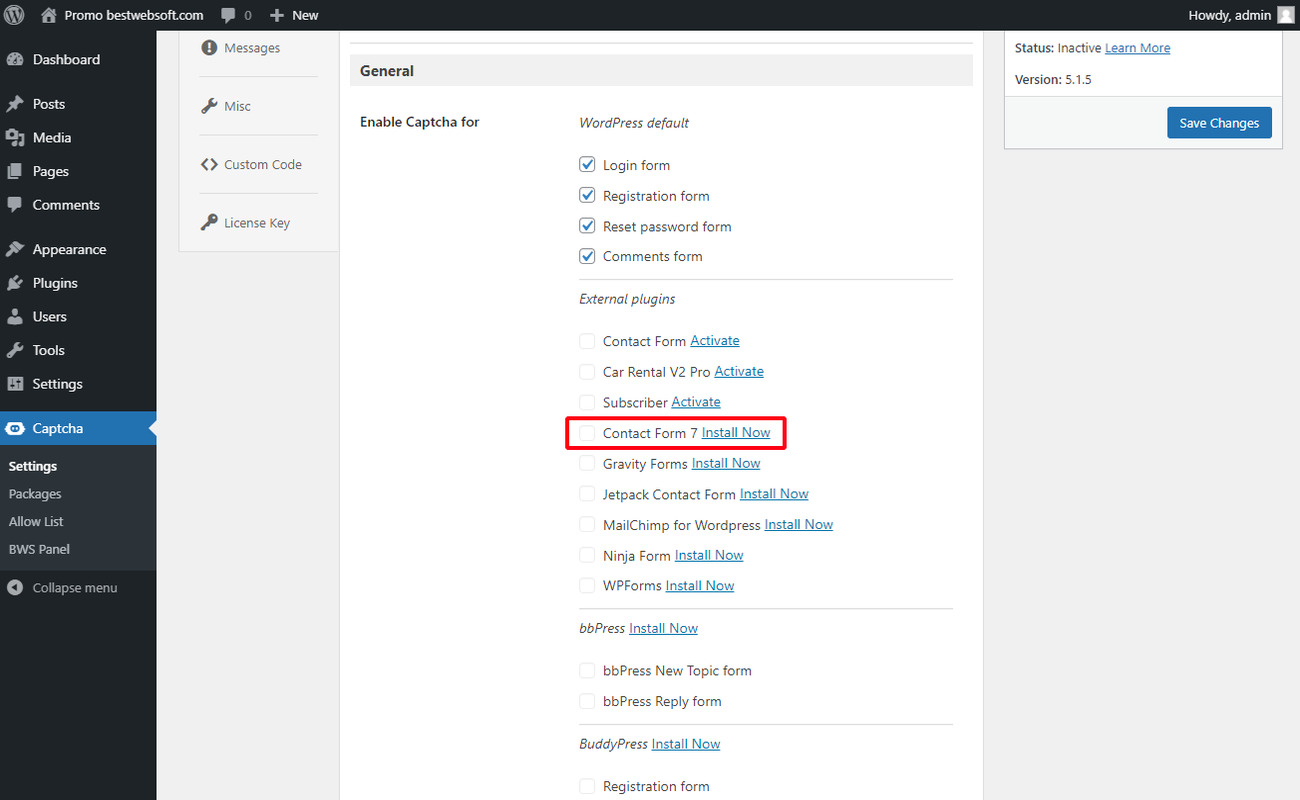
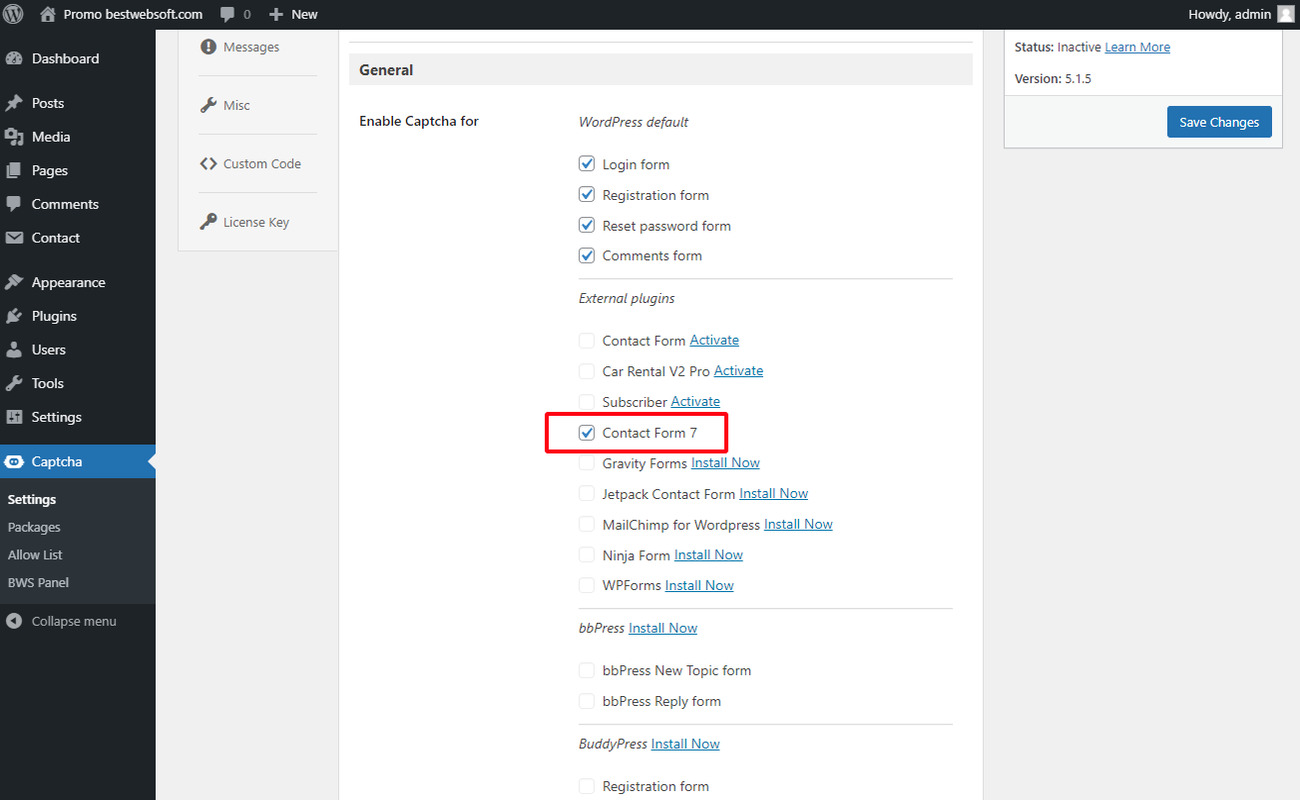
2.1.5.1. After a successful download and activation of the “Contact Form 7” plugin enable Captcha for “Contact Form 7”.
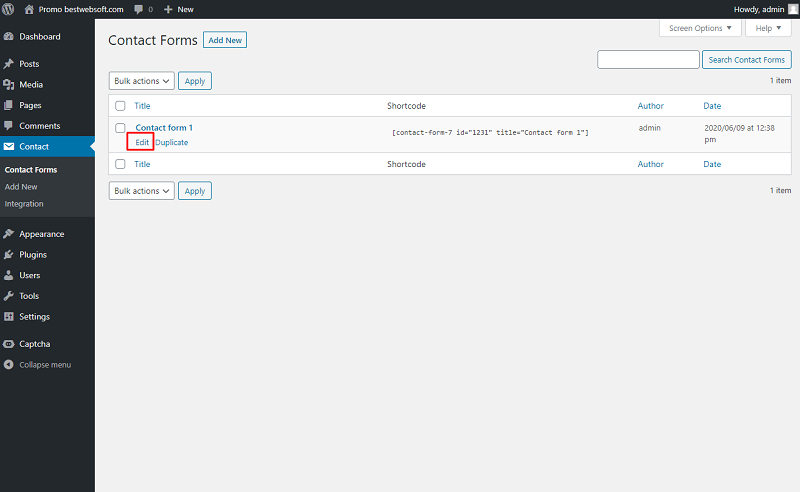
2.1.5.2. Open the “Contact” > “Contact Forms” page.

2.1.5.3. Select the form to add Captcha and open it in the “Edit” mode.
2.1.5.4. Click the “BWS Captcha” button.
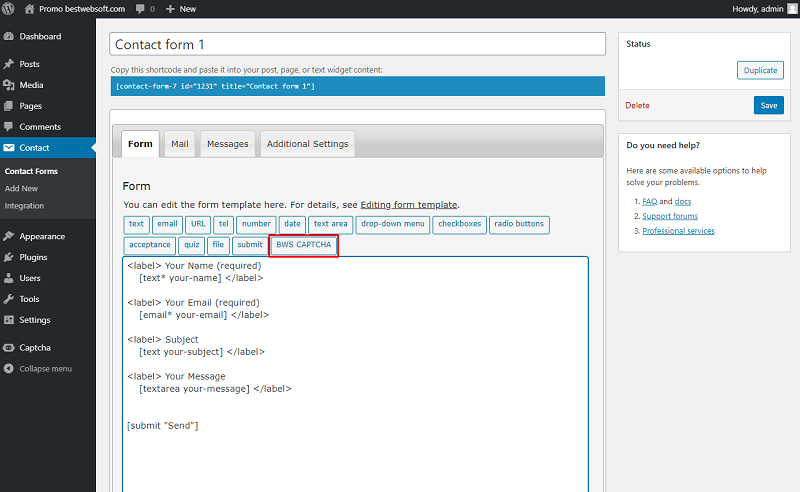
2.1.5.5. The “Form-tag Generator” window will open. Click the “Insert Tag” button to add the Captcha to your form.

2.1.5.6. After the shortcode is added to the form click the “Save” button.

2.1.5.7. After saving changes the “Contact Form 7” with Captcha will look as follows.
2.1.6. Gravity Forms
Captcha by BestWebSoft is compatible with the “Gravity Forms” plugin. Download the plugin by clicking the “Install Now” link in the “External Plugins” section.
2.1.6.1. After a successful download and activation of the “Gravity Forms” plugin enable Captcha for “Gravity Forms”.

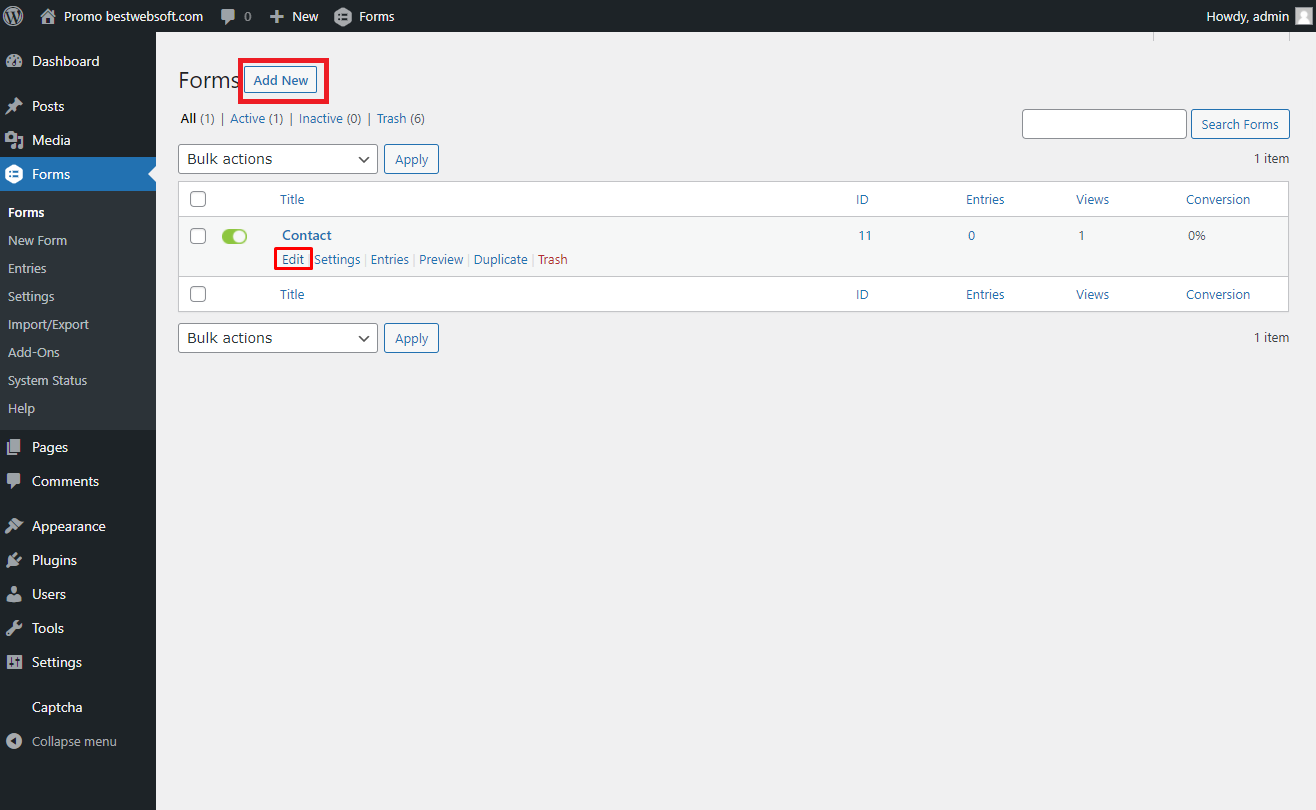
2.1.6.2. Open the “Forms” > “Forms” page.

2.1.6.3. Click the “Add New” button to create a new form or click the “Edit button” to add Captcha to the form created before.
2.1.6.4. Click the “BWS Captcha” badge on the “Standard Fields” section to add Captcha to the form.

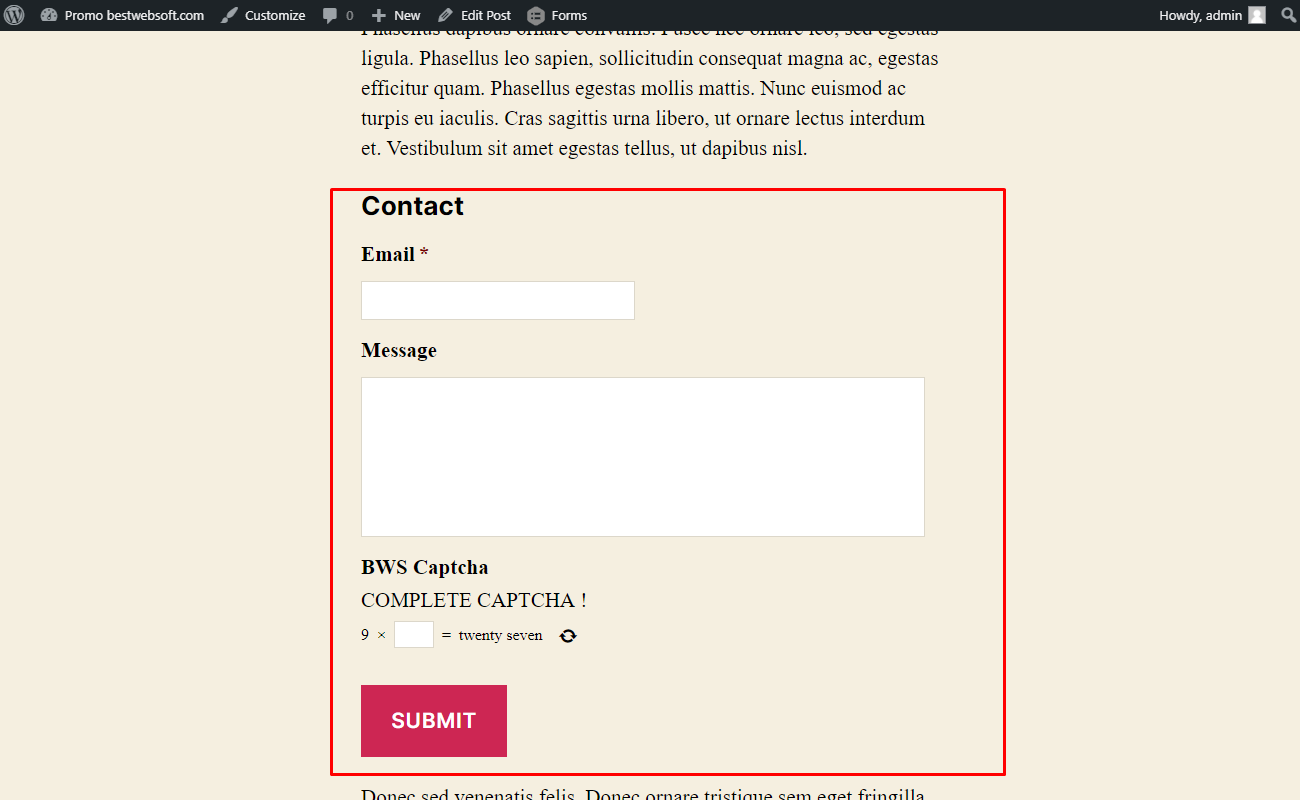
2.1.6.5. The Captcha field will appear at the chosen place. Click the “Update” button to save changes.

2.1.6.6. After saving changes “Gravity Form” with Captcha may look on a page as follows.
2.1.7. Jetpack Contact Form
Captcha by BestWebSoft is compatible with the “Jetpack Contact Form” plugin. Download the plugin by clicking the “Install Now” link in the “External Plugins” section.

2.1.7.1. After a successful download and activation of the plugin enable Captcha for the “Jetpack Contact Form”.

2.1.7.2. Open your post or page and click the “Add block” button, select the “Form” block.

2.1.7.3. The “Contact Form” will appear in the chosen place.

2.1.7.4. After saving changes “Jetpack Contact Form” with Captcha will look as follows.
2.1.8. MailChimp for WordPress
Captcha by BestWebSoft is compatible with the “MailChimp for WordPress” plugin. Download the plugin by clicking the “Install Now” link in the "External Plugins" section.

2.1.8.1. After a successful download and activation of the plugin enable Captcha for “MailChimp for WordPress”.
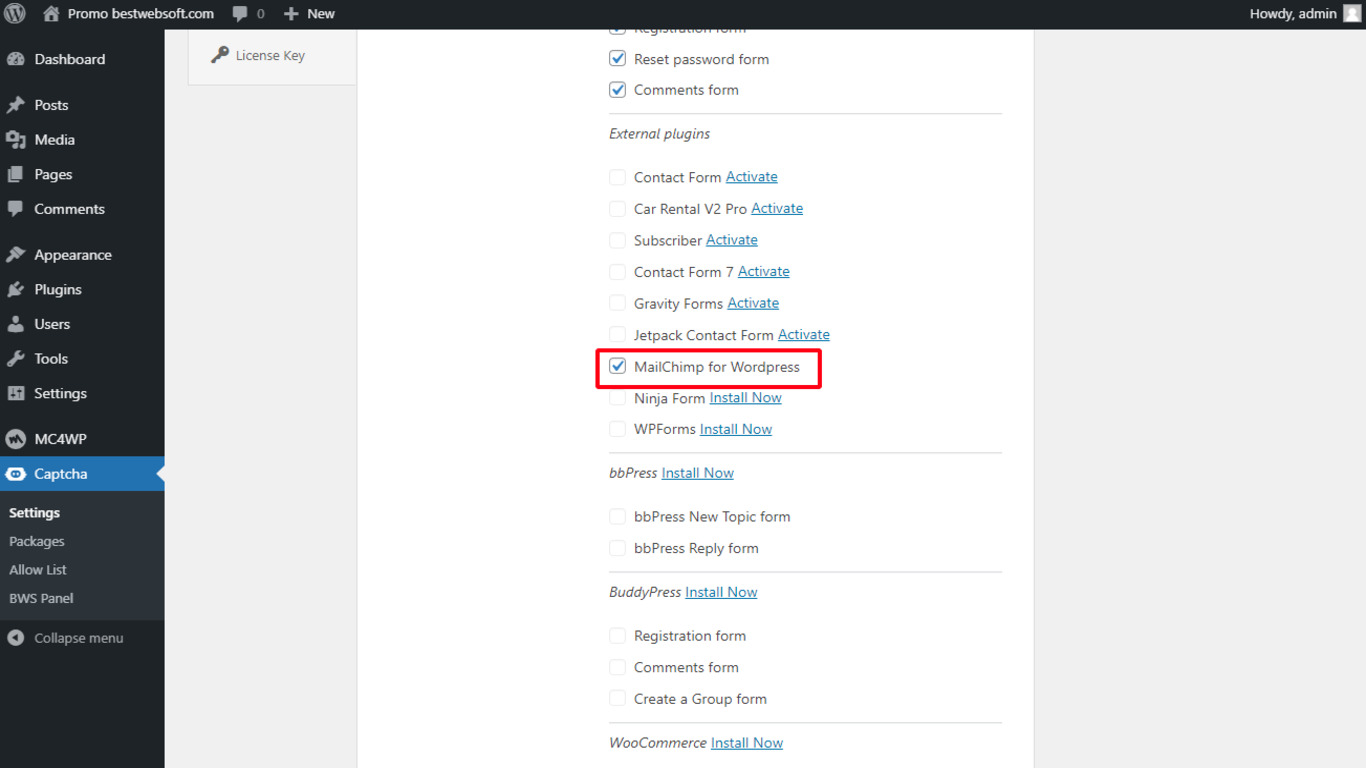
2.1.8.2. After saving changes “MailChimp” form with Captcha will look as follows.

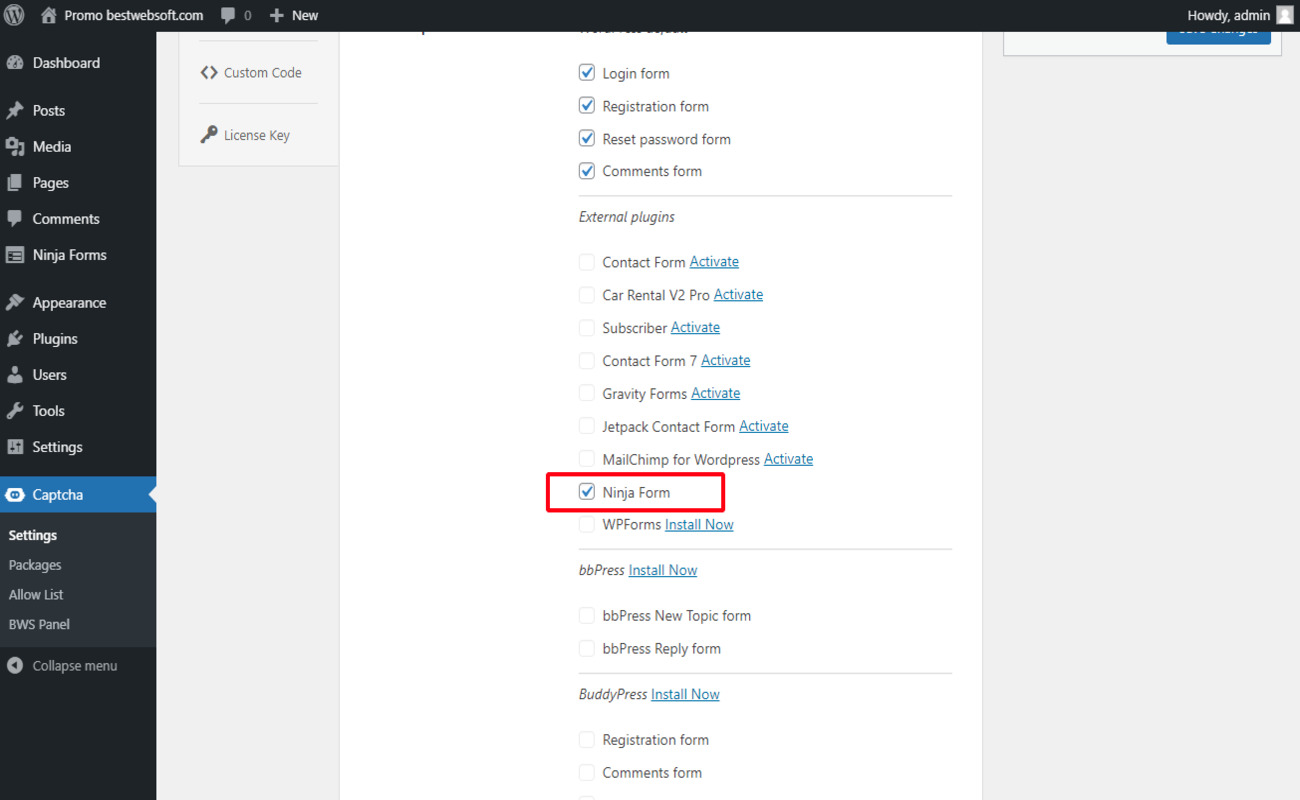
2.1.9. Ninja Forms
Captcha by BestWebSoft is compatible with the “Ninja Forms” plugin. Download the plugin by clicking the “Install Now” link in the “External Plugins” section.

2.1.9.1. After a successful download and activation of the “Ninja Forms” plugin enable Captcha for “Ninja Forms”.
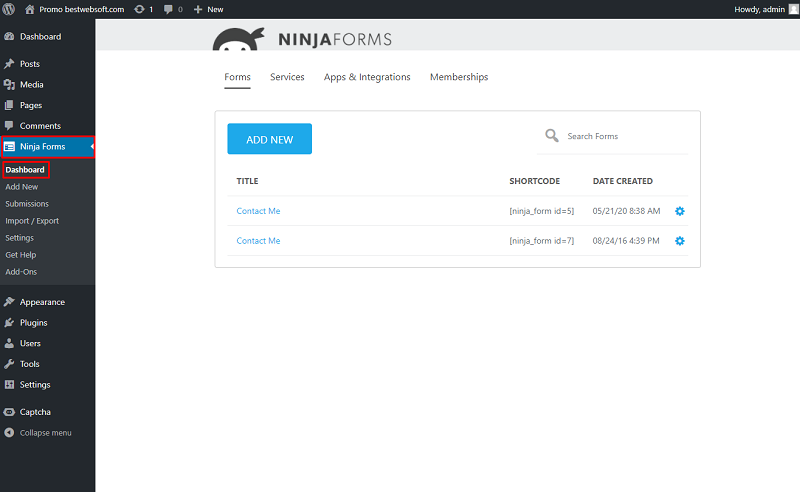
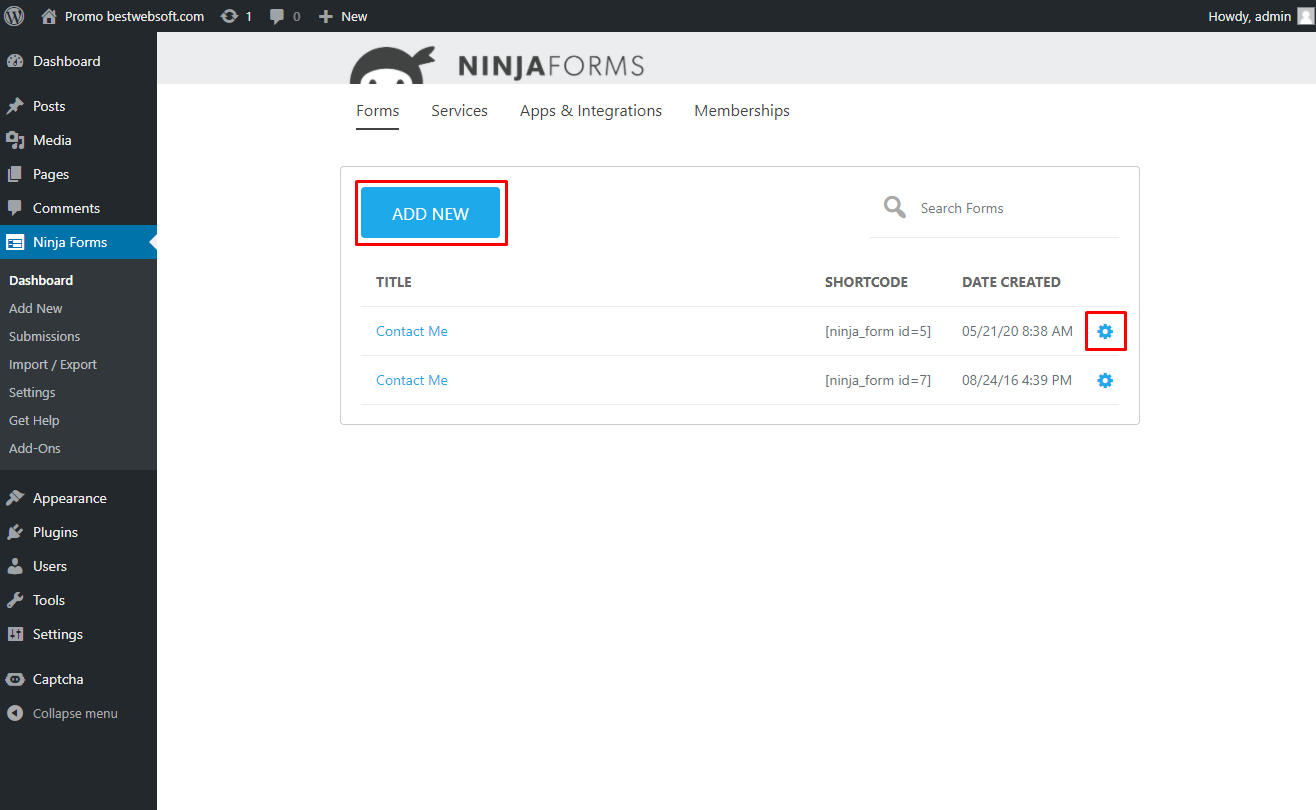
2.1.9.2. Open the “Ninja Forms” > “Dashboard” page.
2.1.9.3. Click the “Add New” button to create a new form or click the “Edit button” (Gear Button) to add Captcha to the form created before.
2.1.9.4. On the form edit page click the “Add New Field” button.
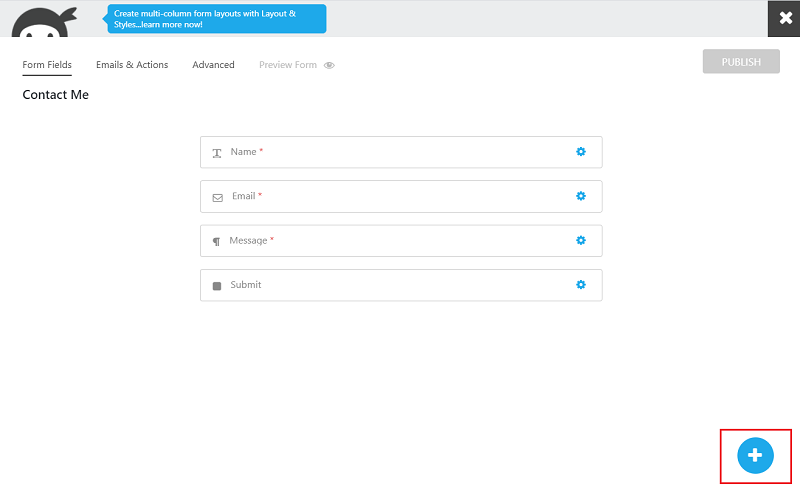
2.1.9.5. Drag and drop the “BWS Captcha” badge to the necessary place of the form and click the “Done” button.

2.1.9.6. After saving changes “Ninja Contact Form” with Captcha will look as follows.

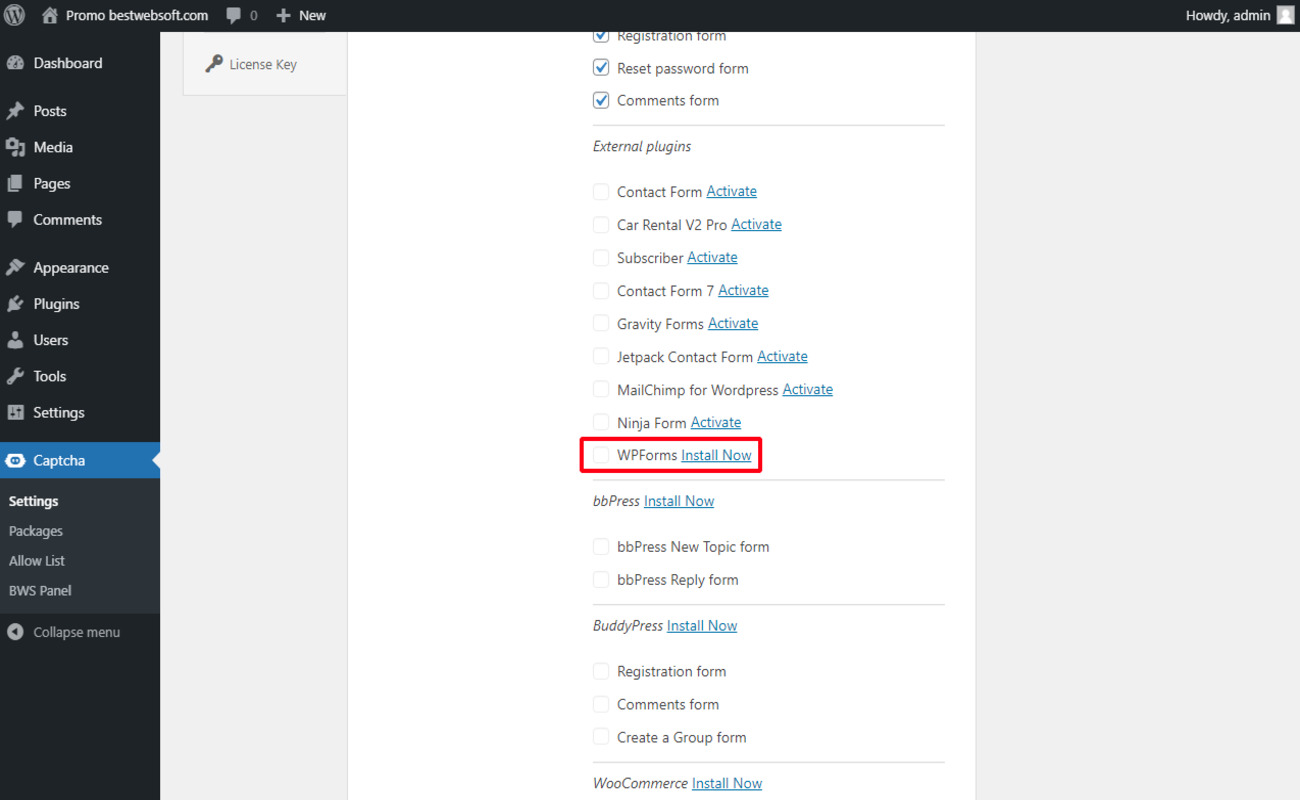
2.1.10. WPForms
Captcha by BestWebSoft is compatible with the “WPForms” plugin. Download the plugin by clicking the “Install Now” link in the “External Plugins” section.
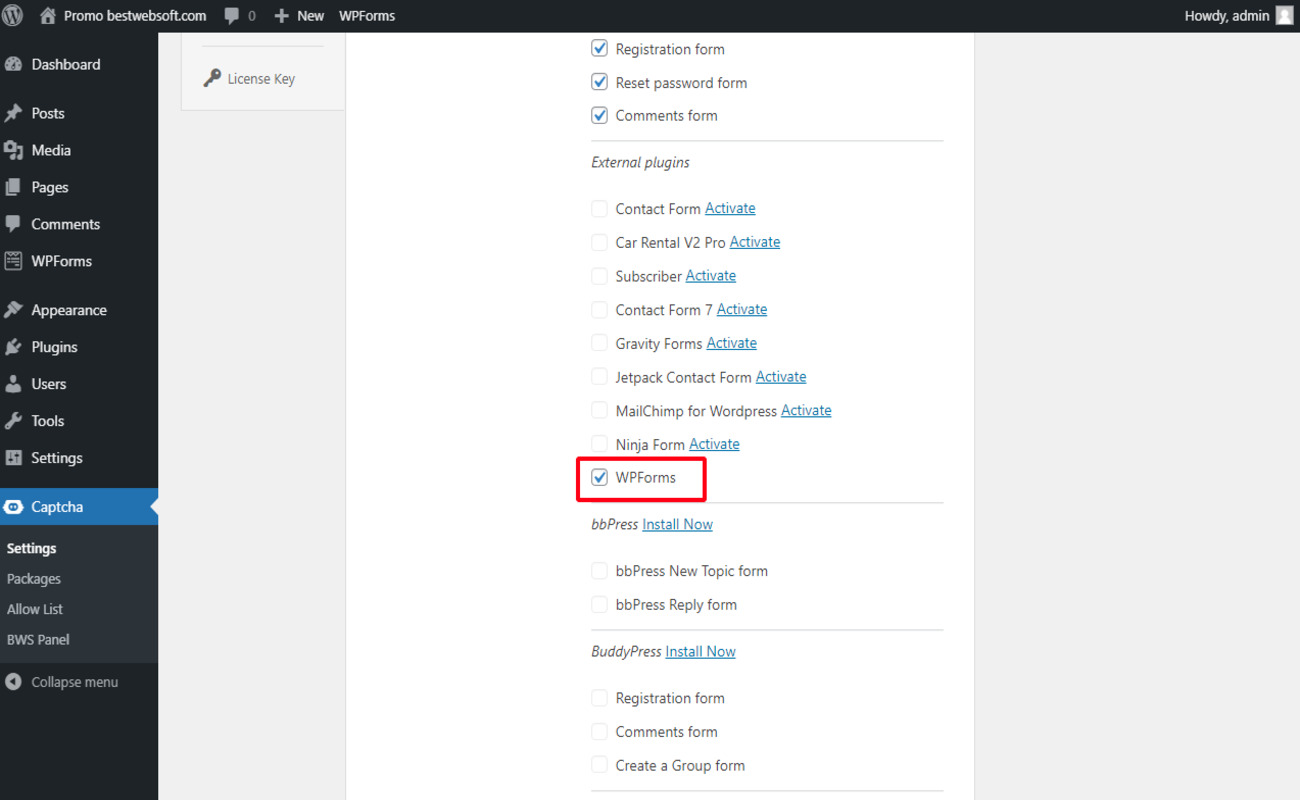
2.1.10.1. After a successful download and activation of the “WPForms” plugin enable Captcha for “WPForms”.
2.1.10.2. Open the “ All Forms” > “Forms” page.

2.1.10.3. Click the “Add New” button to create a new form or click the “Edit button” to add Captcha to the form created before.

2.1.10.4. Select any block for creating a form (for example, a “Simple Contact Form”) and click on the “Use Template” button.

2.1.10.5. Click the “BWS Captcha” badge on the “Standard Fields” section to add Captcha to the form.
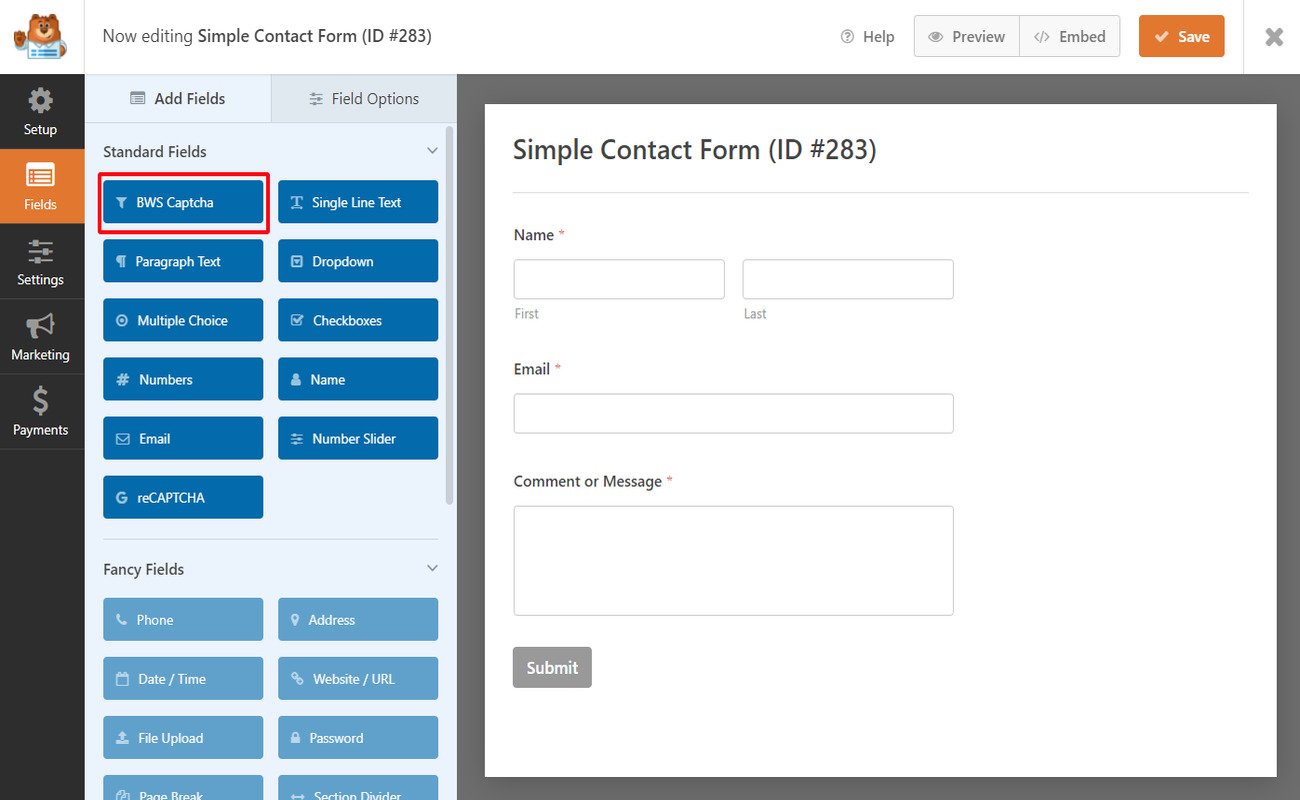
2.1.10.6. The Captcha field will appear at the chosen place. Click the “Save” button to save changes.

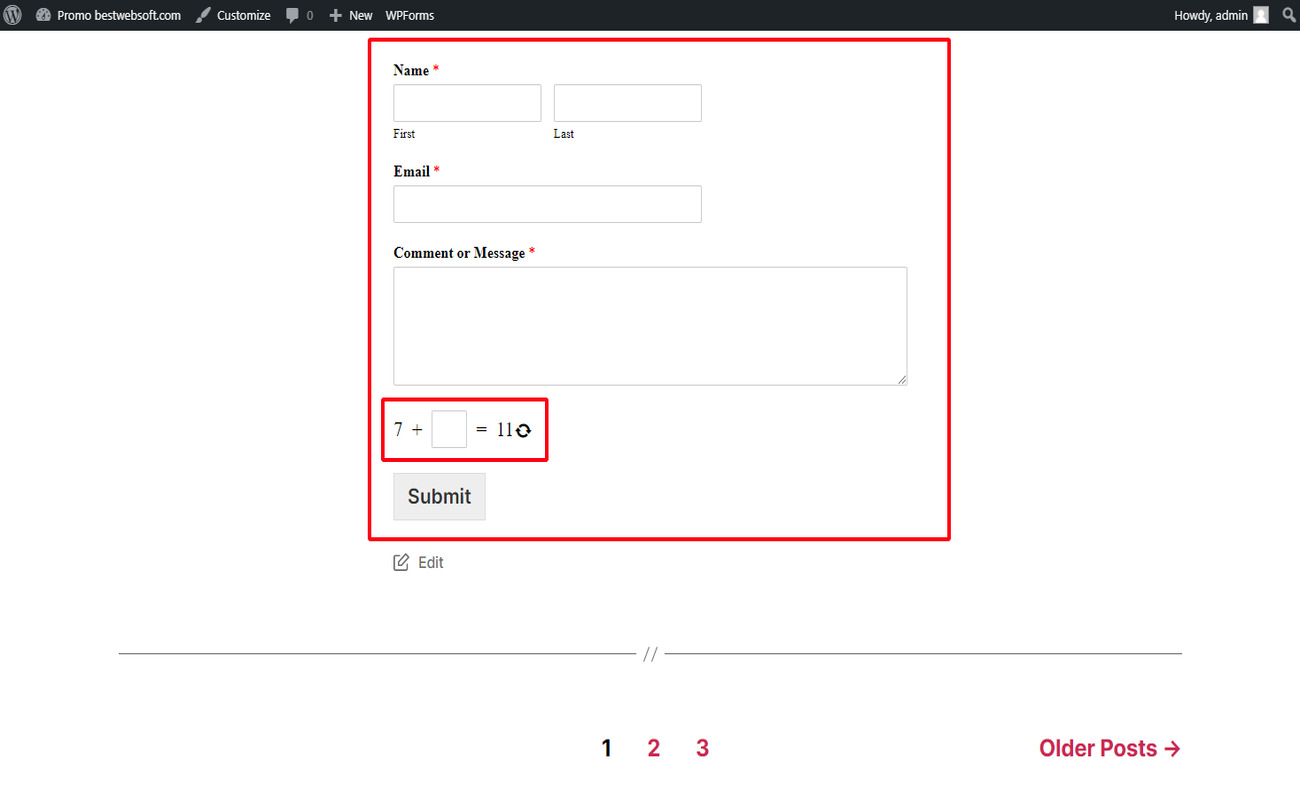
2.1.10.7. After saving changes “WPForms” with Captcha may look on a page as follows.
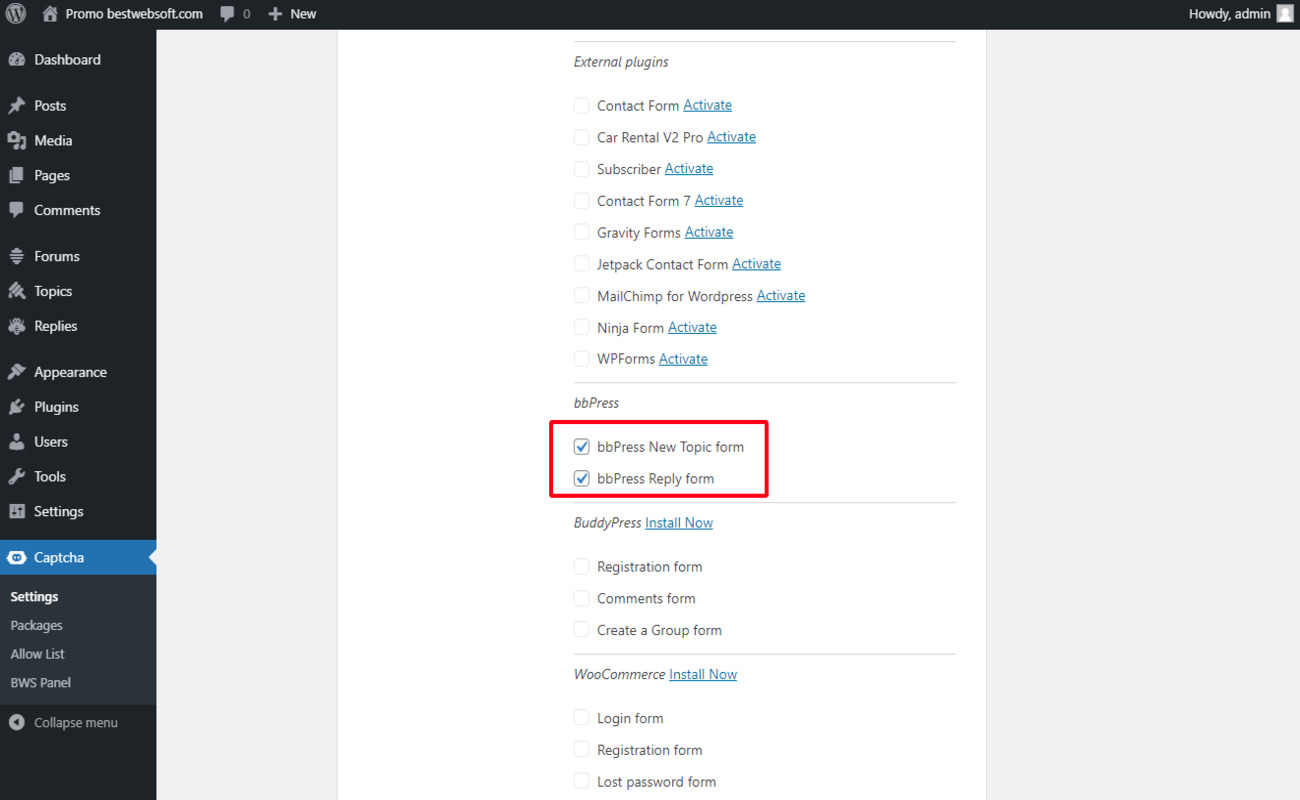
2.1.11. bbPress
Captcha by BestWebSoft is compatible with “bbPress”. You can download the plugin by clicking the “Install Now” link in the "bbPress" section.

2.1.11.1. After a successful download, activation and configuration of the “bbPress” plugin, enable the Captcha for the necessary forms.
2.1.11.2. After saving changes the “bbPress New Topic form” with Captcha will look as follows.

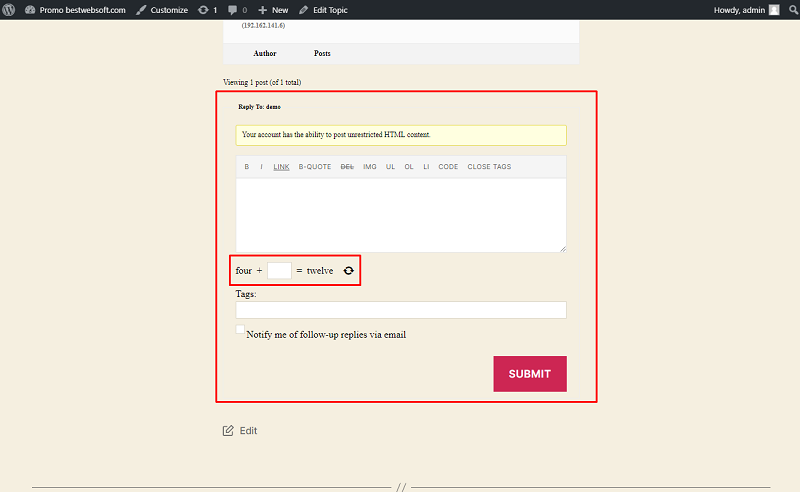
2.1.11.3. The “bbPress Reply form” with Captcha will look as follows.
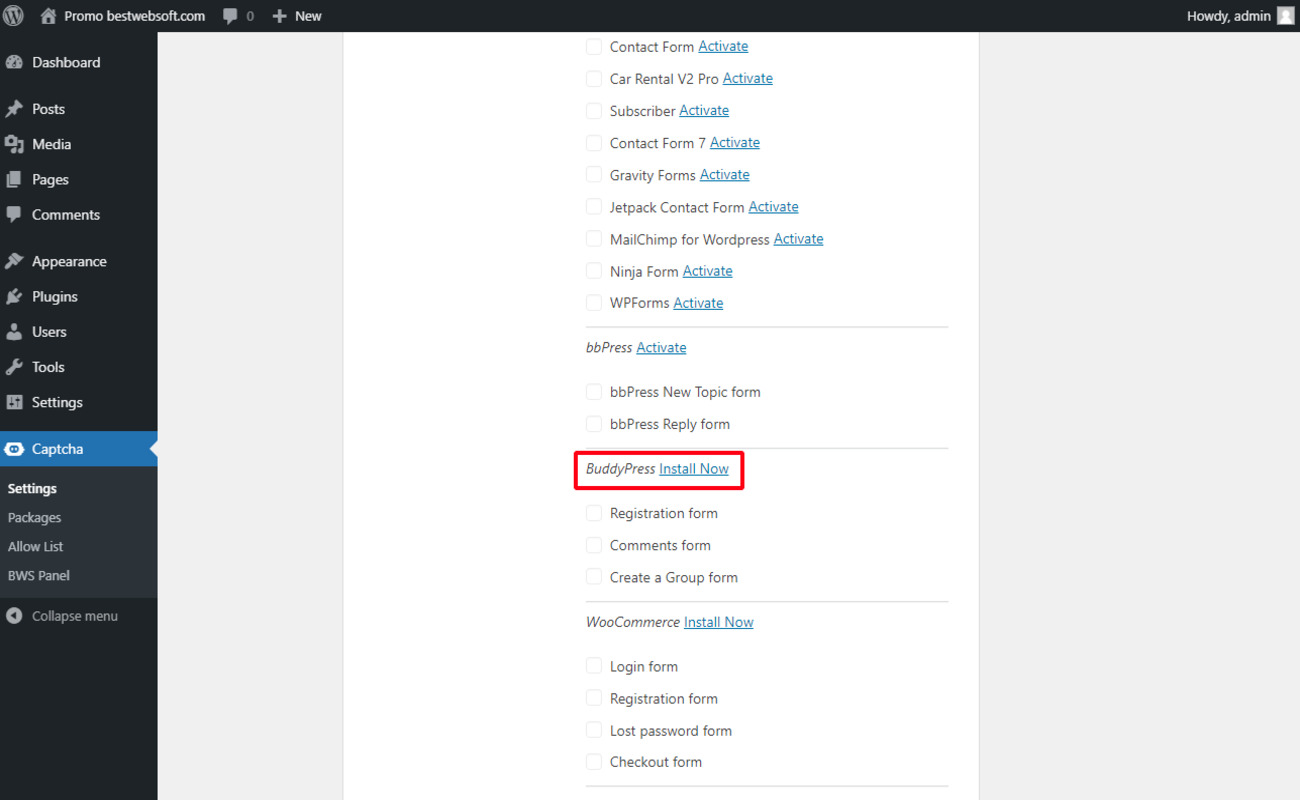
2.1.12. BuddyPress
Captcha by BestWebSoft is compatible with the “BuddyPress” plugin. Download the plugin by clicking the “Install Now” link in the "BuddyPress" section.
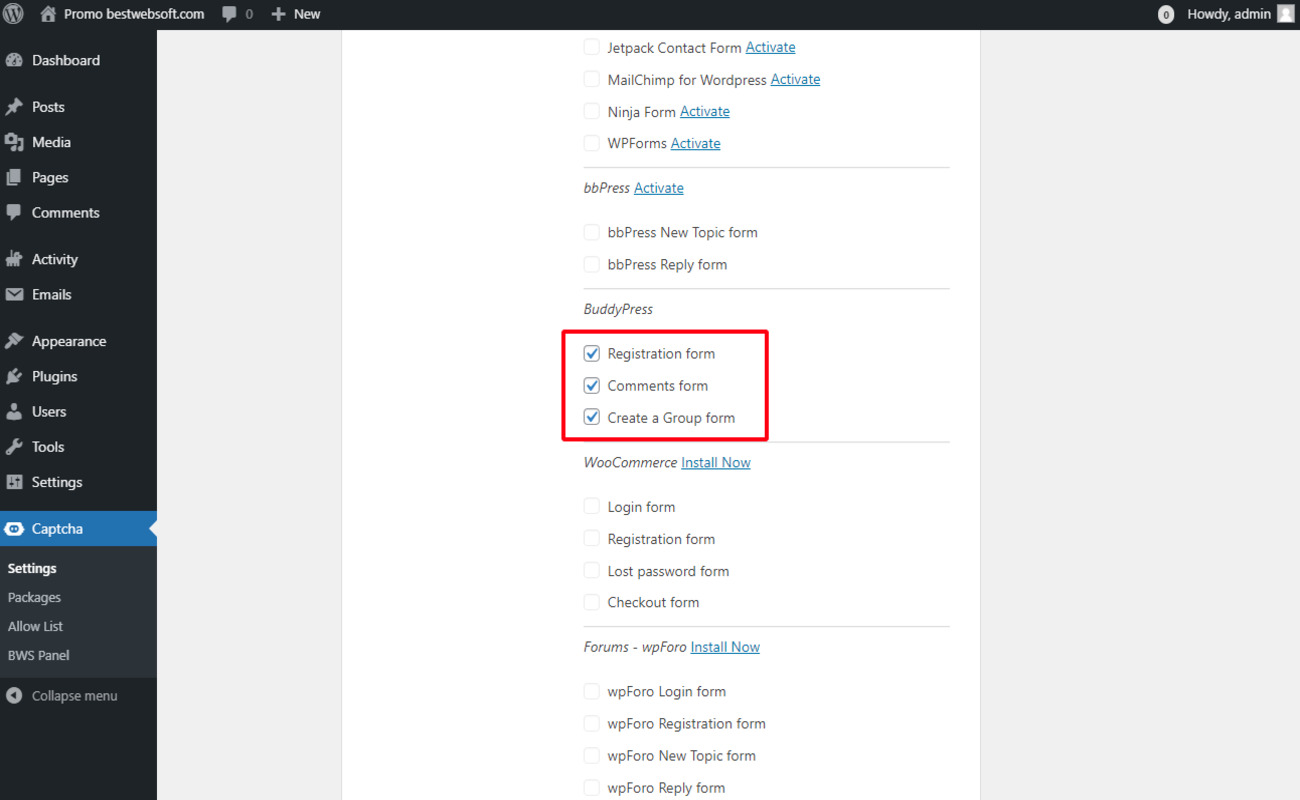
2.1.12.1. After a successful download, activation and configuration of the “BuddyPress” plugin enable Captcha for the necessary forms.
2.1.12.2. After saving changes the “BuddyPress Registration Form” with Captcha will look as follows.

2.1.12.3. The “BuddyPress Comments Form” with Captcha will look as follows.

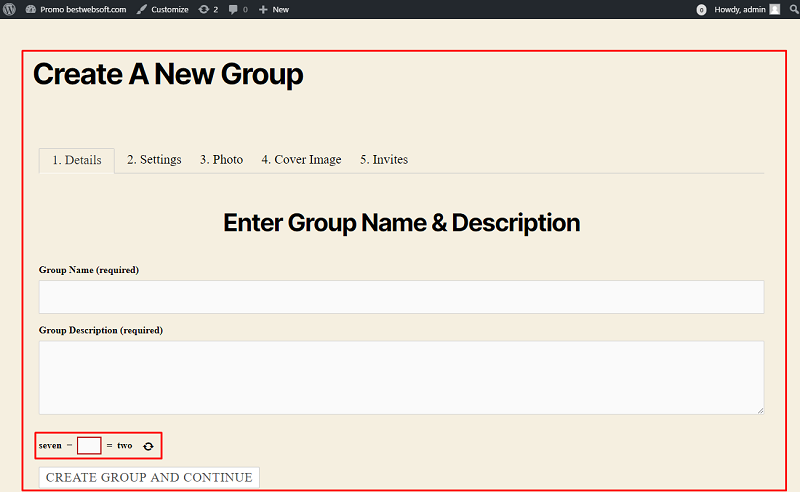
2.1.12.4. The “BuddyPress Add New Group Form” with Captcha will look as follows.
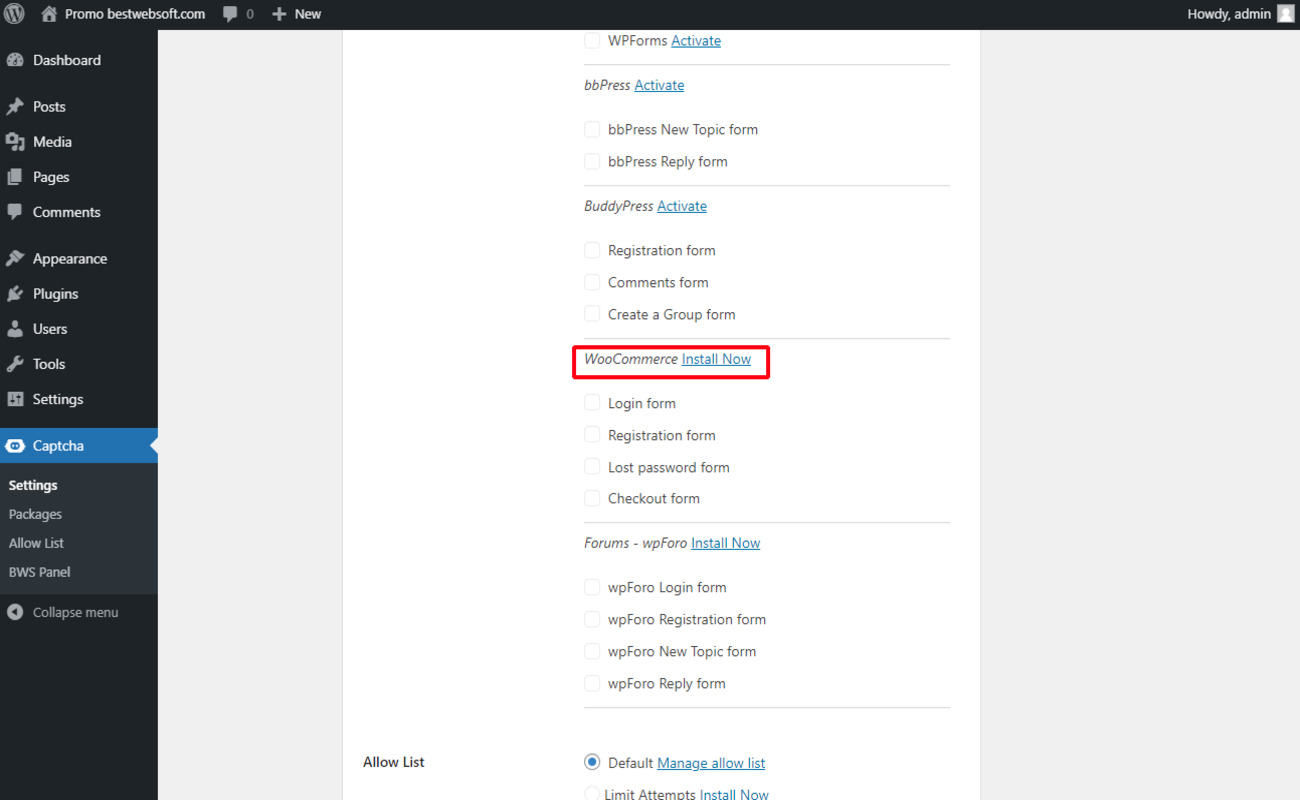
2.1.13. WooCommerce
Captcha by BestWebSoft is compatible with the “WooCommerce” plugin. You can download the plugin by clicking the “Install Now” link in the "WooCommerce" section.
2.1.13.1. After a successful download, activation and configuration of WooCommerce enable Captcha for the necessary forms.

2.1.13.2. The “WooCommerce Login” and “Registration Form” with Captcha will look as follows.

2.1.13.3. The “WooCommerce Reset password Form” with Captcha will look as follows.

2.1.13.4. The “WooCommerce Checkout Form” with Captcha will look as follows.

2.1.14. Forums - wpForo
Captcha by BestWebSoft is compatible with the “wpForo Forum” plugin. You can download the plugin by clicking the “Install Now” link in the “Forums - wpForo” section.

2.1.14.1. After a successful download, activation and configuration of the “wpForo Forum” plugin, enable Captcha for the necessary forms.
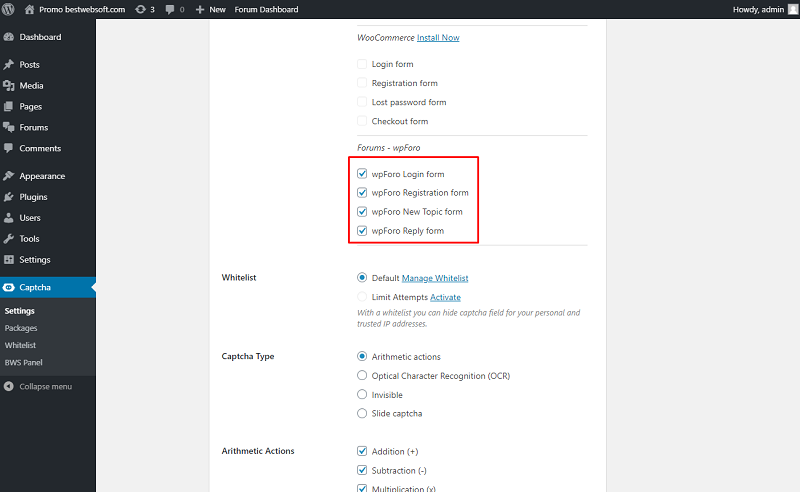
2.1.14.2. After saving changes the “wpForo Login Form” with Captcha will look as follows.

2.1.14.3. The “wpForo Registration Form” with Captcha will look as follows.

2.1.14.4. The “wpForo New Topic Form” with Captcha will look as follows.

2.1.14.5. The “wpForo Reply Form” with Captcha will look as follows.

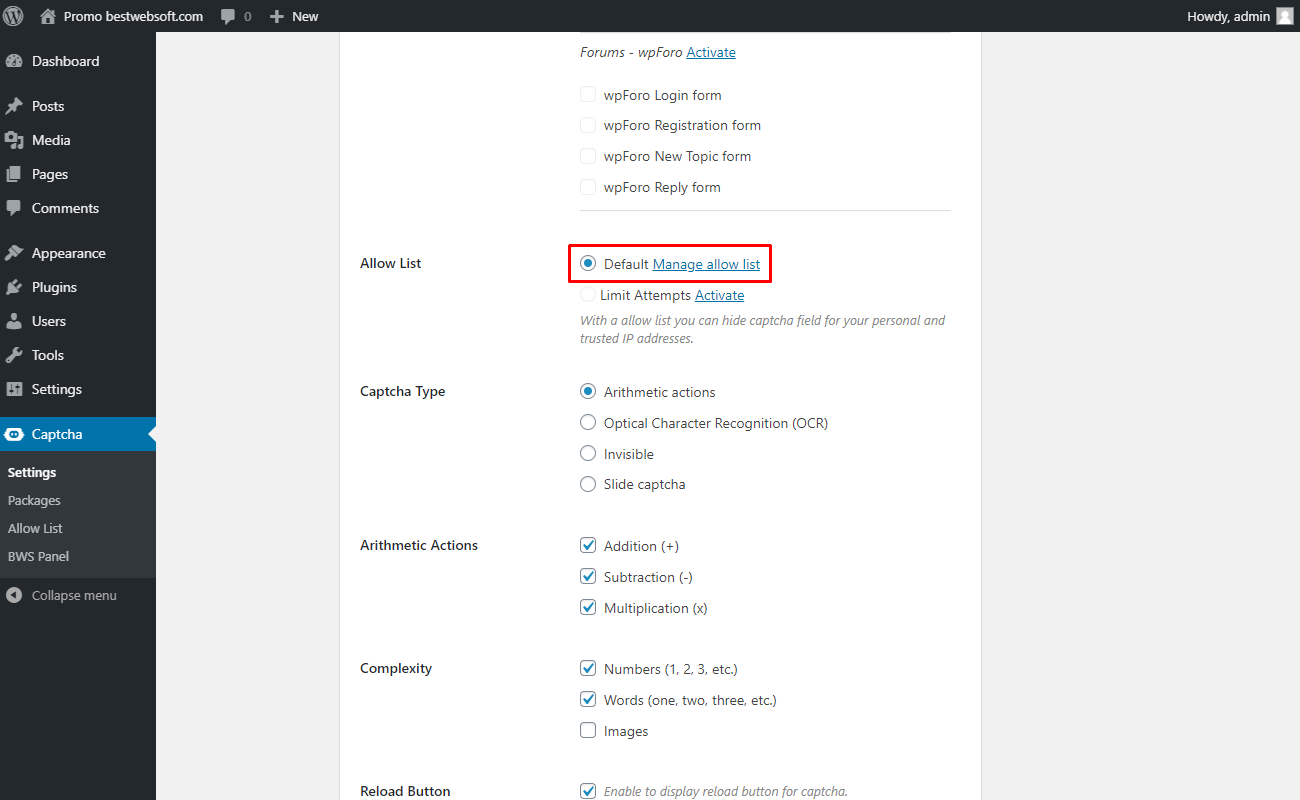
2.2. Allow List
Use the “Allow List” option to choose which allow list to use for hiding the Captcha field for your personal and trusted IP addresses.
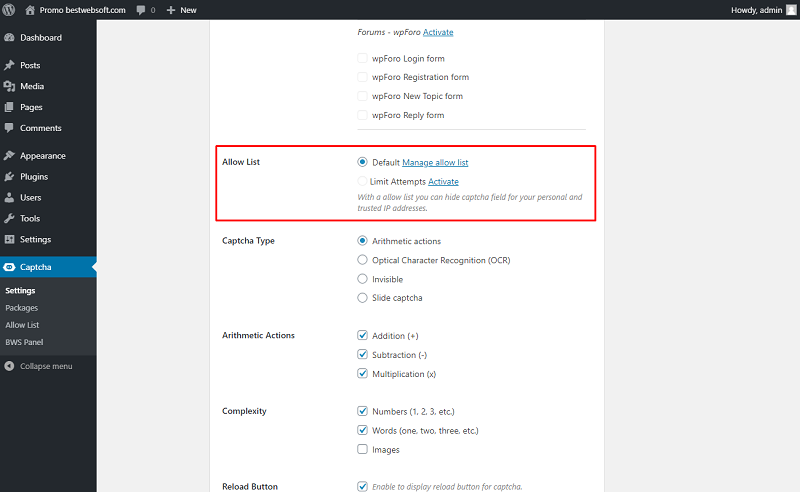
2.2.1. Choose “Default” to use the allow list with IP’s form Captcha plugin “Allow List” page. Click the “Manage allow list” to open the “Allow List” page.
2.2.2. Captcha by BestWebSoft is compatible with the “Limit Attempts by BestWebSoft” plugin. Download and install the plugin by clicking the “Install Now” link in the “Allow List” option.
You can download the Limit Attempts plugin here
https://bestwebsoft.com/products/wordpress/plugins/limit-attempts/
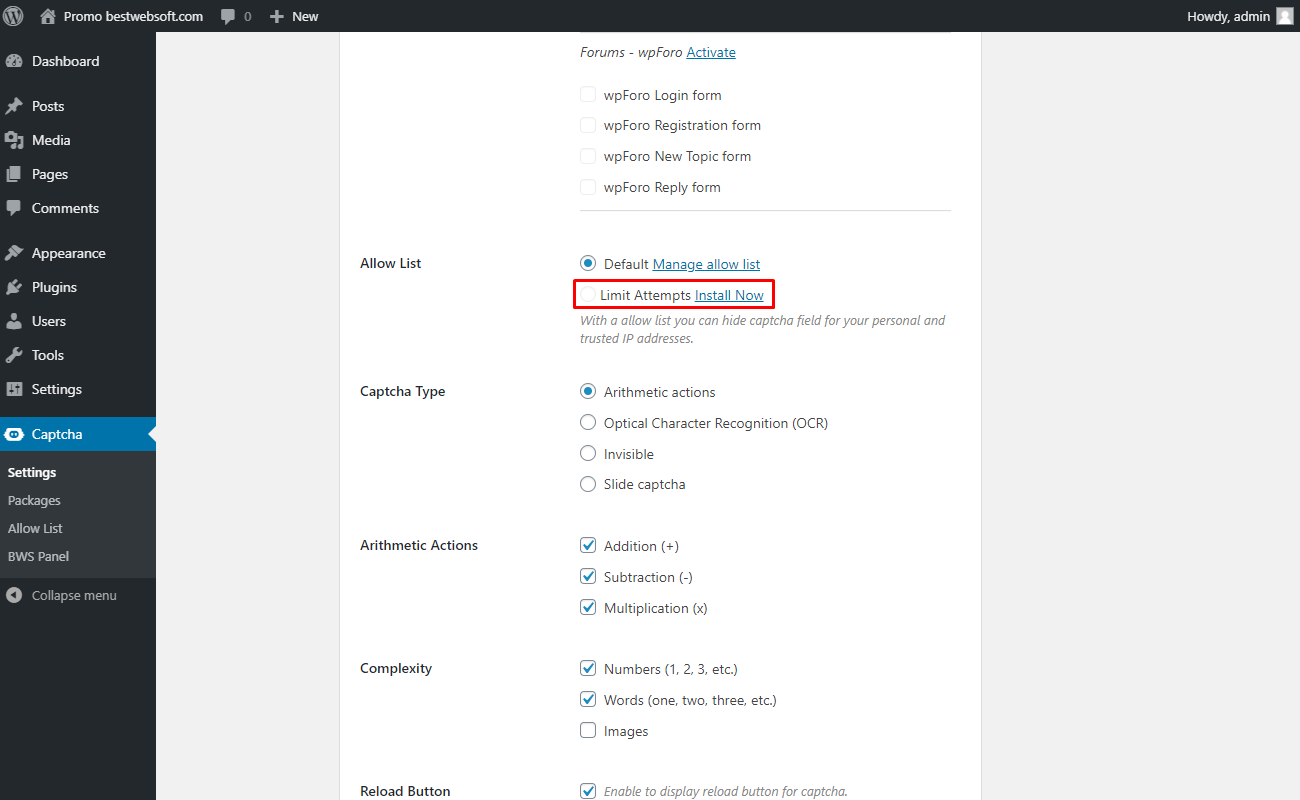
2.2.3. After a successful download and activation of the “Limit Attempts” plugin choose the “Limit Attempts” to use the “Allow List” from “Limit Attempts” plugin.
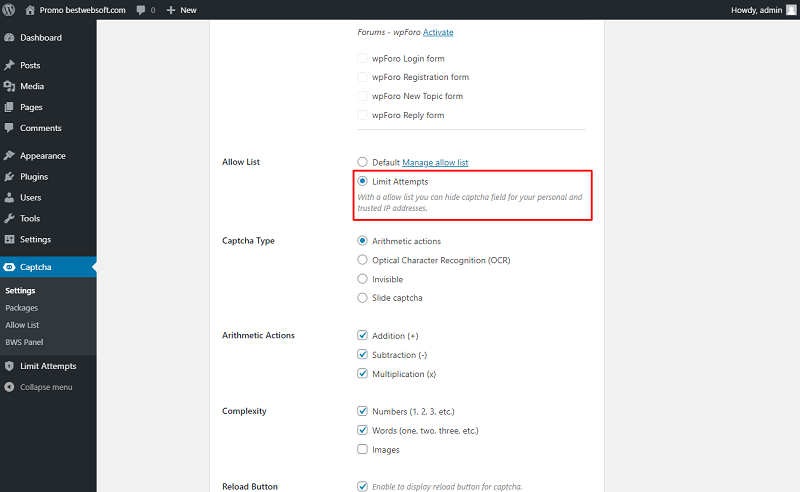
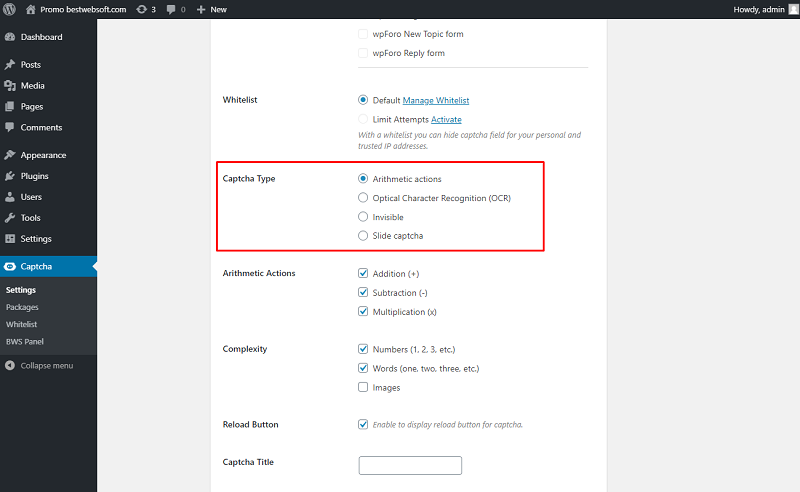
2.3. Captcha Type
Use the “Captcha Type” option to choose the type of displayed Captcha.
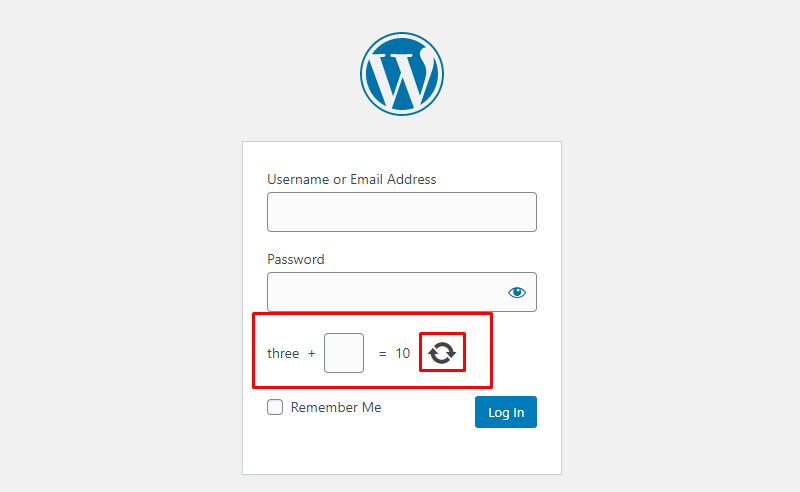
2.3.1. The “Arithmetic actions” Captcha type will look on a page as follows.

2.3.2. The “Optical Character Recognition (OCR)” Captcha type will look on a page as follows.
2.3.3. The “Invisible” Captcha type will look on a page as follows.
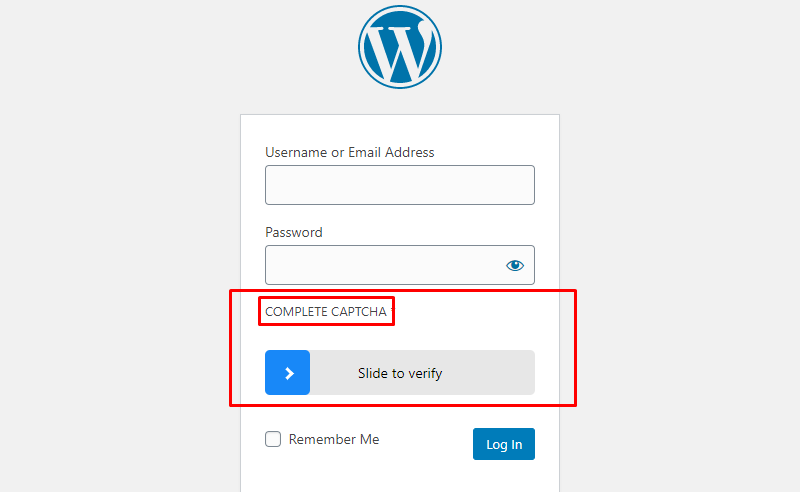
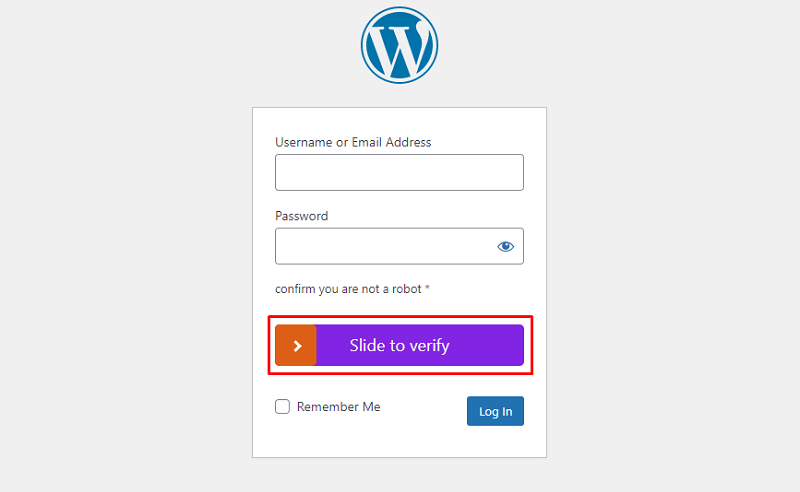
2.3.4. The “Slide captcha” Captcha type will look on a page as follows.

2.4. Arithmetic Actions
Note: This option is available only for “Arithmetic actions” Captcha type. |
Use the “Arithmetic Actions” option to select the actions that the user will need to perform to complete Captcha.

2.5. Complexity
Note: This option is available only for “Arithmetic actions” Captcha type. |
Use the “Complexity” option to select the character’s type that will be displayed in Captcha.

2.5.1. Captcha with numbers (1, 2, 3, etc.), words (one, two, three, etc.) and images enabled may look on a page as follows.

2.6. Image Packages
Note: This option is available only for “Arithmetic actions” and “Optical Character Recognition (OCR)” Captcha types. |
Use the “Image Packages” option to enable image packages that represent numbers for displaying in Captcha.

2.6.1. For example, Captcha with the “Roman” number image package will look as follows.

2.7. Use Several Image Packages At The Same Time
Note: This option is available only for “Arithmetic actions” and “Optical Character Recognition (OCR)” Captcha types. |
Enable the “Use Several Image Packages At The Same Time” to display several image packages in one Captcha attempt.
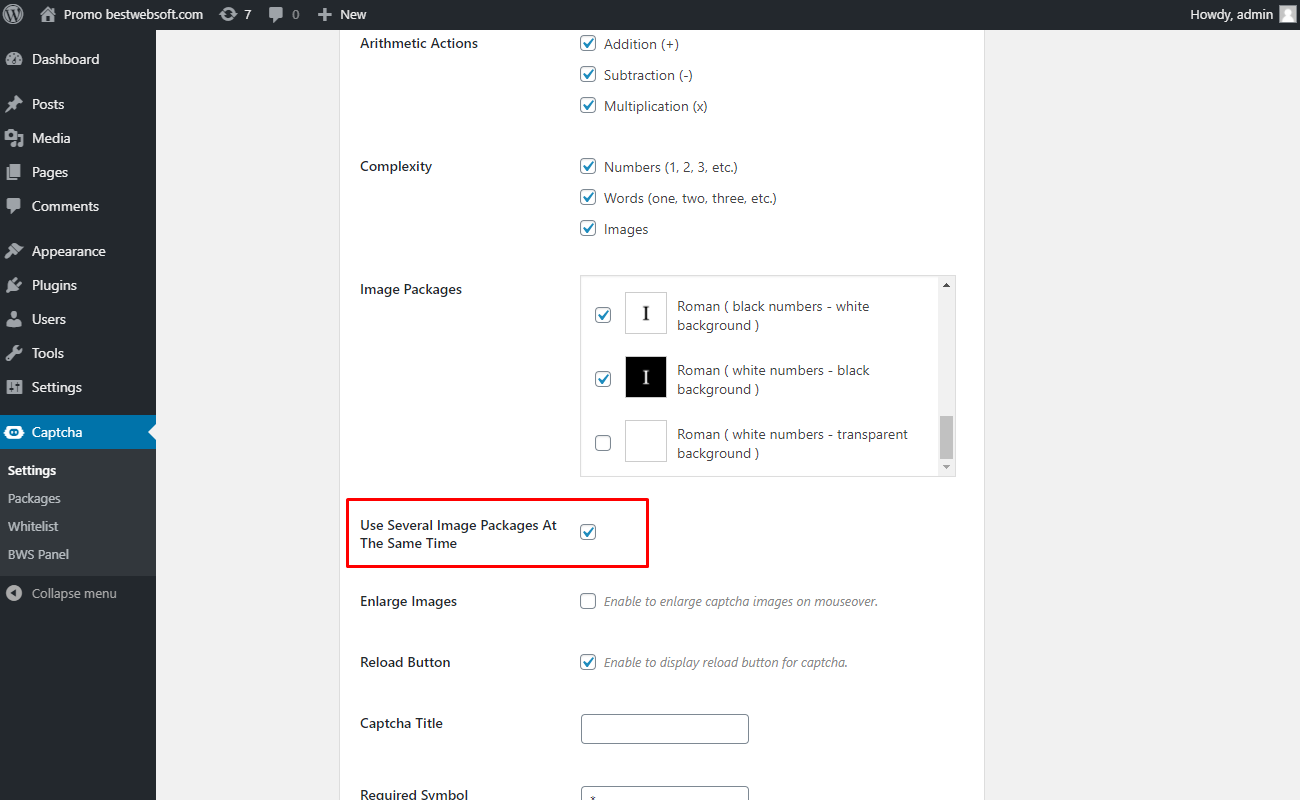
2.7.1. Captcha with several image packages enabled may look as follows.

2.8. Enlarge Images
Note: This option is available only for “Arithmetic actions” and “Optical Character Recognition (OCR)” Captcha types. |
Enable the “Enlarge Images” option to enlarge captcha images on mouseover.

2.8.1. Images with mouse hovered on will look in Captcha as follows.

2.9. Reload Button
Note: This option is available only for “Arithmetic actions” and “Optical Character Recognition (OCR)” Captcha types. |
Enable the “Reload Button” option to display the reload button for captcha.

2.9.1. When the reload button is enabled, Captcha will look on a page as follows.
2.9.2. When the reload button is disabled, Captcha will look on a page as follows.

2.10. Number Of Images
Note: This option is available only for “Optical Character Recognition (OCR)” Captcha types. |
Use the “Number Of Images” option to set a number of images to display simultaneously as a captcha question. Enter the necessary number in the appropriate box.

2.10.1. Captcha with 3 images will look on a page as follows.

2.11. Captcha Title
Use the “Captcha Title” option to change the title for the Captcha block. Enter the necessary title in the appropriate field.

2.11.1. Captcha with a custom title will look on a page as follows.
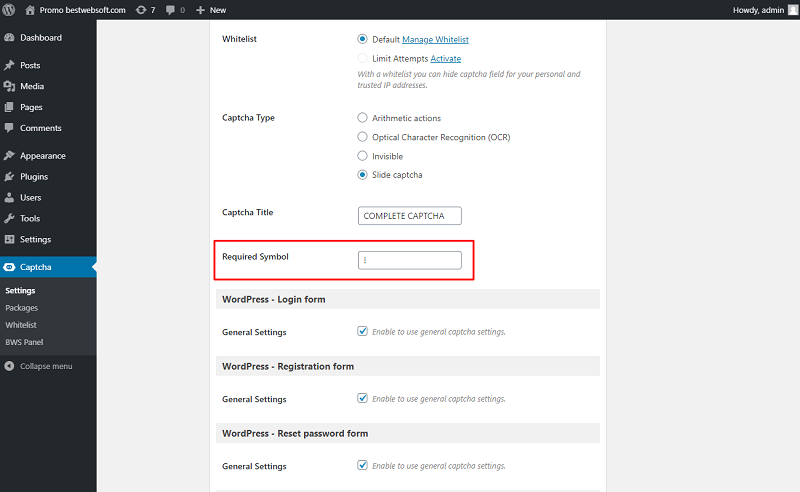
2.12. Required Symbol
Use the “Required Symbol” option to change the symbol near the title. The default symbol is “*”. Enter the necessary symbol in the appropriate field.
2.11.1. Captcha with the customized required symbol will look on a page as follows.

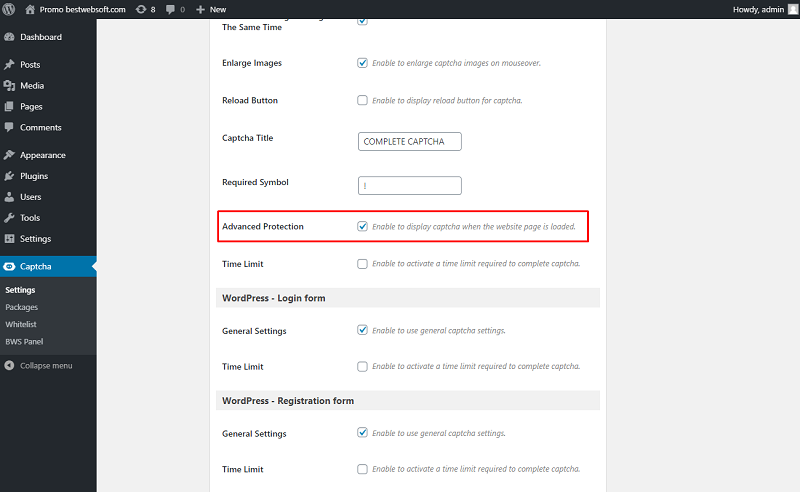
2.13. Advanced Protection
Enable the “Advanced Protection” option to display captcha when the website page is completely loaded.
2.14. Time Limit
Enable the “Time Limit” option to activate a time limit required to complete the captcha.

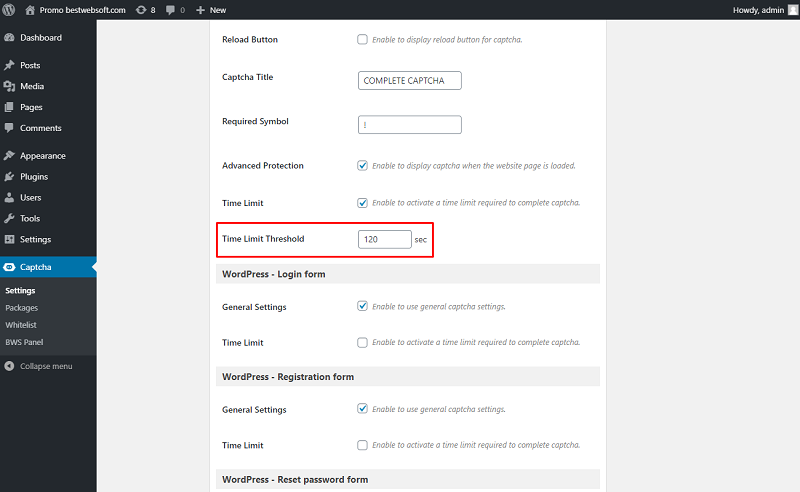
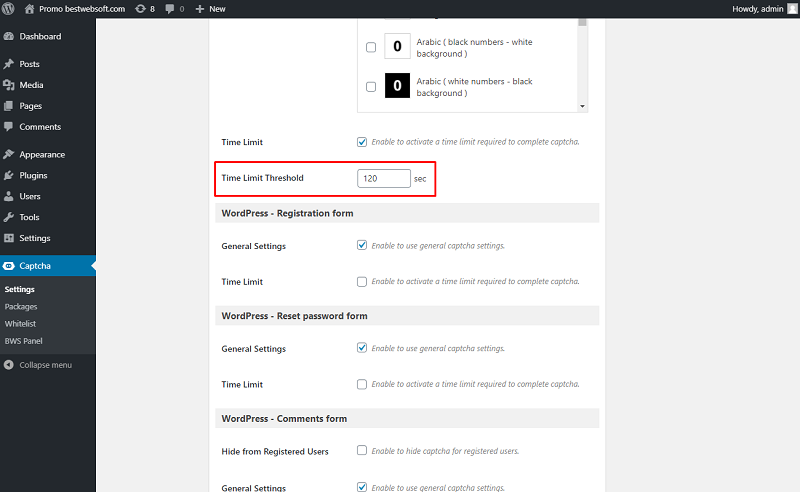
2.15. Time Limit Threshold
Use the “Time Limit Threshold” option to set the captcha entering time limitation in seconds.
Note: Value must be greater than or equal to 10. |
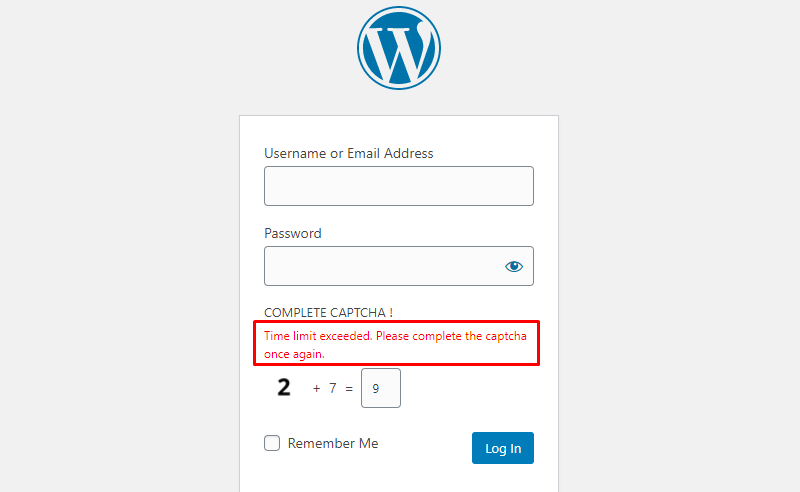
2.15.1. The notification about the captcha exceeded time limit may look on a page as follows.
2.16. Slide Captcha Appearance
Note: The following options are available only for “Slide captcha” Captcha type. |
Use the “Slider Color”, “Successfull Slider Color”, “Slide Container Color”, “Slide Title Color” and “Slide Title Size” options to customize the “Slide captcha” appearance.

2.16.1. After saving changes the “Slide captcha” with customized colors and title size may look as follows.
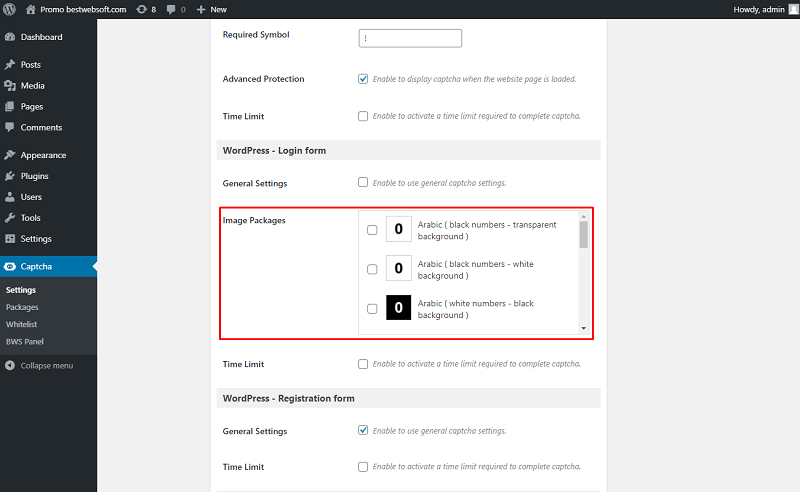
2.17. WordPress - Login Form Settings
Use the options of the “WordPress - Login form” section to change the appearance particularly for login from.

2.17.1. General Settings
Enable the “General Settings” option to use general captcha settings for WordPress Login form.

2.17.1.1. If this option is disabled you will be able to enable image packages that could be different from the packages from the general settings section.

2.17.2. Image Packages
Use the “Image Packages” option to enable image packages that represent numbers for displaying in Captcha on the WordPress login form.
2.17.3. Time Limit
Enable the “Time Limit” option to activate a time limit required to complete the captcha on the WordPress login form.
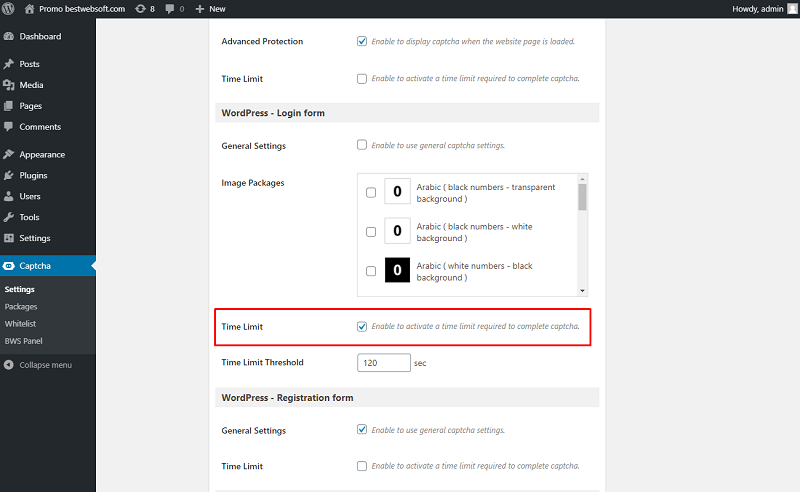
2.17.4. Time Limit Threshold
Use the “Time Limit Threshold” option to set the captcha entering time limitation in seconds on the WordPress login form.
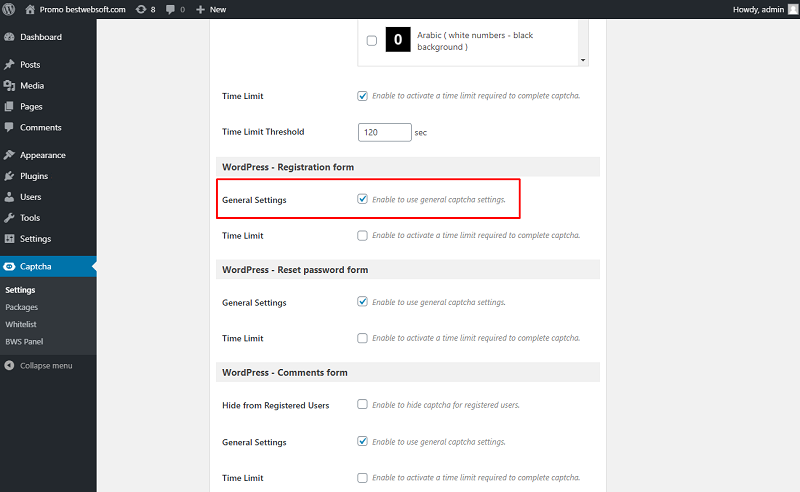
2.18. WordPress - Registration Form
Use the options of the “WordPress - Registration Form” section to change the appearance particularly for registration form.
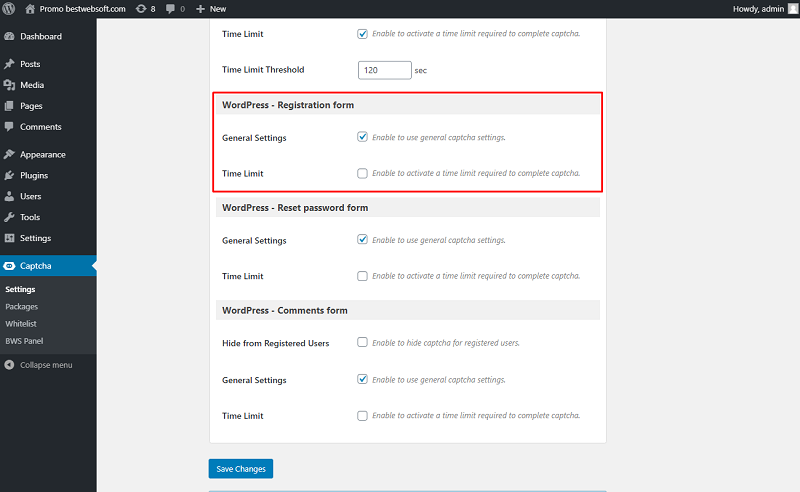
2.18.1. General Settings
Enable the “General Settings” option to use general captcha settings for the WordPress registration form.
2.18.1.1. If this option is disabled you will be able to enable image packages that could be different from the packages from the general settings section.

2.18.2. Image Packages
Use the “Image Packages” option to enable image packages that represent numbers for displaying in Captcha on the WordPress registration form.

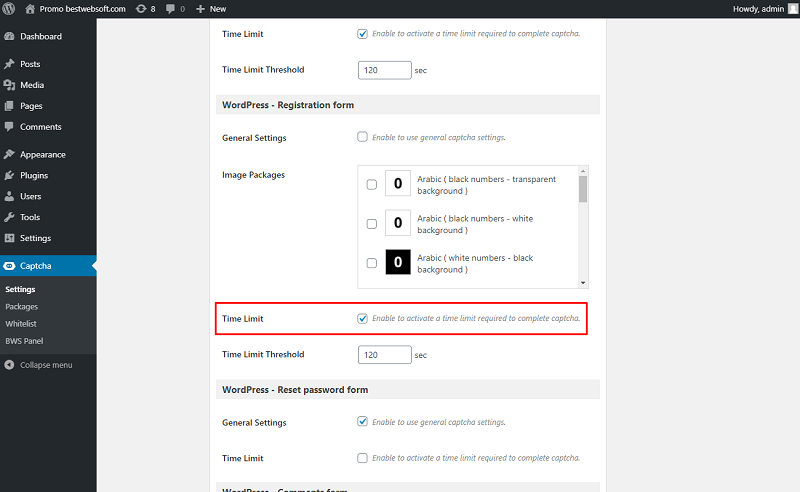
2.18.3. Time Limit
Enable the “Time Limit” option to activate a time limit required to complete the captcha on the WordPress registration form.
2.18.4. Time Limit Threshold
Use the “Time Limit Threshold” option to set the captcha entering time limitation in seconds on the WordPress registration form.

2.19. WordPress - Reset Password Form
Use the options of the “WordPress - Reset password form” section to change the appearance particularly for reset password form.

2.19.1. General Settings
Enable the “General Settings” option to use general captcha settings for the WordPress reset password form.

2.19.1.1. If this option is disabled you will be able to enable image packages that could be different from the packages from the general settings section.

2.19.2. Image Packages
Use the “Image Packages” option to enable image packages that represent numbers for displaying in Captcha on the WordPress reset password form.

2.19.3. Time Limit
Enable the “Time Limit” option to activate a time limit required to complete the captcha on the WordPress reset password form.

2.19.4. Time Limit Threshold
Use the “Time Limit Threshold” option to set the captcha entering time limitation in seconds on the WordPress reset password form.

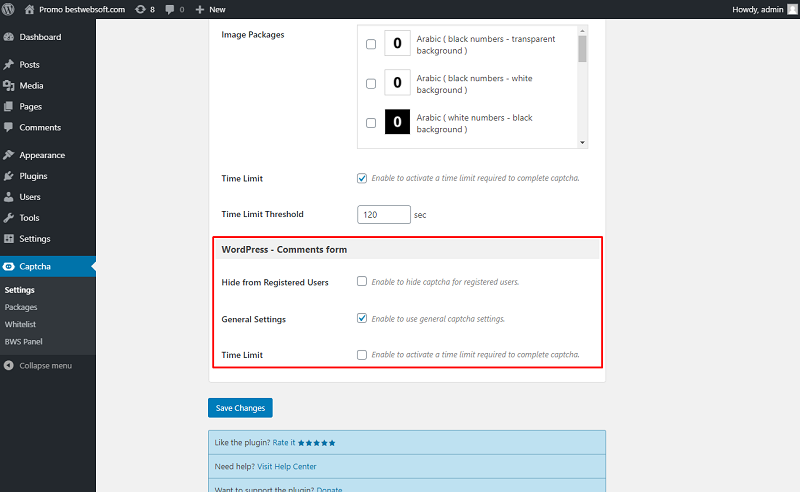
2.20. WordPress - Comments Form
Use the options of the “WordPress - Comments form” section to change the appearance particularly for reset comments form.
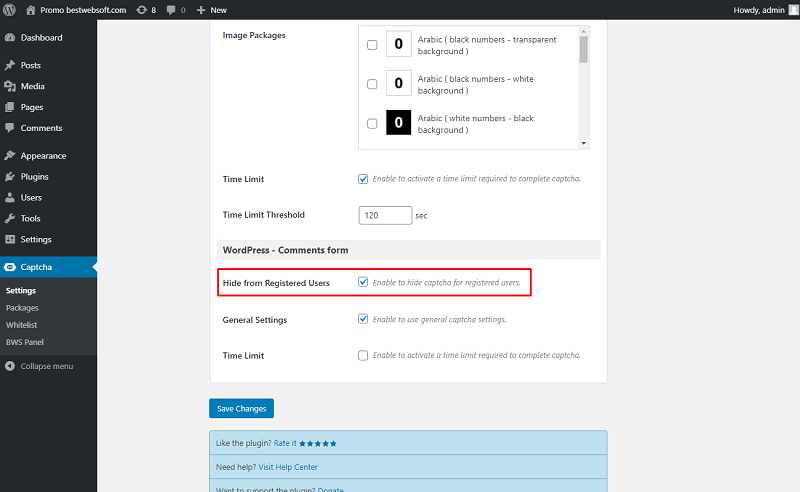
2.20.1. Hide from Registered Users
Enable the “Hide from Registered Users” option to hide captcha for registered users for the WordPress reset comments form.
2.20.2. General Settings
Enable the “General Settings” option to use general captcha settings for the WordPress reset comments form.

2.20.2.1. If this option is disabled you will be able to enable image packages that could be different from the packages from the general settings section.

2.20.3. Image Packages
Use the “Image Packages” option to enable image packages that represent numbers for displaying in Captcha on the WordPress reset comments form.

2.20.4. Time Limit
Enable the “Time Limit” option to activate a time limit required to complete the captcha on the WordPress reset comments form.

2.20.5. Time Limit Threshold
Use the “Time Limit Threshold” option to set the captcha entering time limitation in seconds on the WordPress reset comments form.

3. Messages
Use the options of the “Messages” tab to customize the text of the notification messages.
3.1. Captcha Field is Empty
Use the “Captcha Field is Empty” option to change the text displayed when the user has not completed the captcha.

3.1.1. A customized message when the captcha field is empty may look on a page as follows.

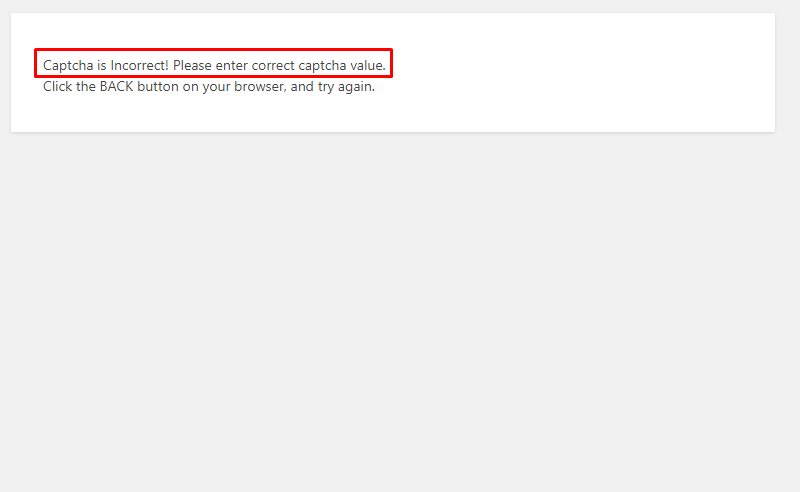
3.2. Captcha is Incorrect
Use the “Captcha is Incorrect” option to change the text displayed when the user has entered incorrect captcha value.
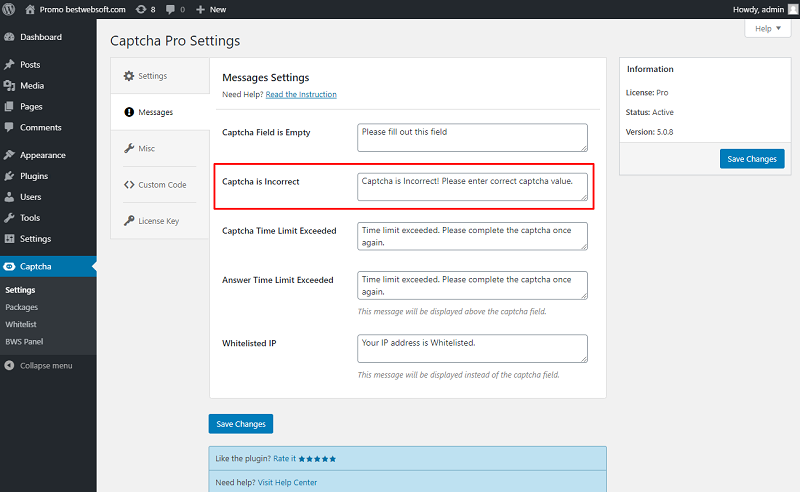
3.2.1. A customized message when the captcha is incorrect may look on a page as follows.
3.3. Captcha Time Limit Exceeded
Use the “Captcha Time Limit Exceeded” option to change the text displayed when the user has tried to send the form but the captcha time limit was exceeded.
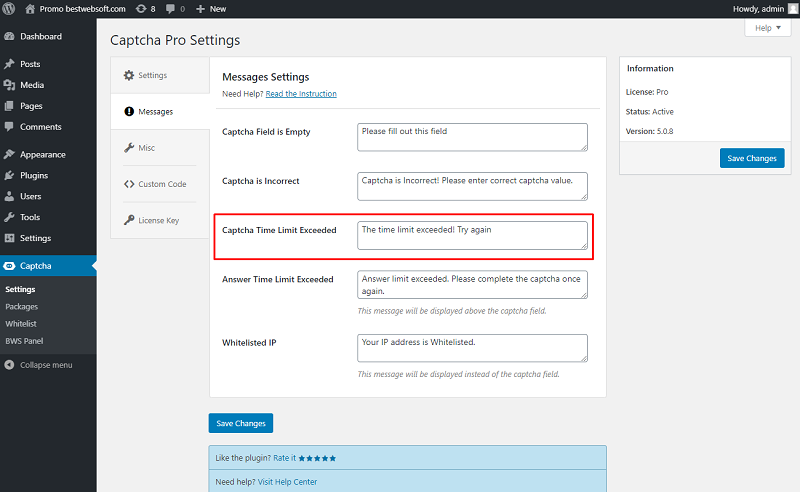
3.3.1. A customized message when the captcha time limit exceeded may look on a page as follows.

3.4. Answer Time Limit Exceeded
Use the “Answer Time Limit Exceeded” option to change the text displayed when the user enters captcha for longer than the specified time.
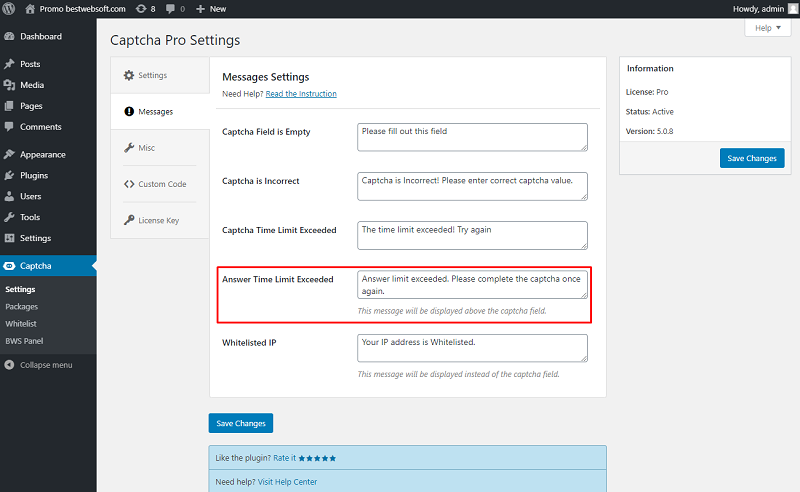
3.4.1. A customized message when the answer time limit exceeded may look on a page as follows.

3.5. Allow Listed IP
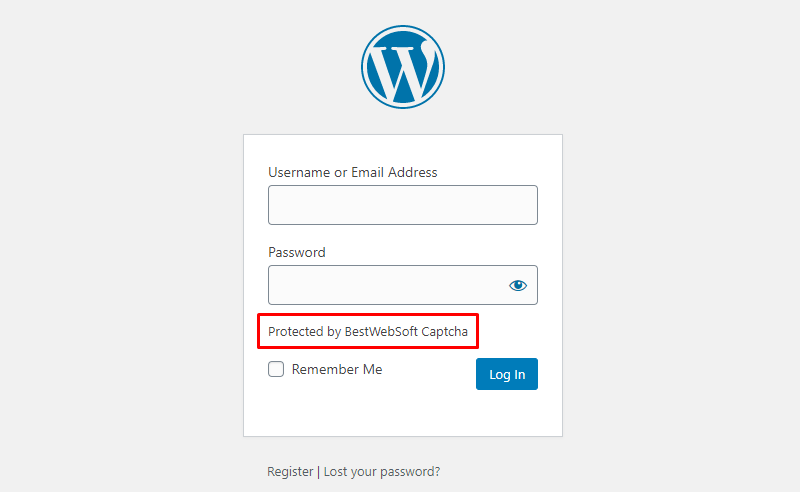
Use the “Allow Listed IP” option to change the text displayed instead of Captcha for the allowlisted IP addresses.

3.5.1. A customized message when the users IP added to the allow list may look on a page as follows.
4. Miscellaneous Settings
Use the options of the “Miscellaneous Settings” tab to make the settings regarding the track usage and default settings.
4.1. Track Usage
Enable the “Track Usage” option to allow tracking plugin usage anonymously.

4.2. Default Settings
Click the “Restore Settings” button to reset all the settings made previously and revert them to the default ones.

4.2.1. Click the “Yes, restore all settings” button to confirm the procedure.

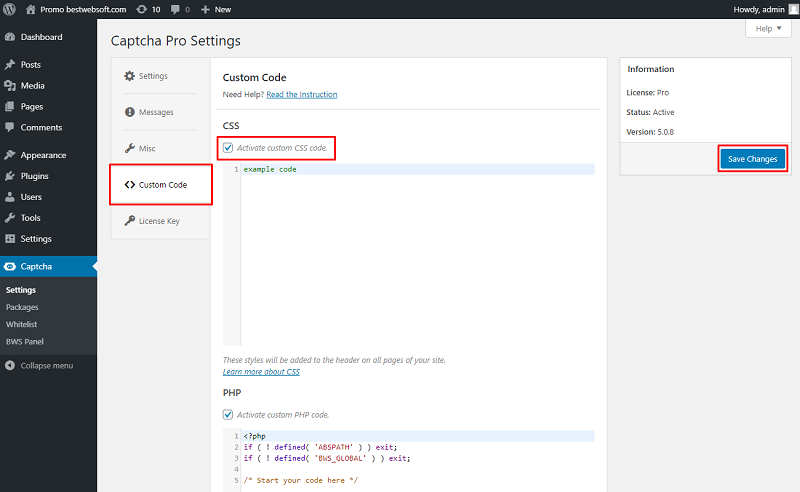
5. Custom Code
Use the “Custom code” tab to insert a CSS, PHP or JavaScript code. To activate a custom code, enable the “Activate custom … code” option and save changes.
6. License Key
Use the “License Key” tab to activate or check the Pro plugin license.
6.1. Pro License
After a successful plugin purchase, you will receive an email notification with a download link and a license key. Activate Pro license by pasting a license key into the “Captcha Pro License” field and clicking the “Save Changes” button.

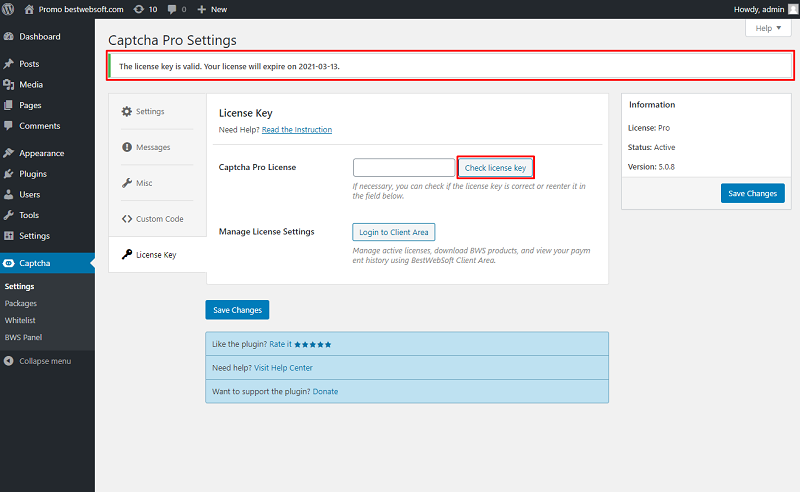
6.2. Check License Key
To check the license key, click the “Check license key” button. If the entered key is correct, the notification “The license key is valid. Your license will expire on XXXX-XX-XX” will be displayed in the upper left corner of the page.
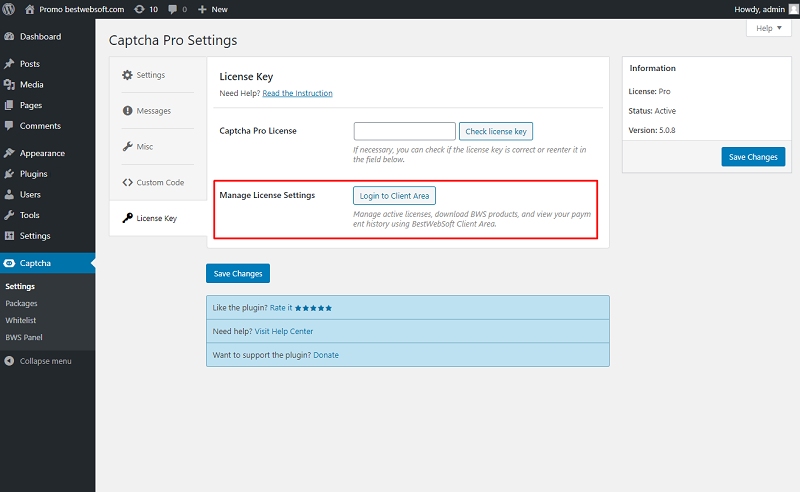
6.3. Manage License Settings
Use the “Manage License Settings” option to change your license settings. Click the “Login to Client Area” button to open your personal Client Area dashboard located on the https://bestwebsoft.com/ website. Browse and download purchased products, change the license domain and copy the license keys.
7. Packages
Use the “Packages” page to add and manage image packages for Captcha.

7.1. Click the “Add New” button to upload new images packages.

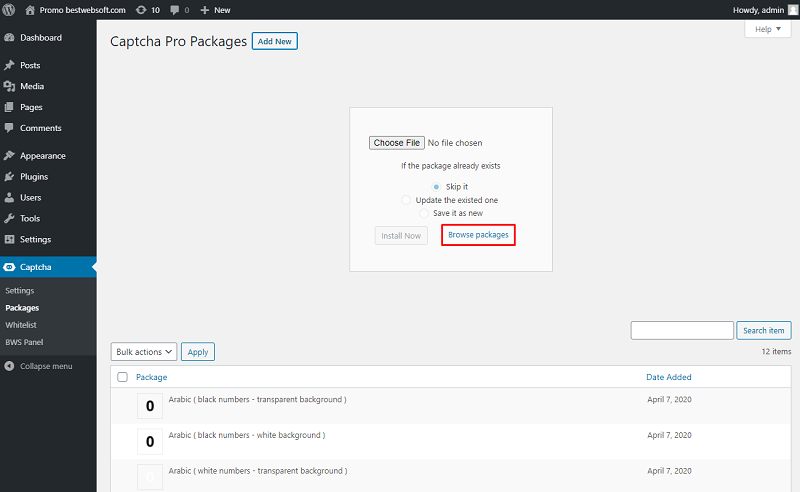
7.2. Click the “Choose File” button to choose the necessary package to upload from your PC, choose the action If the package already exists and click the “Install Now” button.

7.3. The notification of how many packages and images have been updated or added to the database will appear on the top of the page.

7.4. Click the “Browse packages” link to download additional packages from the BestWebSoft website.
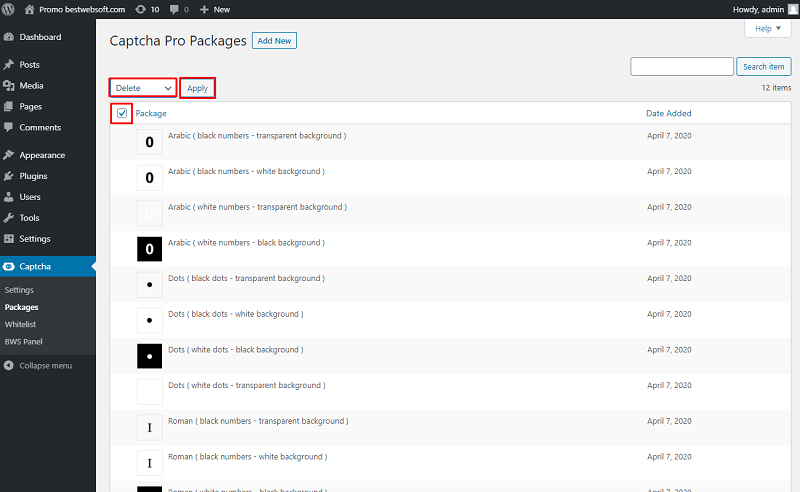
7.5. Use the “Bulk actions” to delete packages. Enable the packages that you want to delete and click the “Apply” button.
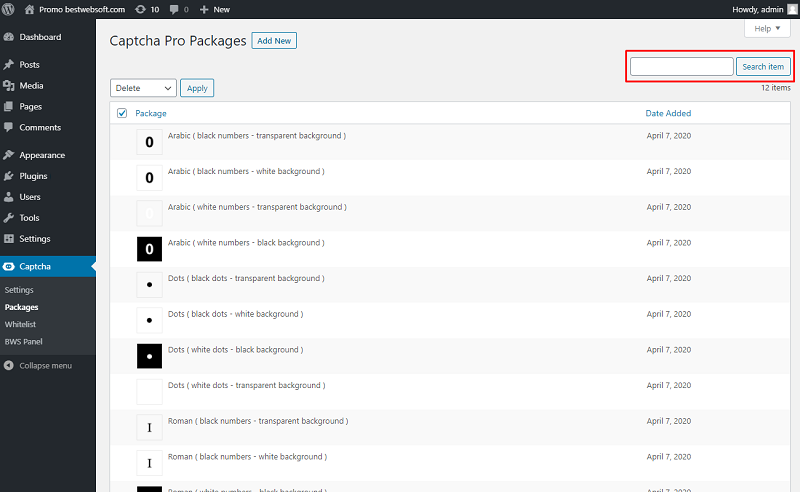
7.6. Use the “Search” field to find items on the list. Enter the text and click the “Search item” button.
8. Allow List
Add and manage trusted IP addresses using the “Allow List” page. Captcha will be hidden for all the ID addresses stored in this list.
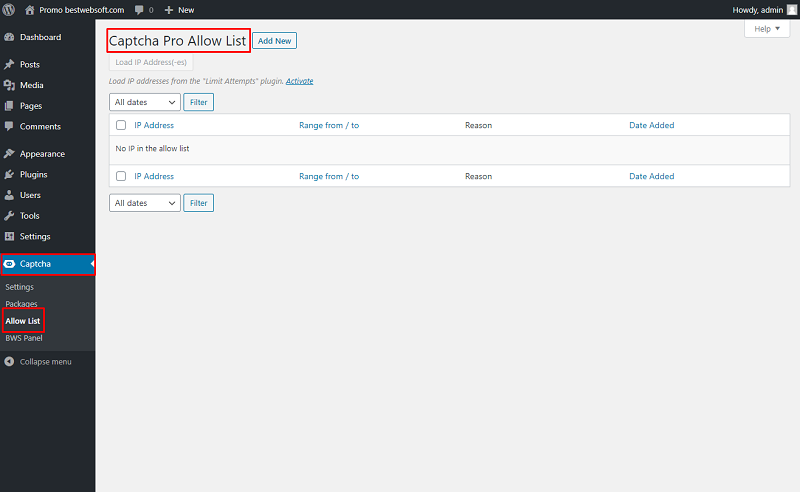
8.1. Open the “Captcha” > “Allow List” page on your WordPress admin dashboard.
8.2. Click the “Add New” button to add IP addresses to the Allow List.

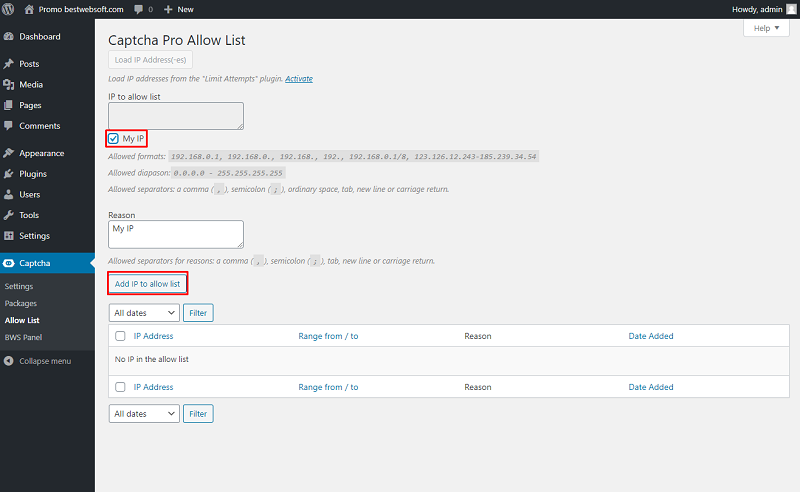
8.3. Enter one or multiple IP addresses in the “IP to allow list” field, enter the reason for allowlisting and click the “Add IP to allow list” button.
Note: Allowed diapason: 0.0.0.0 - 255.255.255.255 Allowed separators for IPs: a comma (,), semicolon (;), ordinary space, tab, new line or carriage return. |

8.4. To add your own IP to the allow list enable the “My IP” option and click the “Add IP to allow list” button.
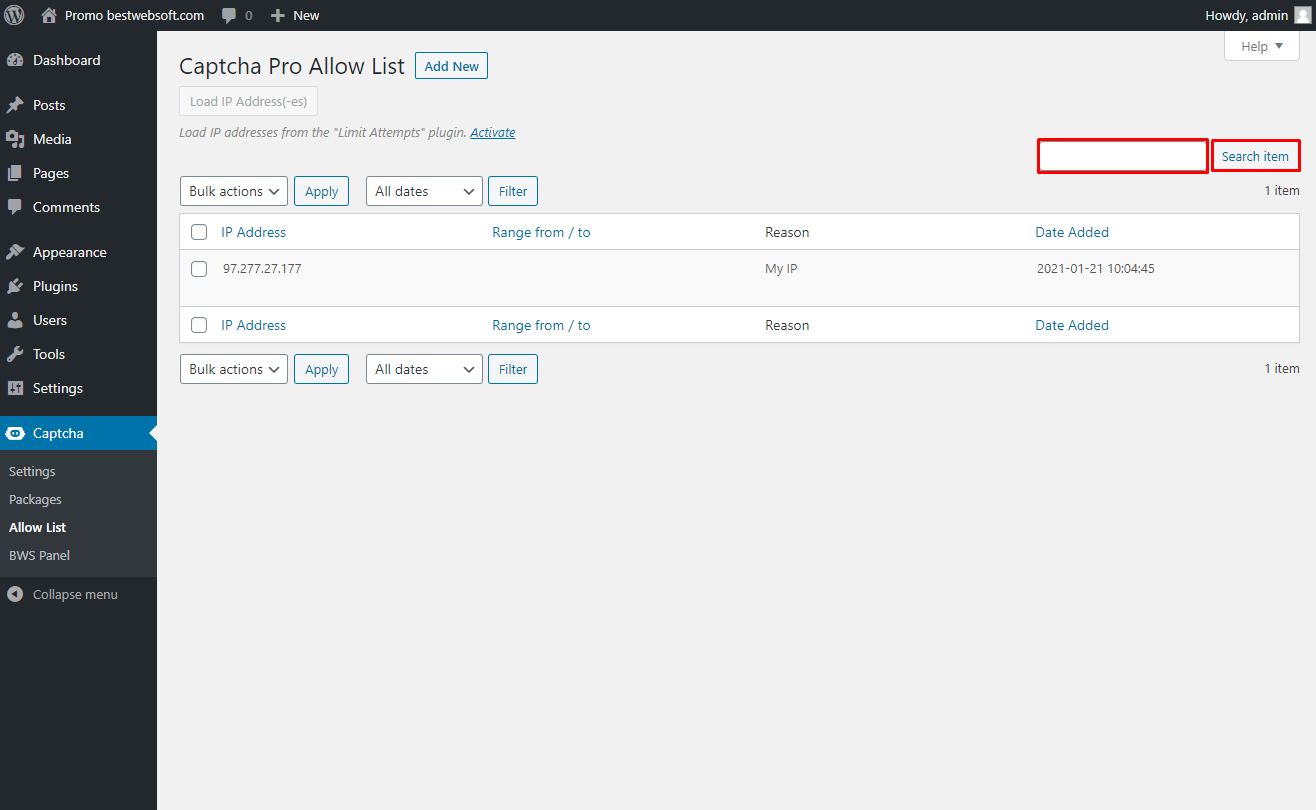
8.5. All the allowlisted IP’s with the additional information will be displayed in the list.

8.6. Use the “Search” field to find the previously added IP’s. Enter the request and click the “Search IP” button.
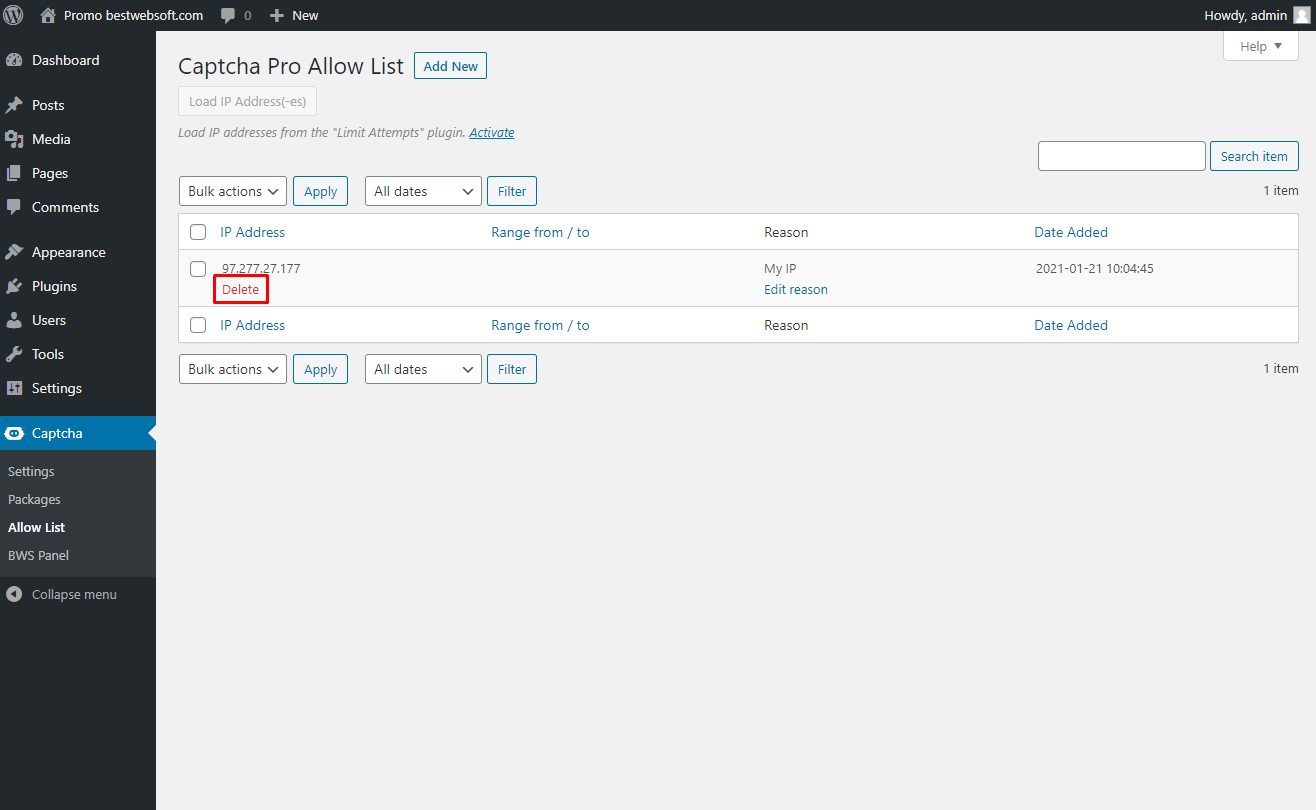
8.7. To delete the IP address from the “Allow List” hover the cursor on the necessary IP and click the “Delete” button.
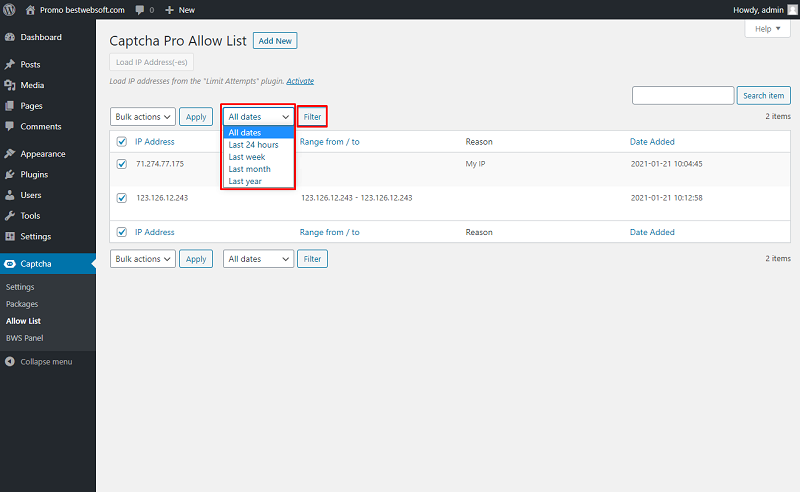
8.8. To delete several IP addresses, enable them in the list, select the “Delete” Bulk Action and click the “Apply” button.

8.9. To filter added IPs by dates select the date range from the dropdown menu and click the “Filter” button.
8.10. Captcha by BestWebSoft is compatible with the “Limit Attempts by BestWebSoft” plugin. Download and install the plugin by clicking the “Install Now” link on the “Allow List” page.
You can download the Limit Attempts plugin here
https://bestwebsoft.com/products/wordpress/plugins/limit-attempts/
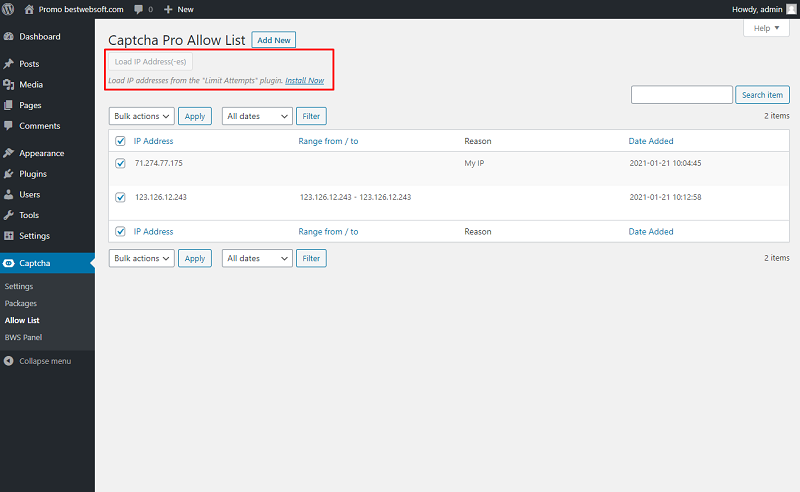
8.11. After a successful download and activation of the “Limit Attempts” plugin click the “Load IP Address(es)” button to copy IPs from the Limit Attempts allow list to the Captcha allow list.

8.12. The notification of how many IP-address(es) successfully copied to the allow list will appear at the top of the page.

Thank you!
Help & Support
Visit our Help Center if you have any questions — https://support.bestwebsoft.com/
Services
We provide additional services such as WordPress themes & plugins development,
graphic design, custom programming.
Contact us now to get a free quote — https://bestwebsoft.com/contacts/